AI RENDERING GUIDE
How to Create Rooftop Terrace and Outdoor Amenity Renders With AI
Published 9 min read
A rooftop terrace is often the image that sells a residential project or a hotel. Buyers and guests do not imagine themselves in a stairwell; they imagine themselves at sunset on the roof, with planters, lounge chairs and the city behind them.
The problem is that rooftop spaces are hard to visualize early. The deck, the parapet and the planters are usually only a few lines in the model, and the atmosphere — sky, view, planting, evening lights — is exactly what a traditional render takes longest to build.
With AI rendering you can go from a sketch or a simple model view to a photorealistic terrace image, then try different layouts, planting and lighting without rebuilding the scene. This guide shows you how.
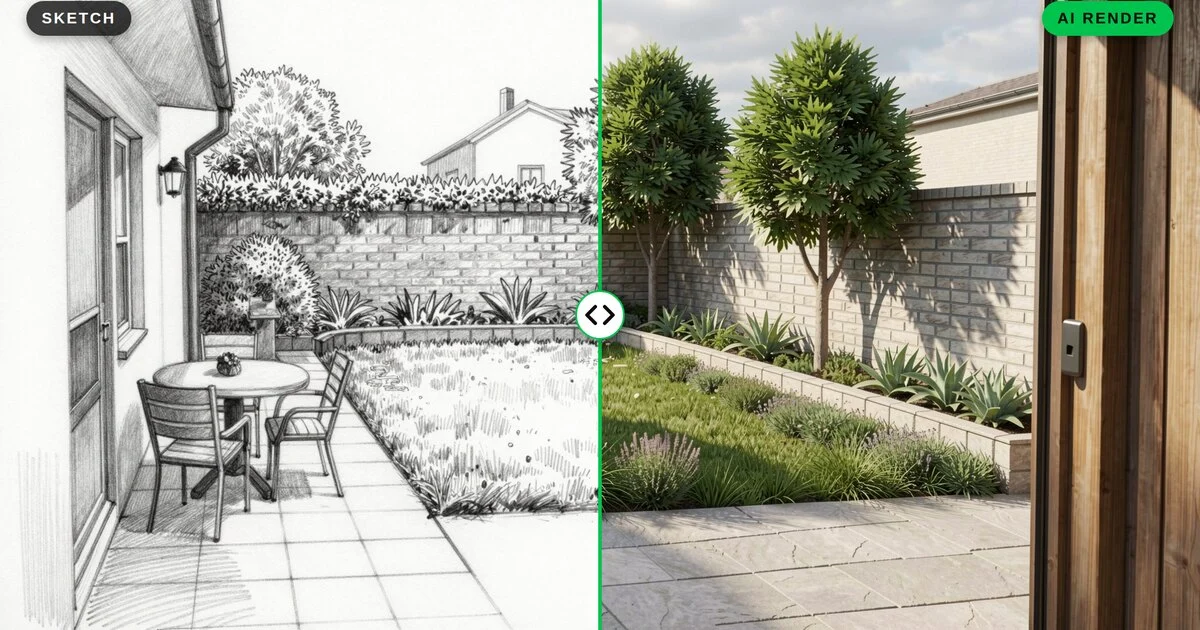
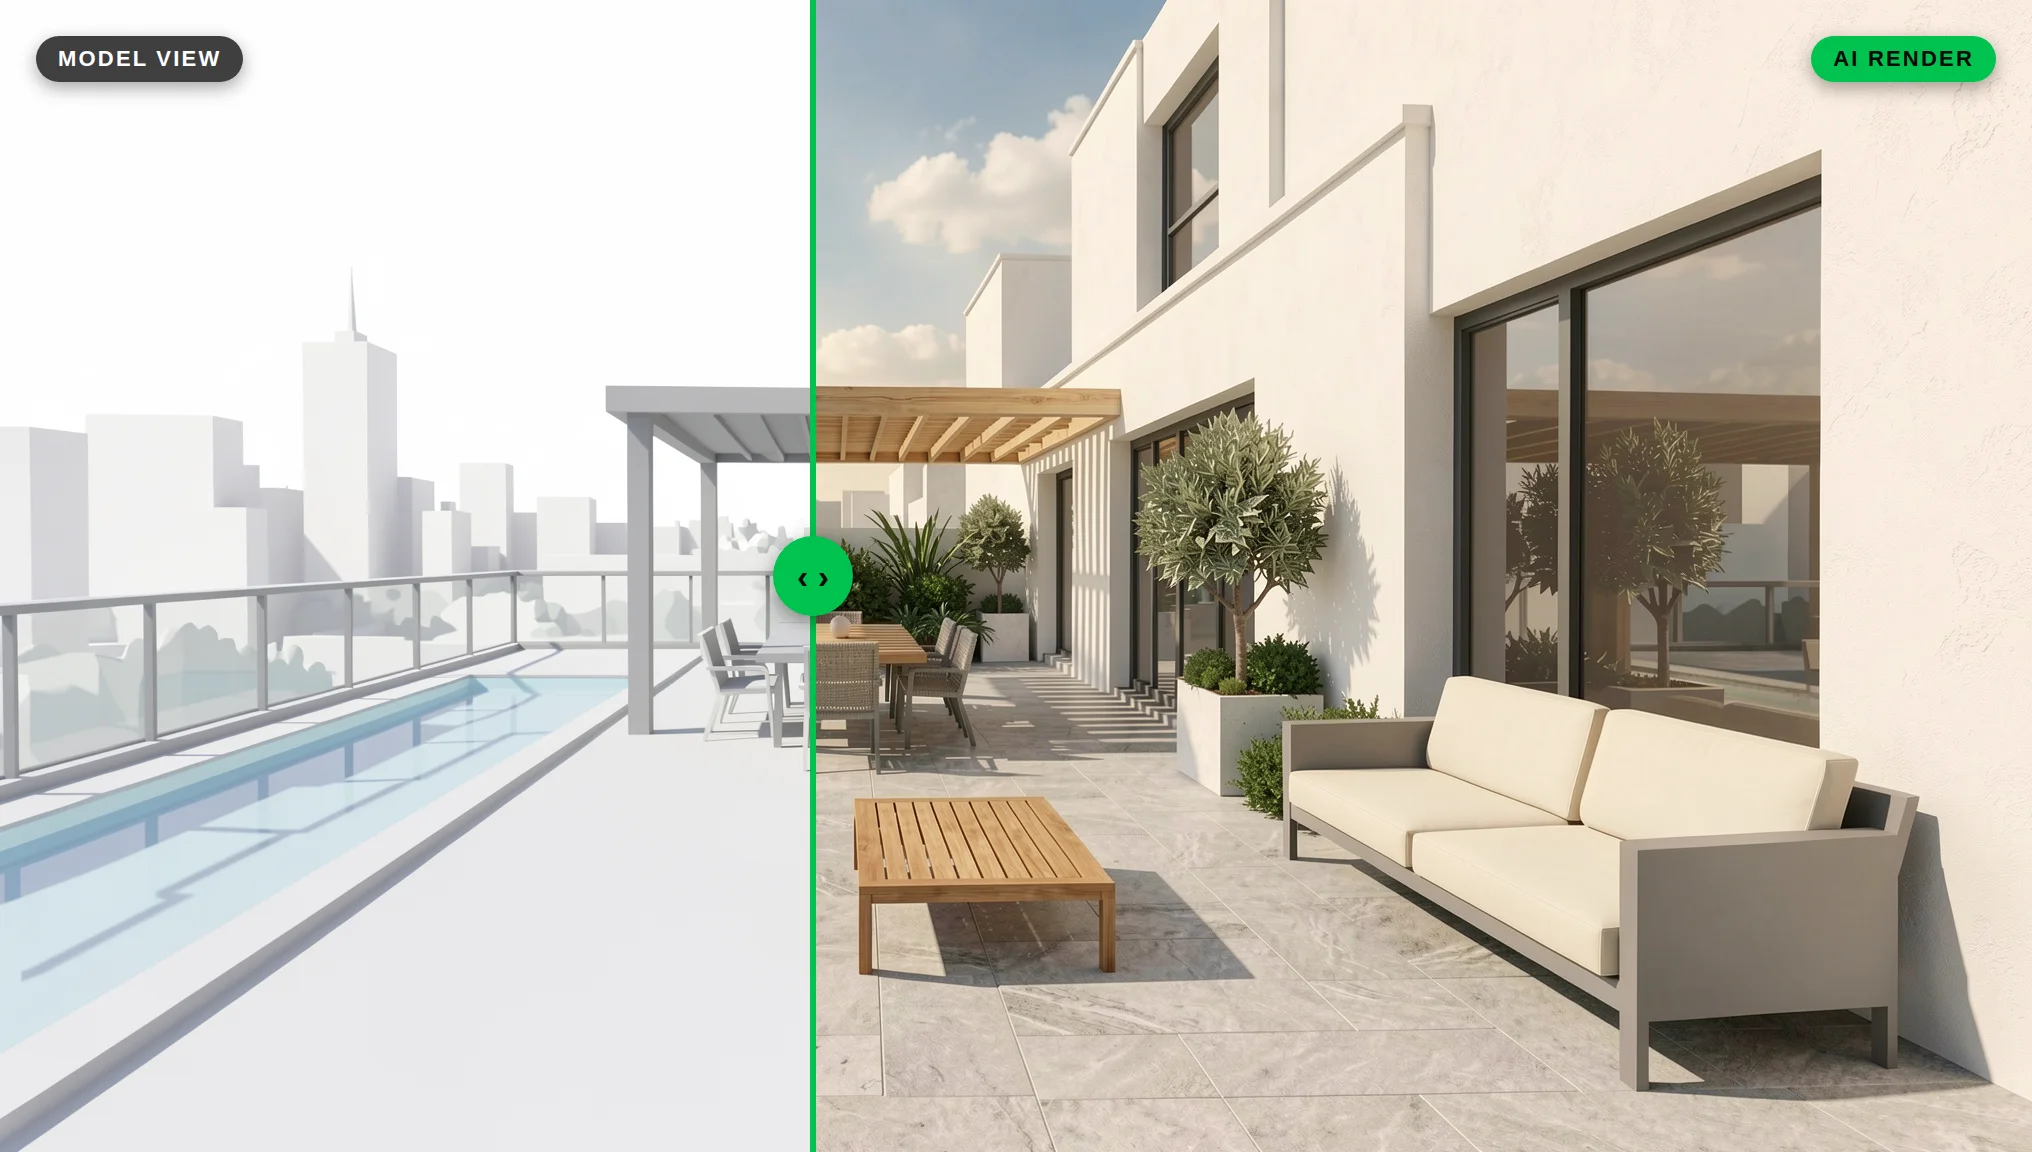
All images in this guide were made in QUVIAI: the hand sketch was generated with text-to-image, the model view was made from the sketch with Edit, and every render, option, night view and video frame was made from those two images.
What you need
- A starting image of the terrace: a hand sketch, a line drawing, or a screenshot of your 3D model
- A QUVIAI account — the free plan gives you 5 credits a day, and no credit card is needed
- A short list of what the terrace should include: seating, planting, shade, pool or water feature, bar or kitchen
If you do not have a model yet, you can start from text alone with Text → Image and use the result as a mood image for the client meeting.
Step 1: Choose the view that tells the story
Rooftop images work best when they show three things at once: the usable space, the edge of the roof and what lies beyond it.
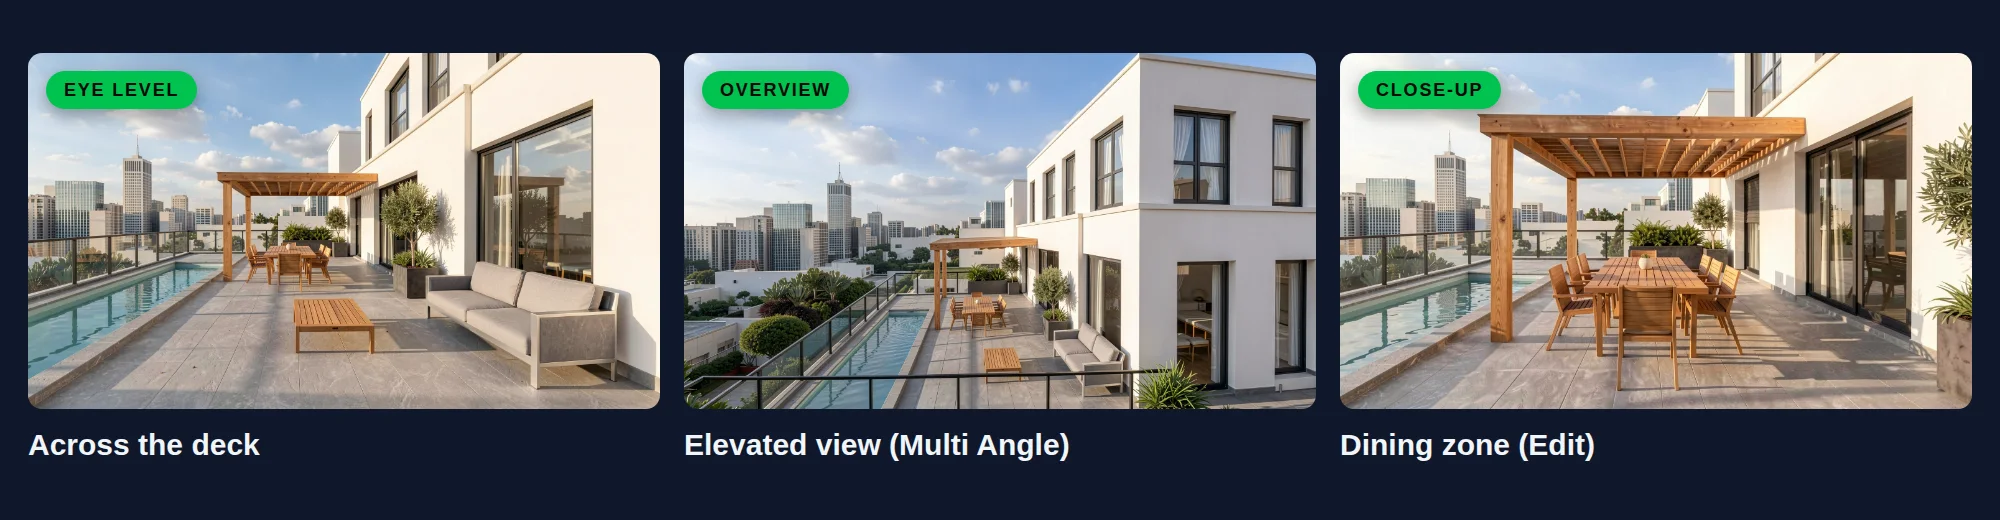
- Eye-level view across the deck. Place the camera at standing height near the entrance to the terrace, looking toward the best view. This is the image buyers relate to most.
- Elevated overview. A higher angle explains the layout: zones for lounging, dining and planting, and how people move between them.
- Close-up of one zone. A seating corner or the pool edge gives you a detailed, social-media-ready image.
Pick one main view first. For other angles of the same design, see How to Generate Multiple Angles From an Architectural Render with AI.
Step 2: Prepare a clean starting image
The AI follows the composition and main forms of your image, so make them clear:
- Show the edges. Draw or model the parapet, railing or glass balustrade. A terrace without a visible edge can be read as a ground-level patio.
- Mark the big elements. Pool, planters, pergola, bar counter and fixed benches should be visible as simple shapes.
- Leave the sky open. Do not fill the background with placeholder colour; you will describe the sky and the skyline in your prompt.
- Hide what you do not want. Remove dimensions, text, grids and helper lines from model screenshots.
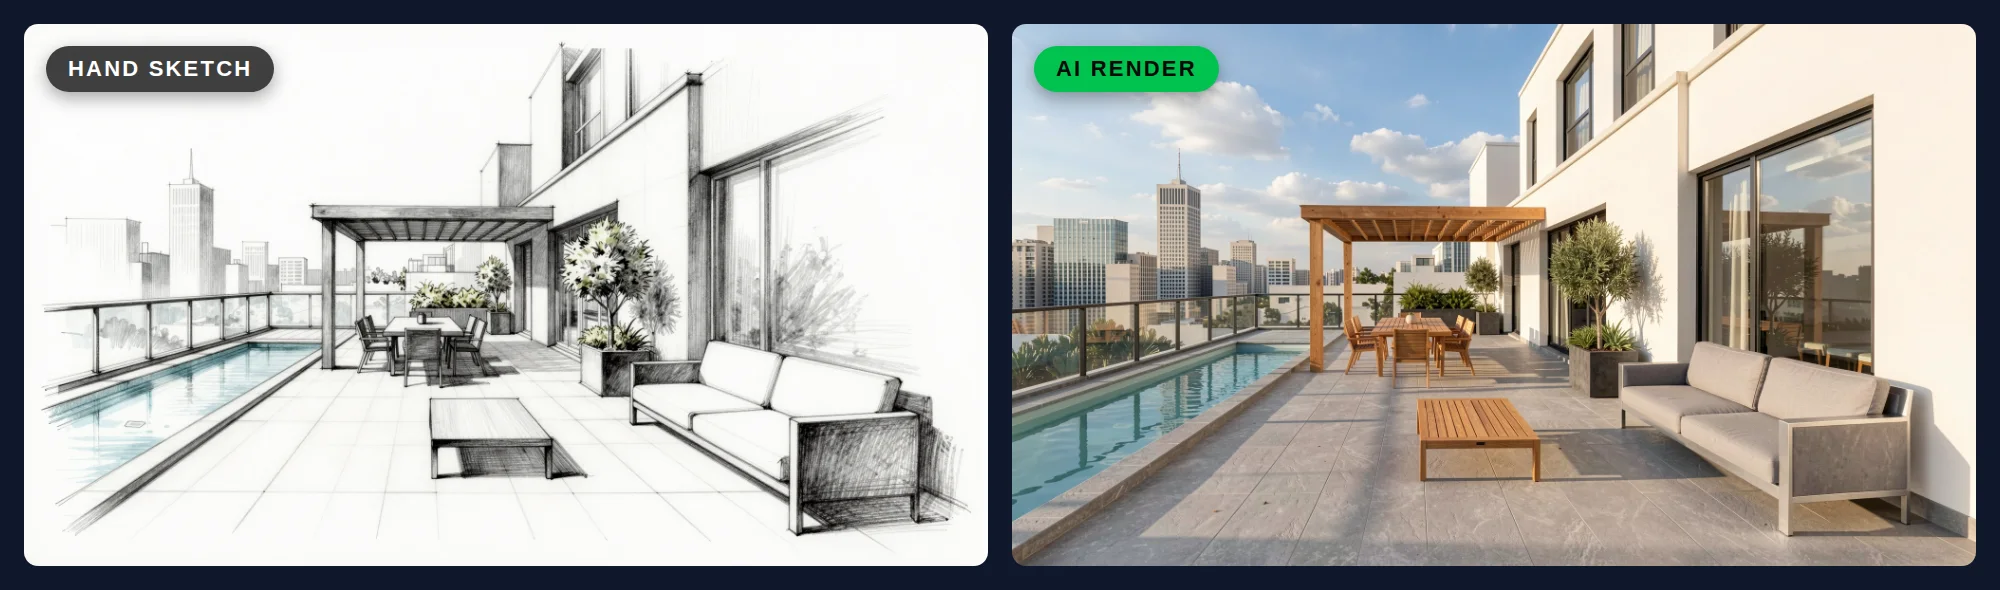
A rough sketch is enough for early design. Our guide on turning an architectural sketch into a photorealistic render covers this in detail, and How to Render a 3D Model or BIM View With AI explains how to capture a model view.
Simple shapes in the background are read literally. In our model view the distant towers were plain white boxes and the trees behind the dining table were faceted low-poly shapes. The render kept the towers as blank blocks and turned the low-poly trees into white plants (left). One maskless Edit replaced them with a real skyline and green planting (right):
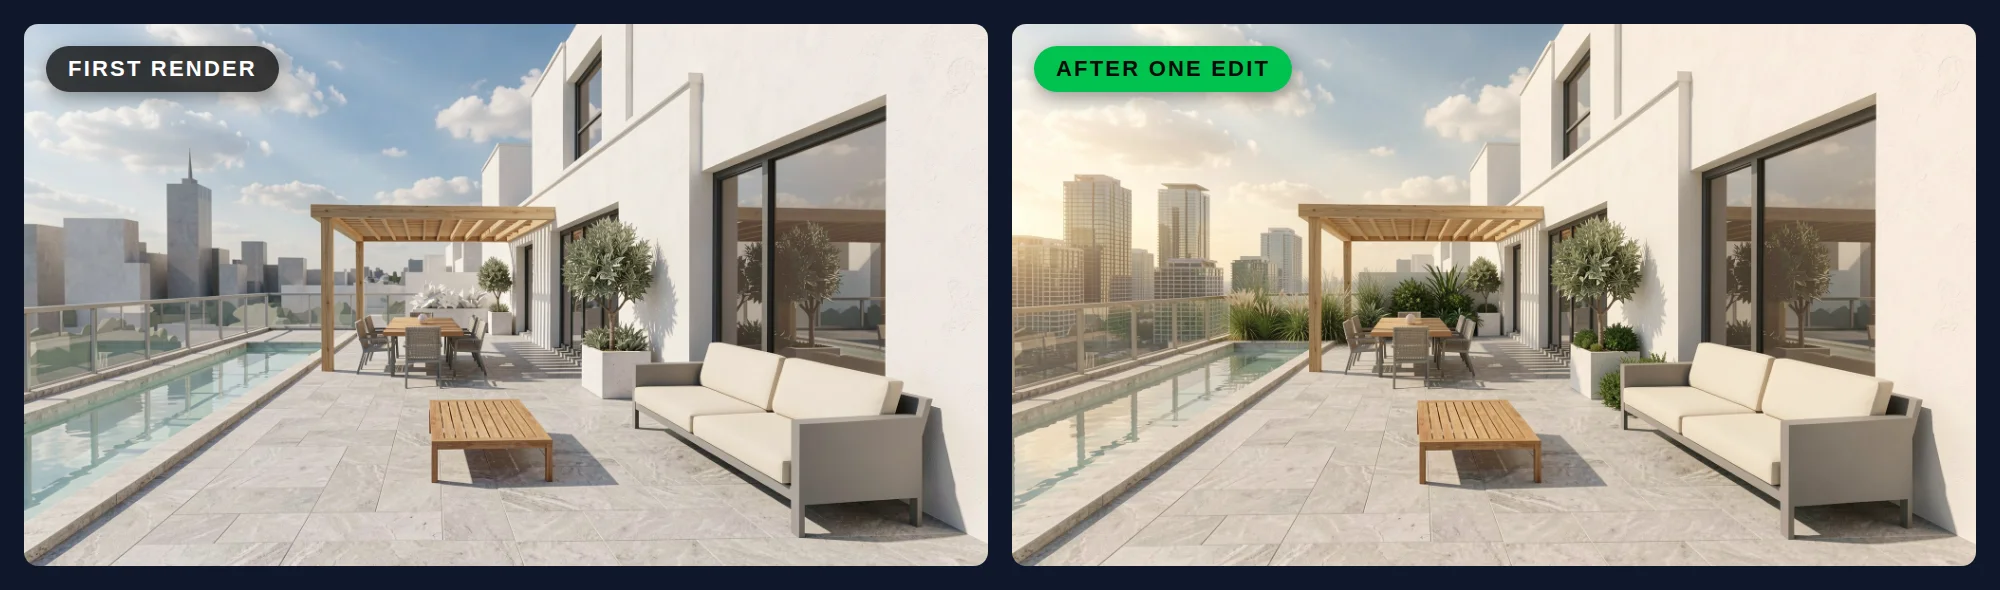
“Change only the distant city towers in the background into a realistic city skyline of glass and concrete high-rise buildings with visible windows and floors, softened by a little haze, and change the white plants in the planters behind the dining table into green ornamental grasses and small green shrubs. Keep the terrace, the light grey stone paving, the pool, the glass balustrade, the timber pergola, the dining table and chairs, the sofa, the coffee table, the olive trees, the white building with its windows, the sky, the warm light and the camera angle exactly the same. Photorealistic architectural photograph.”
Step 3: Write a prompt for the terrace
Upload your image to Sketch → Render and describe what the drawing cannot show. For outdoor amenity spaces, four parts of the prompt matter most:
- Surfaces: "light grey porcelain deck tiles", "timber decking", "white rendered parapet with glass balustrade"
- Planting: "tall ornamental grasses in corten planters", "olive trees in large pots", "low Mediterranean planting"
- Furniture and shade: "outdoor lounge sofas with beige cushions", "long dining table under a timber pergola", "large white parasols"
- Setting and light: "city skyline in the background", "sea view", "warm sunset light", "clear blue sky"
A full example, exactly as we used it for the terrace in this guide:
“Photorealistic architectural photograph of a residential rooftop terrace with light grey stone paving, a long rectangular pool with a glass balustrade, outdoor lounge sofas, olive trees in large planters, a timber pergola over a dining table, city skyline in the background, warm late-afternoon light, eye level, natural colours. Keep the same layout, pool, pergola, planters, furniture and camera angle as the reference image.”
Keep the prompt about what is in the view. For more examples, see AI Architecture Prompts: How to Write Prompts for Architectural Renders.
Step 4: Edit planting, furniture and surfaces
Your first render is a starting point. Instead of redrawing, edit the image itself with AI render editing:
- Masked editing: select only the planters and change the plants, or select the deck and switch from stone to timber. The edit is focused on the masked area, so the rest of the image is kept.
- Maskless editing: describe the change in words, for example "replace the parasols with a fabric shade sail".
This is also the fastest way to show options. Generate the same terrace with two or three surface and furniture combinations and present them side by side. See Masked vs Maskless AI Editing and How to Show Clients Material Options With AI Renders.
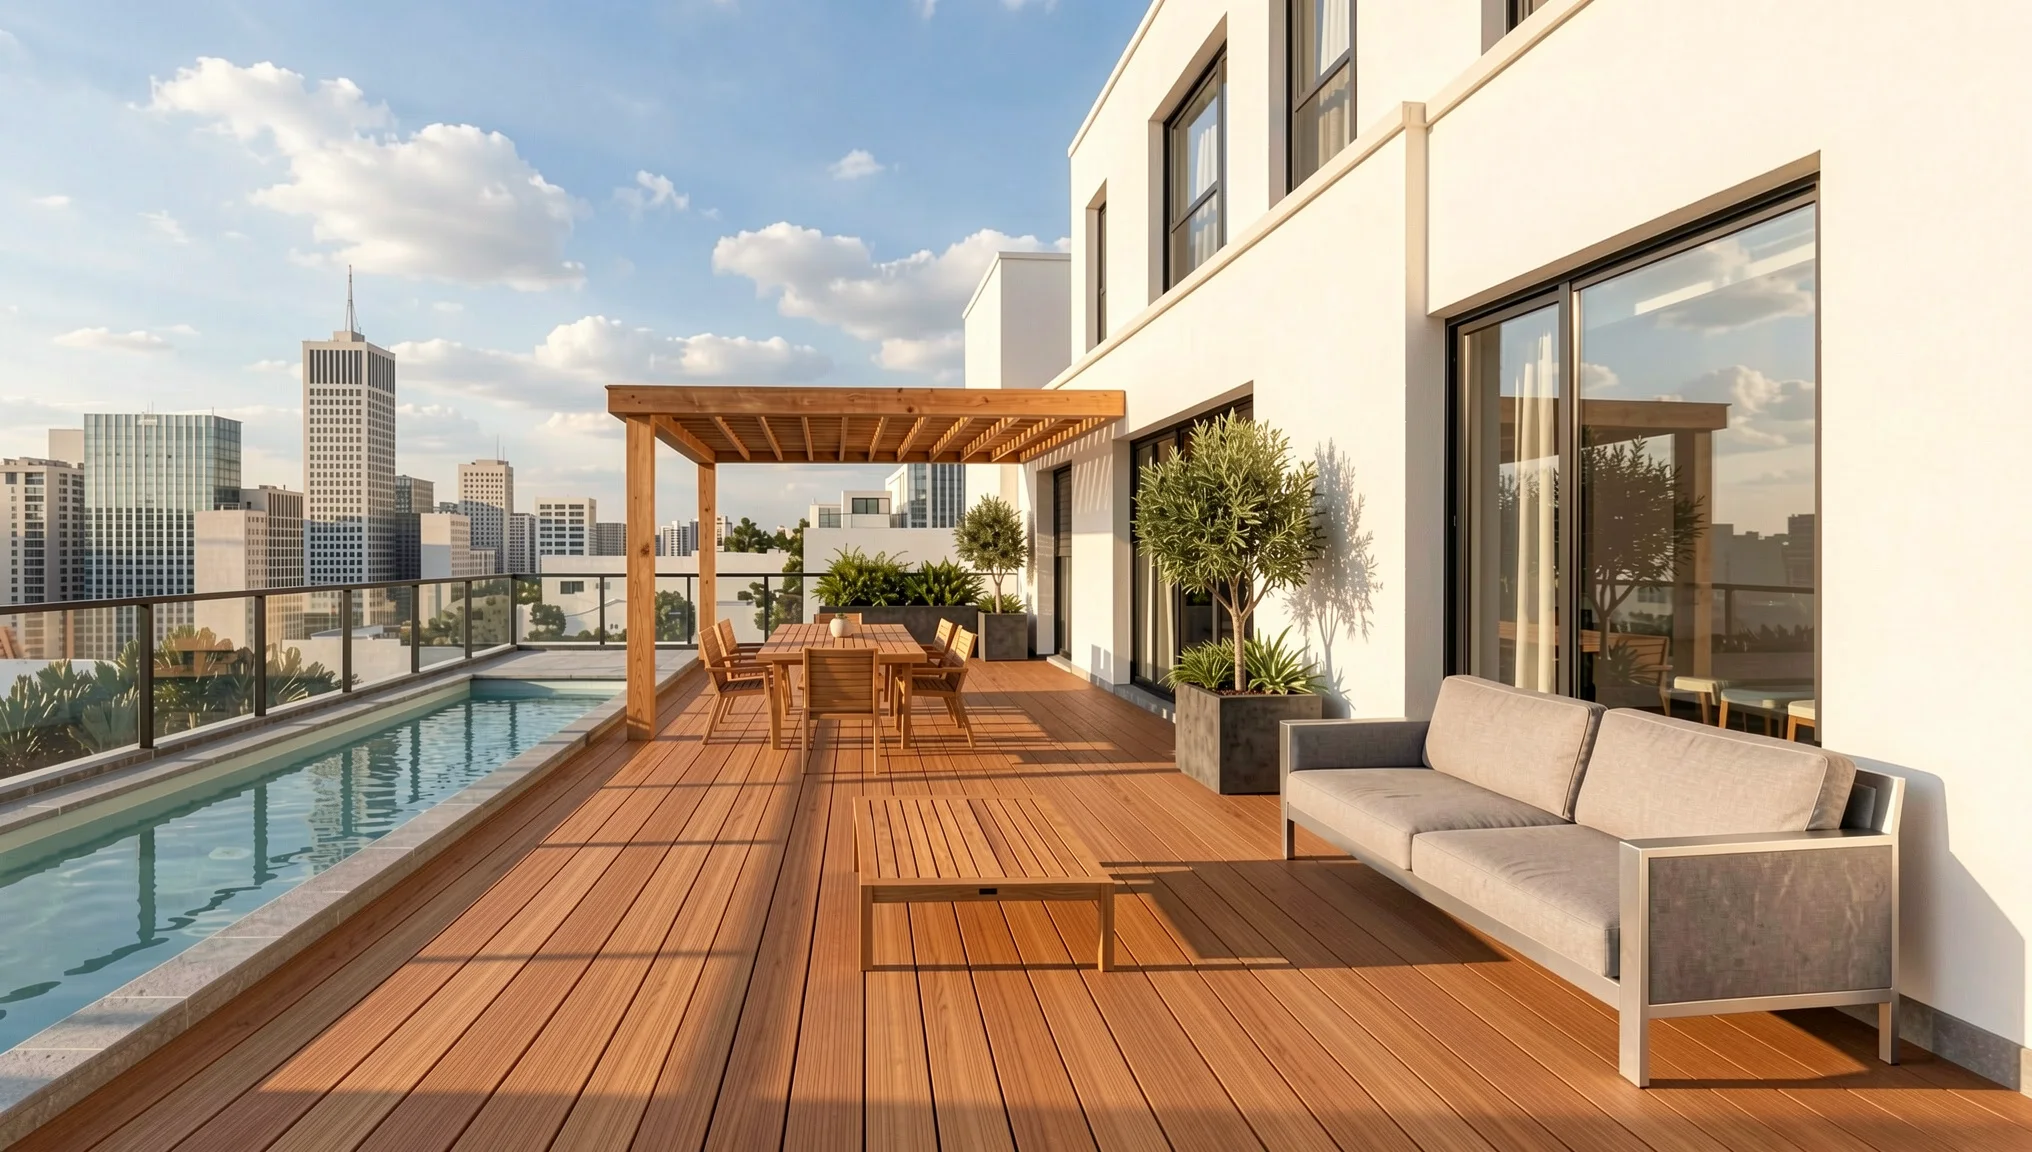
Both options below were made from the same first render, each with one maskless Edit:
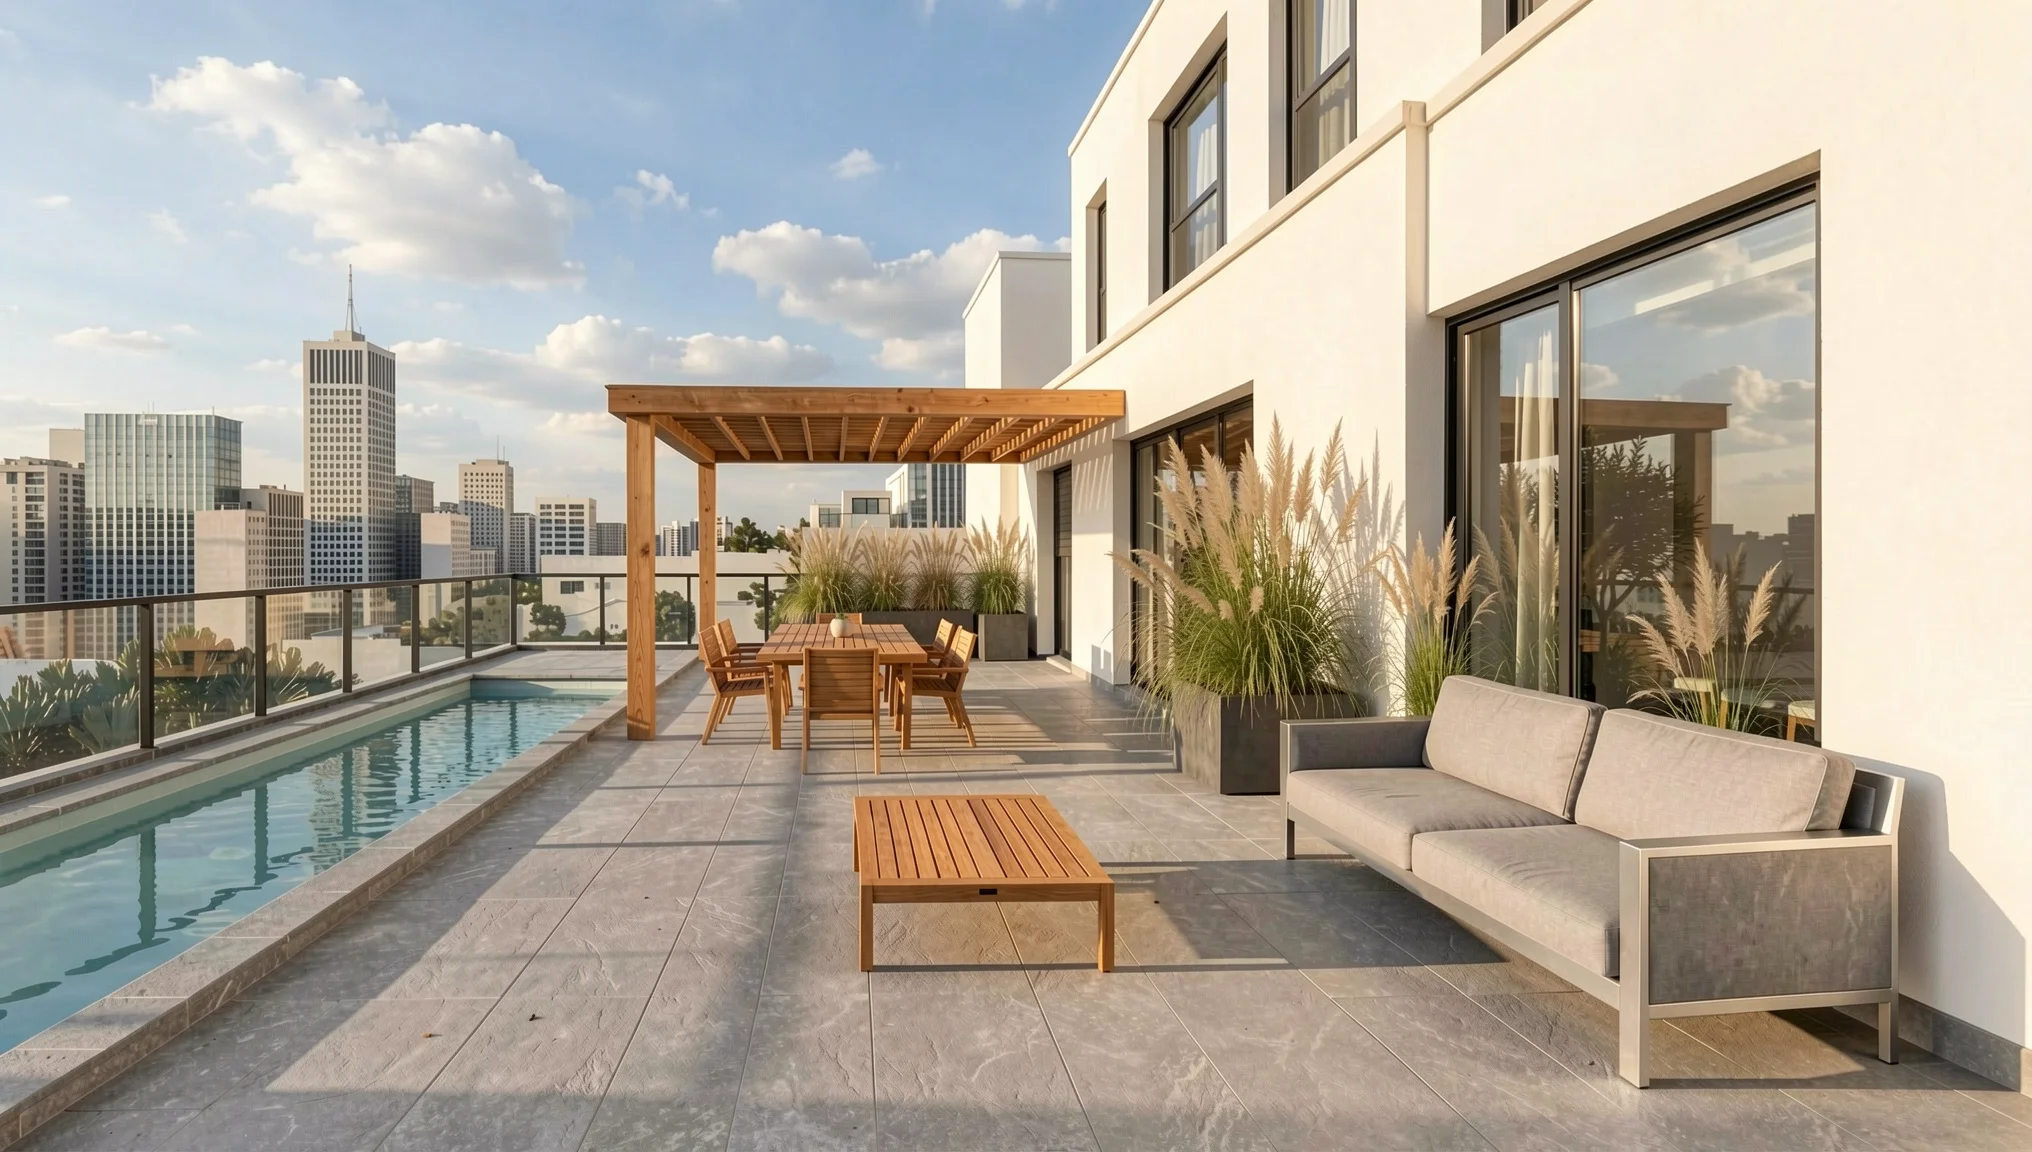
Option A changed only the planting:
“Change only the plants inside the existing planters: replace the olive trees and the green plants with tall ornamental grasses in soft beige and green tones. Keep the planters themselves, their dark colour, size and position exactly the same, and do not add any new planters. Keep the grey sofa with its slim metal frame, the timber coffee table, the light grey stone paving, the pool, the glass balustrade, the timber pergola, the dining table and chairs, the white building with its windows, the city skyline, the warm late-afternoon light and the camera angle exactly the same. Photorealistic architectural photograph.”
Option B changed only the floor:
“Change only the floor of the terrace from grey stone paving to warm natural timber decking with long narrow boards running away from the viewer. Keep the stone edge of the pool, the pool, the glass balustrade, the timber pergola, the dining table and chairs, the sofa, the coffee table, the olive trees in their dark planters, the white building with its windows, the city skyline, the warm late-afternoon light and the camera angle exactly the same. Photorealistic architectural photograph.”
Name what must stay the same. Our first attempt at option A also asked for corten planters, and the edit turned the sofa into a corten box as well. Keeping the planters and describing the sofa ("the grey sofa with its slim metal frame") fixed it.
Step 5: Create day and night versions
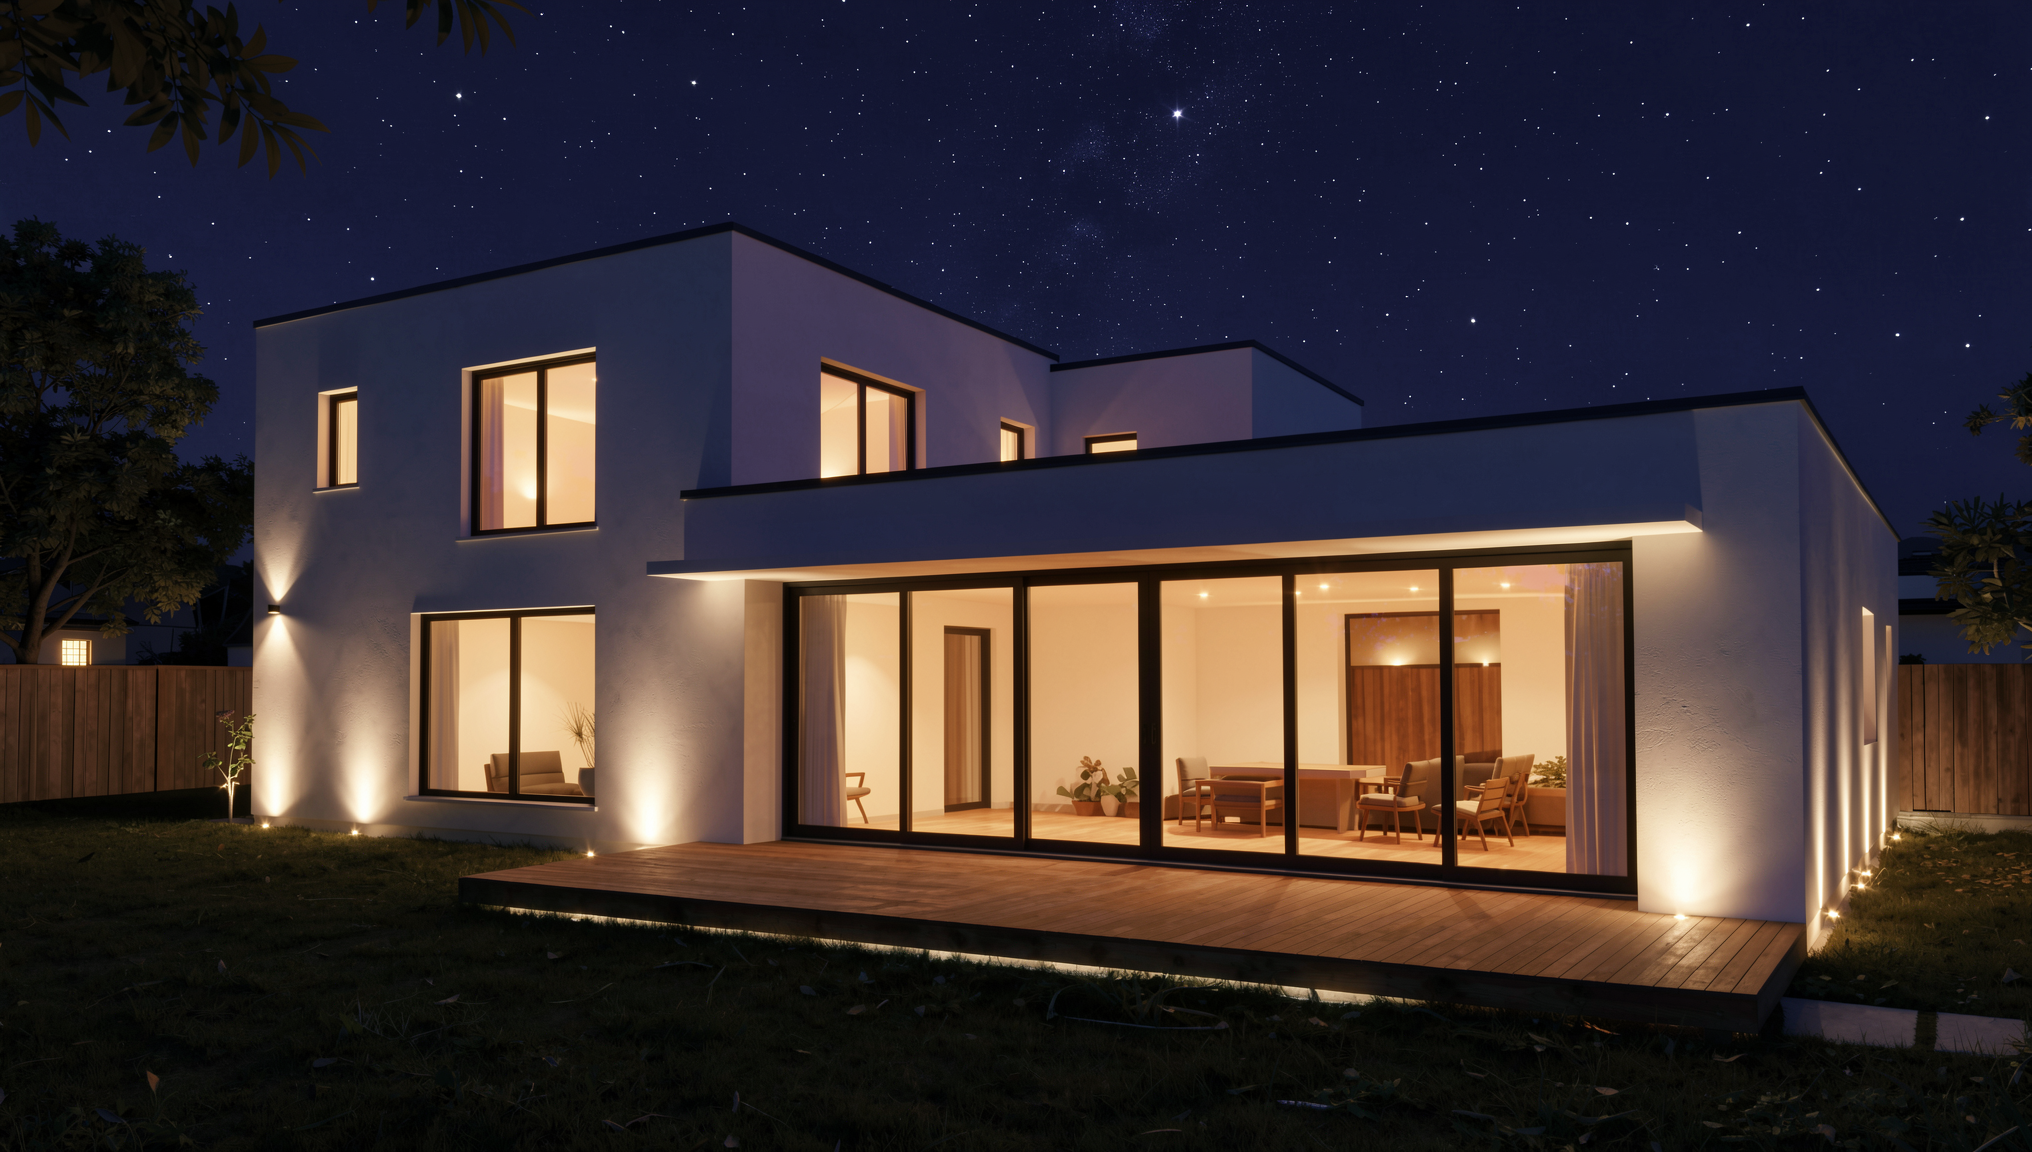
Rooftop terraces are often used most in the evening, and night images are usually the most persuasive ones in a brochure. With QUVIAI you can create the same terrace under different light conditions — for example a bright midday version and an evening version with warm string lights, lit planters and a glowing pool.
Describe the lighting you designed: "warm LED strip under the benches", "uplights in the planters", "soft pool lighting". Our guide on Day to Night Render With AI explains the process step by step.
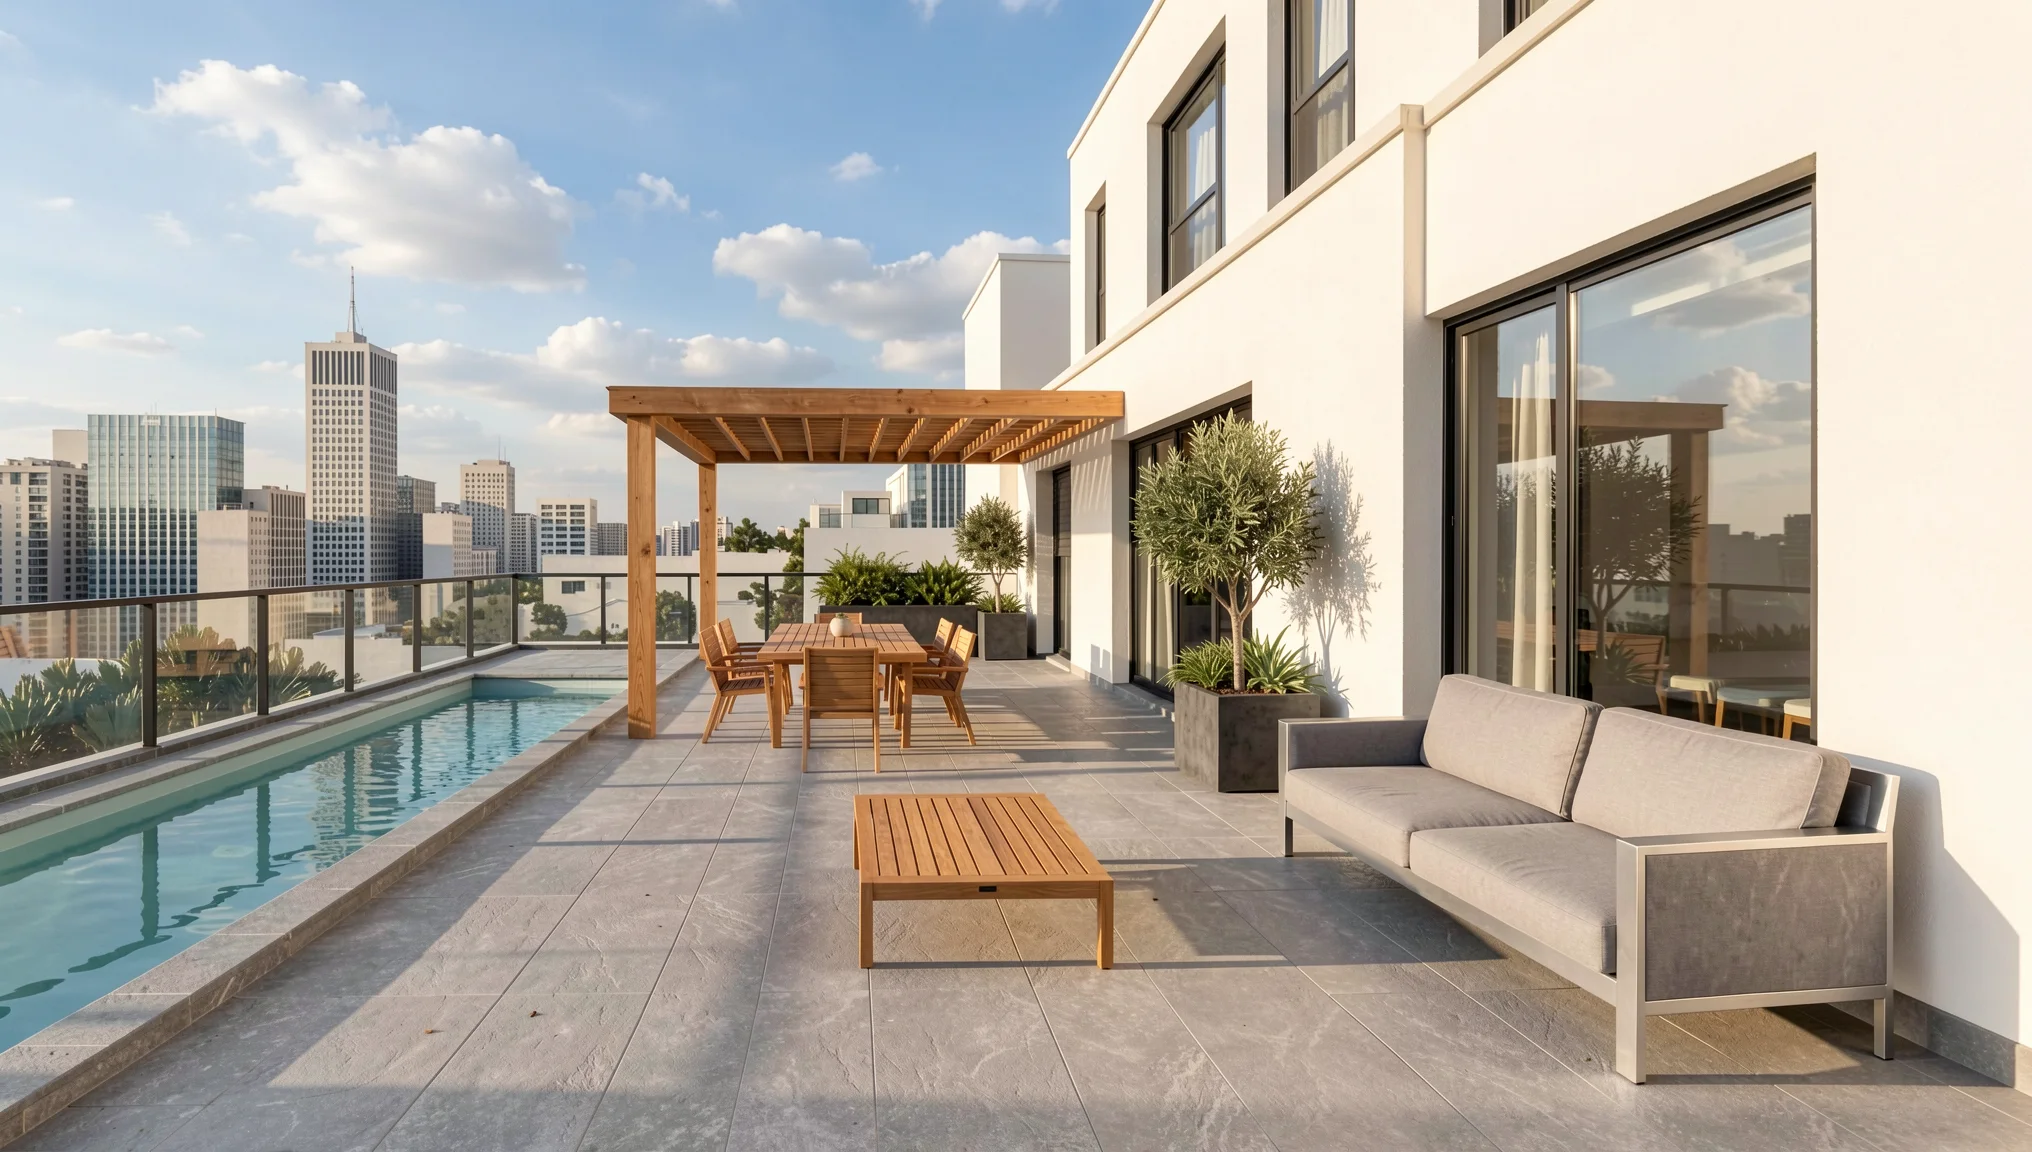
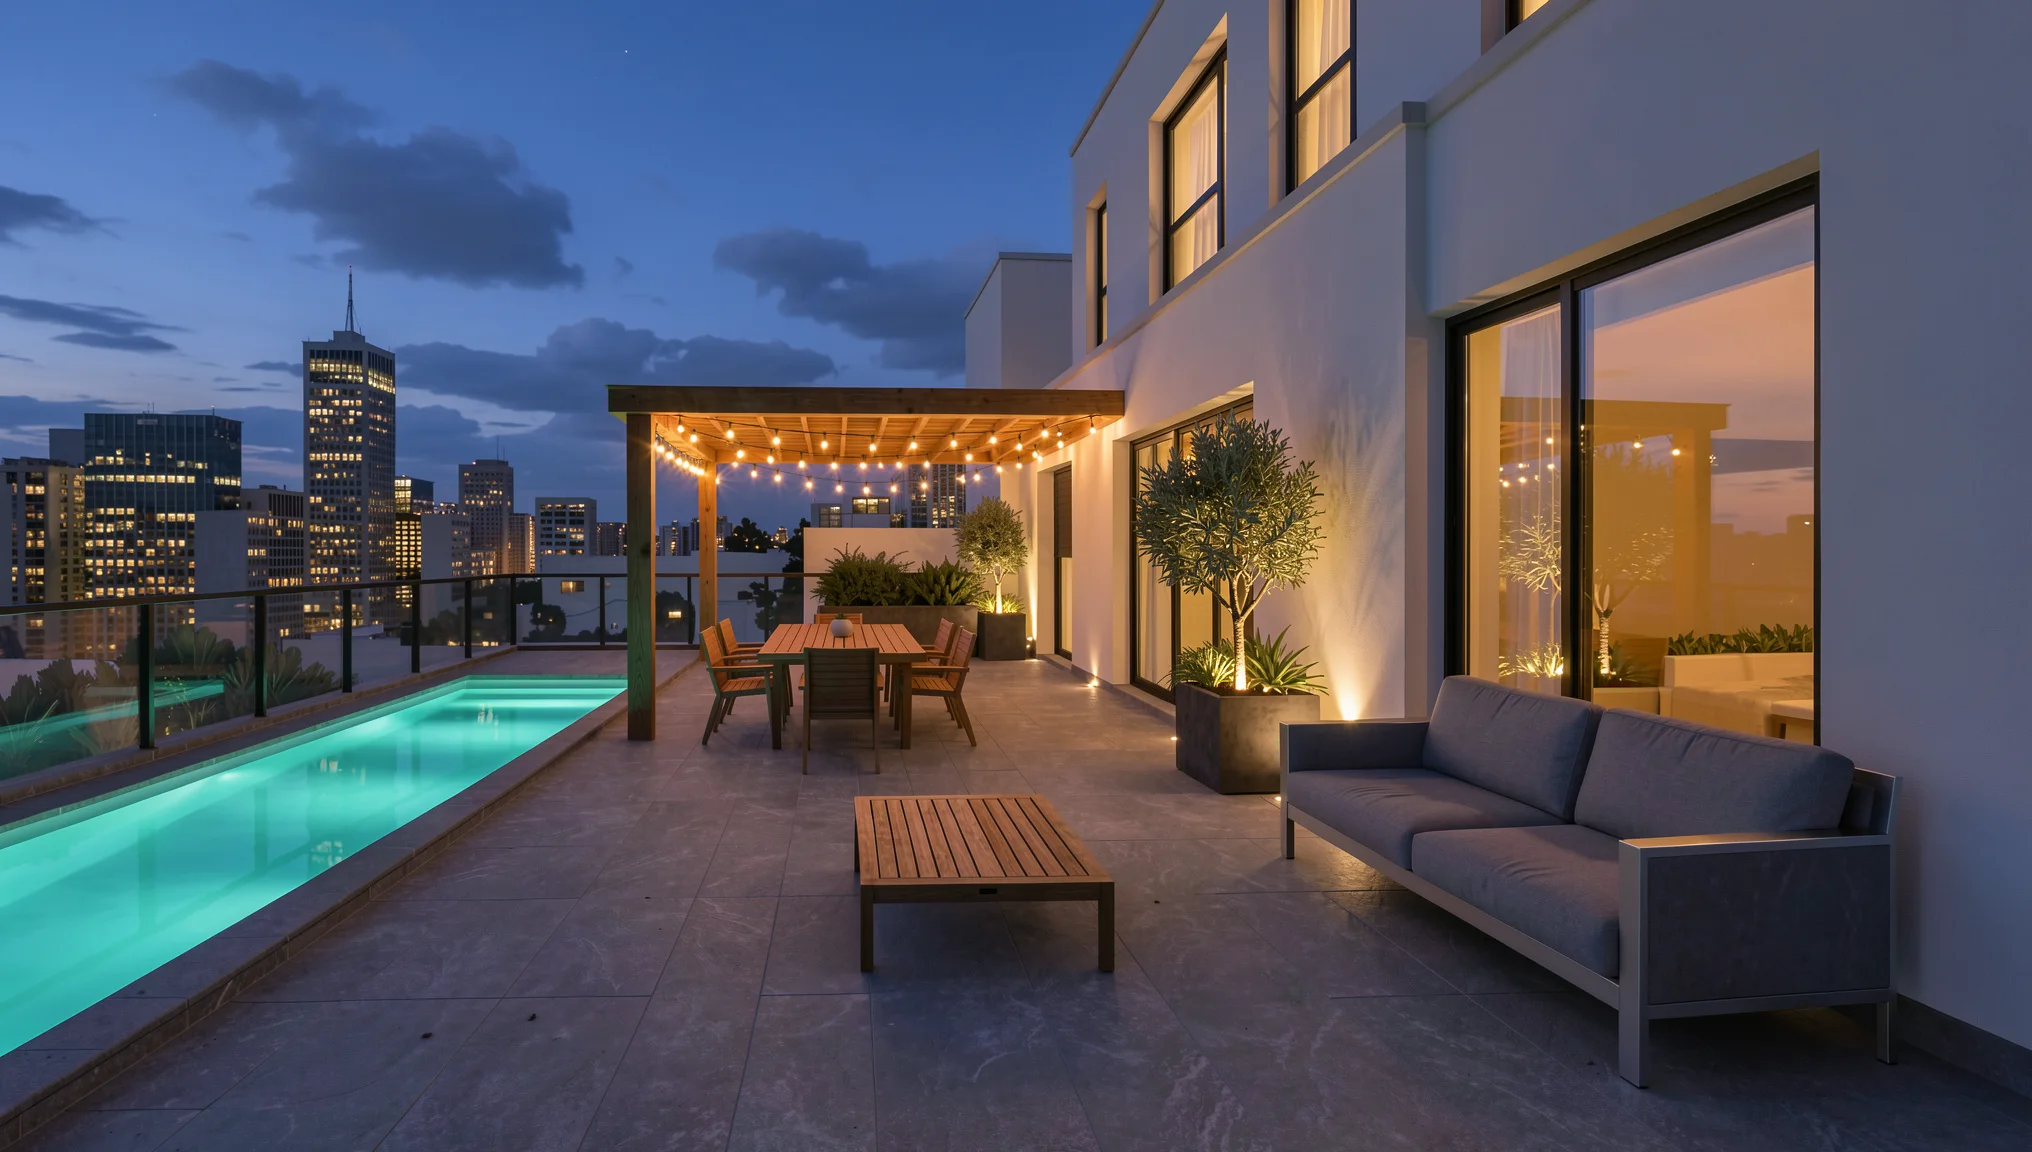
The dusk version was made from the daytime render with one Edit:
“Change the scene to dusk at blue hour with a deep blue evening sky and the lights of the city towers coming on. Add warm string lights hanging under the timber pergola above the dining table, warm uplights in the planters lighting the olive trees from below, a soft turquoise underwater glow in the pool and warm light shining from the windows of the building. Keep the terrace, the stone paving, the pool, the glass balustrade, the pergola, the furniture, the planters, the building and the camera angle exactly the same. Photorealistic architectural photograph.”
Step 6: Add movement for presentations
A short clip of the terrace at sunset can open a sales presentation or a social media post. Use Render → Video to turn your final still into a short video, for example with a slow camera move toward the view. See AI Video Generation for Architecture for tips.

“Slow, smooth camera dolly forward across the rooftop terrace at eye level, moving past the timber coffee table towards the glass balustrade and the city skyline, in warm late-afternoon sunset light. The water in the long pool ripples gently and reflects the sky, the leaves of the olive trees and the plants in the planters move softly in a light breeze, and soft shadows from the timber pergola lie across the grey stone paving. Keep the terrace unchanged: the same pool, the same glass balustrade, the same pergola, dining table and chairs, the same grey sofa, coffee table and planters, and the same white building on the right. No people, no new buildings, no text, no camera shake, no sudden cuts, photorealistic architectural film with natural colours.”
Tips for better rooftop renders
- Make the edge believable. Railings and balustrades are thin and easy to lose. Draw them clearly or capture the model at a larger size.
- Keep scale consistent. Add one or two people or a known object (a sun lounger, a dining chair) to the prompt so the space reads at the right size.
- Match the view to the site. If the real view is a residential street, do not promise a sea view. Describe the actual surroundings so the image does not mislead buyers.
- Check against the design. AI may reinterpret small details. Compare the render with your drawings, and edit or regenerate any element that changed before you share it. Structural loads, waterproofing and guard heights still need to be checked by the project team against local regulations — a render does not replace that.
Conclusion
A good rooftop render does not need a fully detailed model. Choose a view that shows the deck, the edge and the view, prepare a clean sketch or model image, and let QUVIAI add the surfaces, planting, sky and light. Then edit options, create a night version and turn the best image into a short video.
Try it with your next terrace or outdoor amenity on quvi.ai — the free plan includes 5 credits a day.