Masked vs Maskless AI Editing: Which One Should You Use for Your Render?
You get a render back and, overall, it's close to what you wanted — but one detail isn't quite right. A wall should be a different color, there's an object in the scene that shouldn't be there, or a specific area needs a different material. Re-rendering the whole scene from scratch wastes time, and risks changing parts of the composition you were already happy with.
This is exactly what AI render editing is for: instead of regenerating the entire image, you update only the part that needs to change. You can do this two ways — with a mask, or without one.
Maskless Editing: Describe the Change in Words
With maskless editing, you don't select any area — you simply describe what you want changed in a text prompt (for example, "change the sofa's color to blue"). The system locates the relevant part of the image and applies the change there.
This approach is fast and practical when what you want to change is clear and well-defined — a specific object's color or material, for example.
Masked Editing (Inpainting): Select the Exact Area
With masked editing — commonly known as inpainting — you use a selection tool (a rectangle or a freehand lasso) to mark exactly which part of the image should change. This guarantees the edit happens only within the area you selected, without touching the rest of the scene.
This approach gives you more control when the boundaries of the change matter — for example, updating only one section of a facade while leaving everything around it untouched.
Step by Step: Which One to Use, and When
- Decide whether the change is confined to a clear area or object. If the boundaries are clear ("only change this part of the facade"), masked editing is the better fit. If the change is more general or object-based ("change the sofa's color to blue"), maskless editing is usually faster.
- For maskless editing: describe the change in a text prompt and generate the result.
- For masked editing: mark the area you want to change with the selection tool, then describe what should happen inside it.
- Review the result, and try again if needed. With either method, you can retry with a different description or a different selection if the first result isn't quite right.
Real Examples
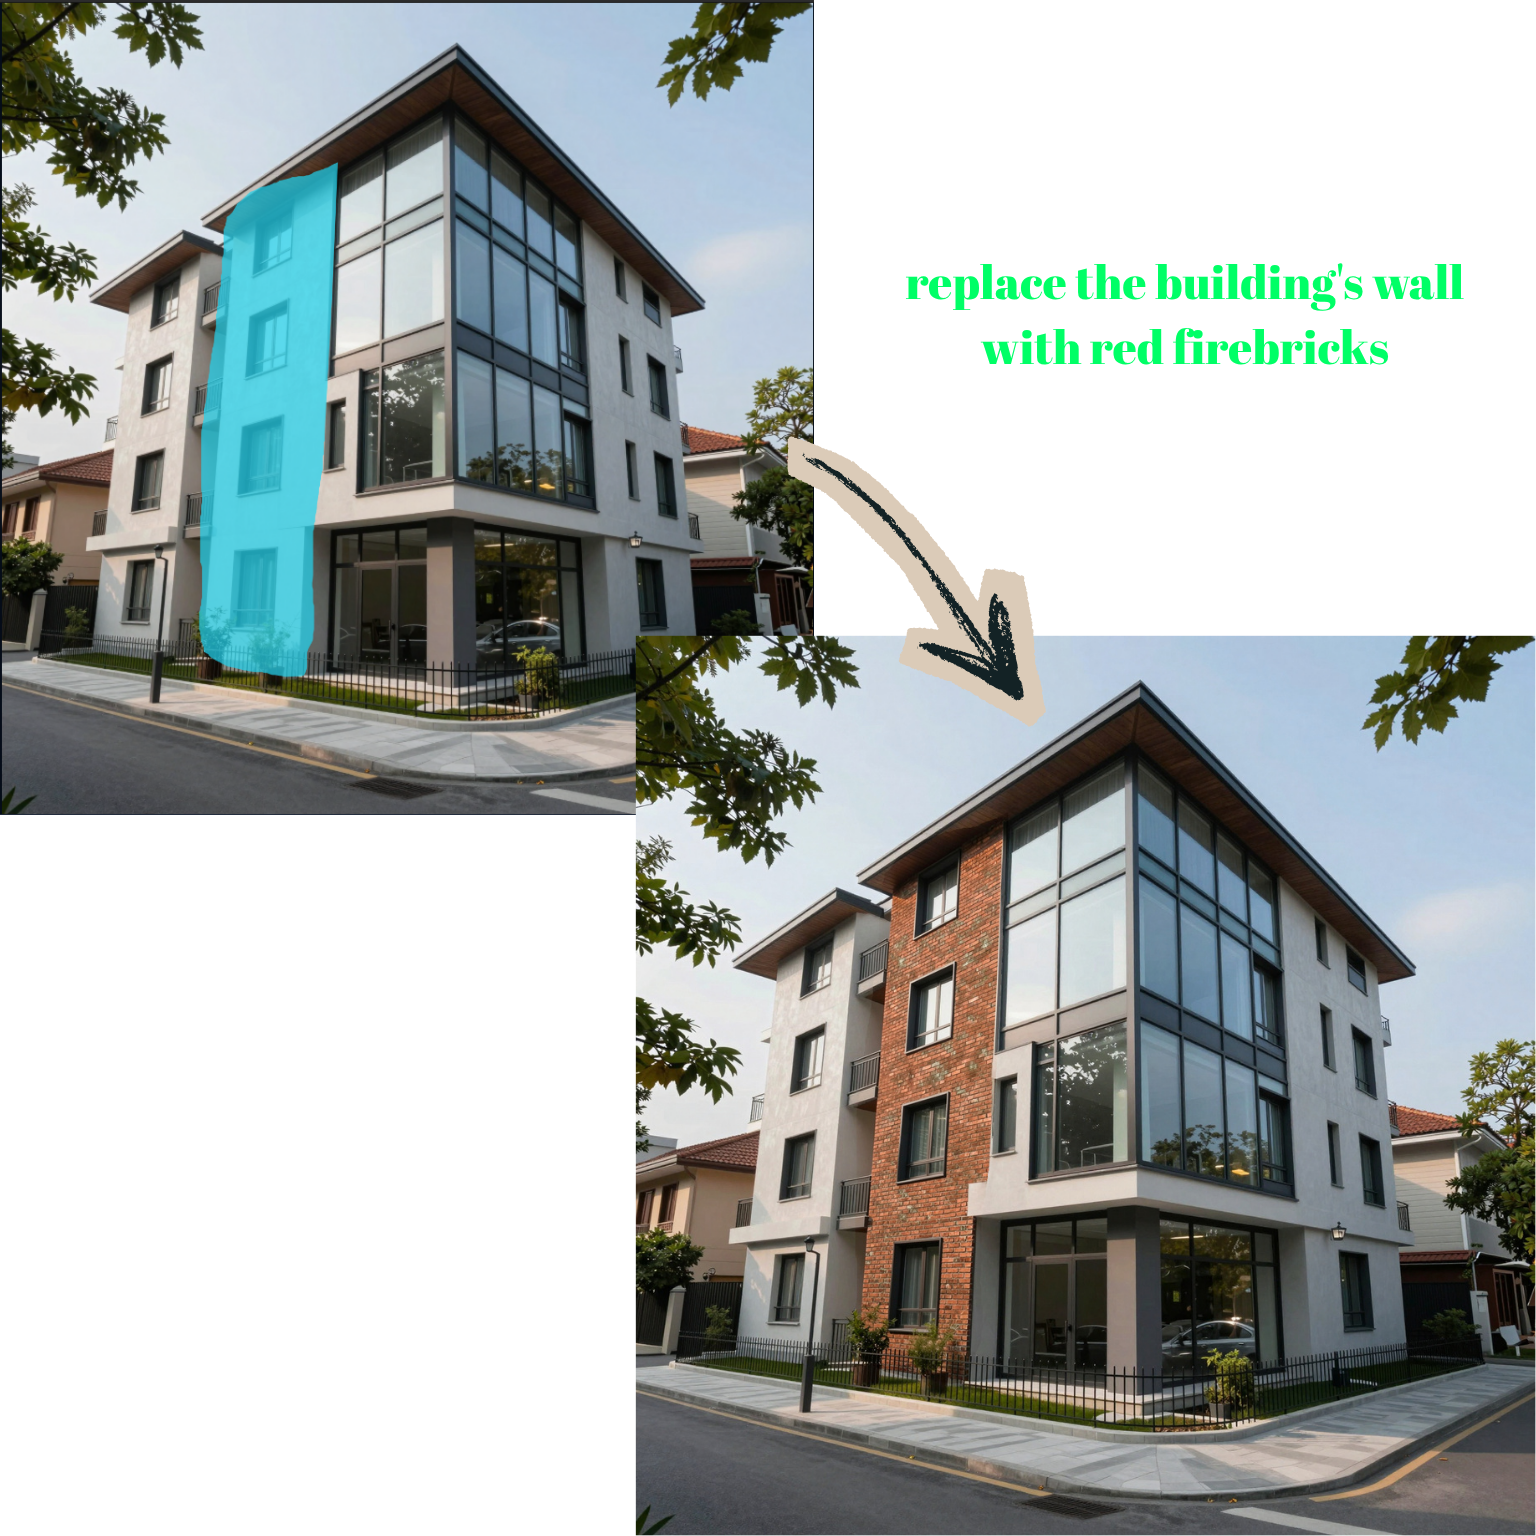
In this example, only the narrow, selected section of the facade was converted to brick — the windows, the neighboring facade, and the surroundings are all completely unchanged.
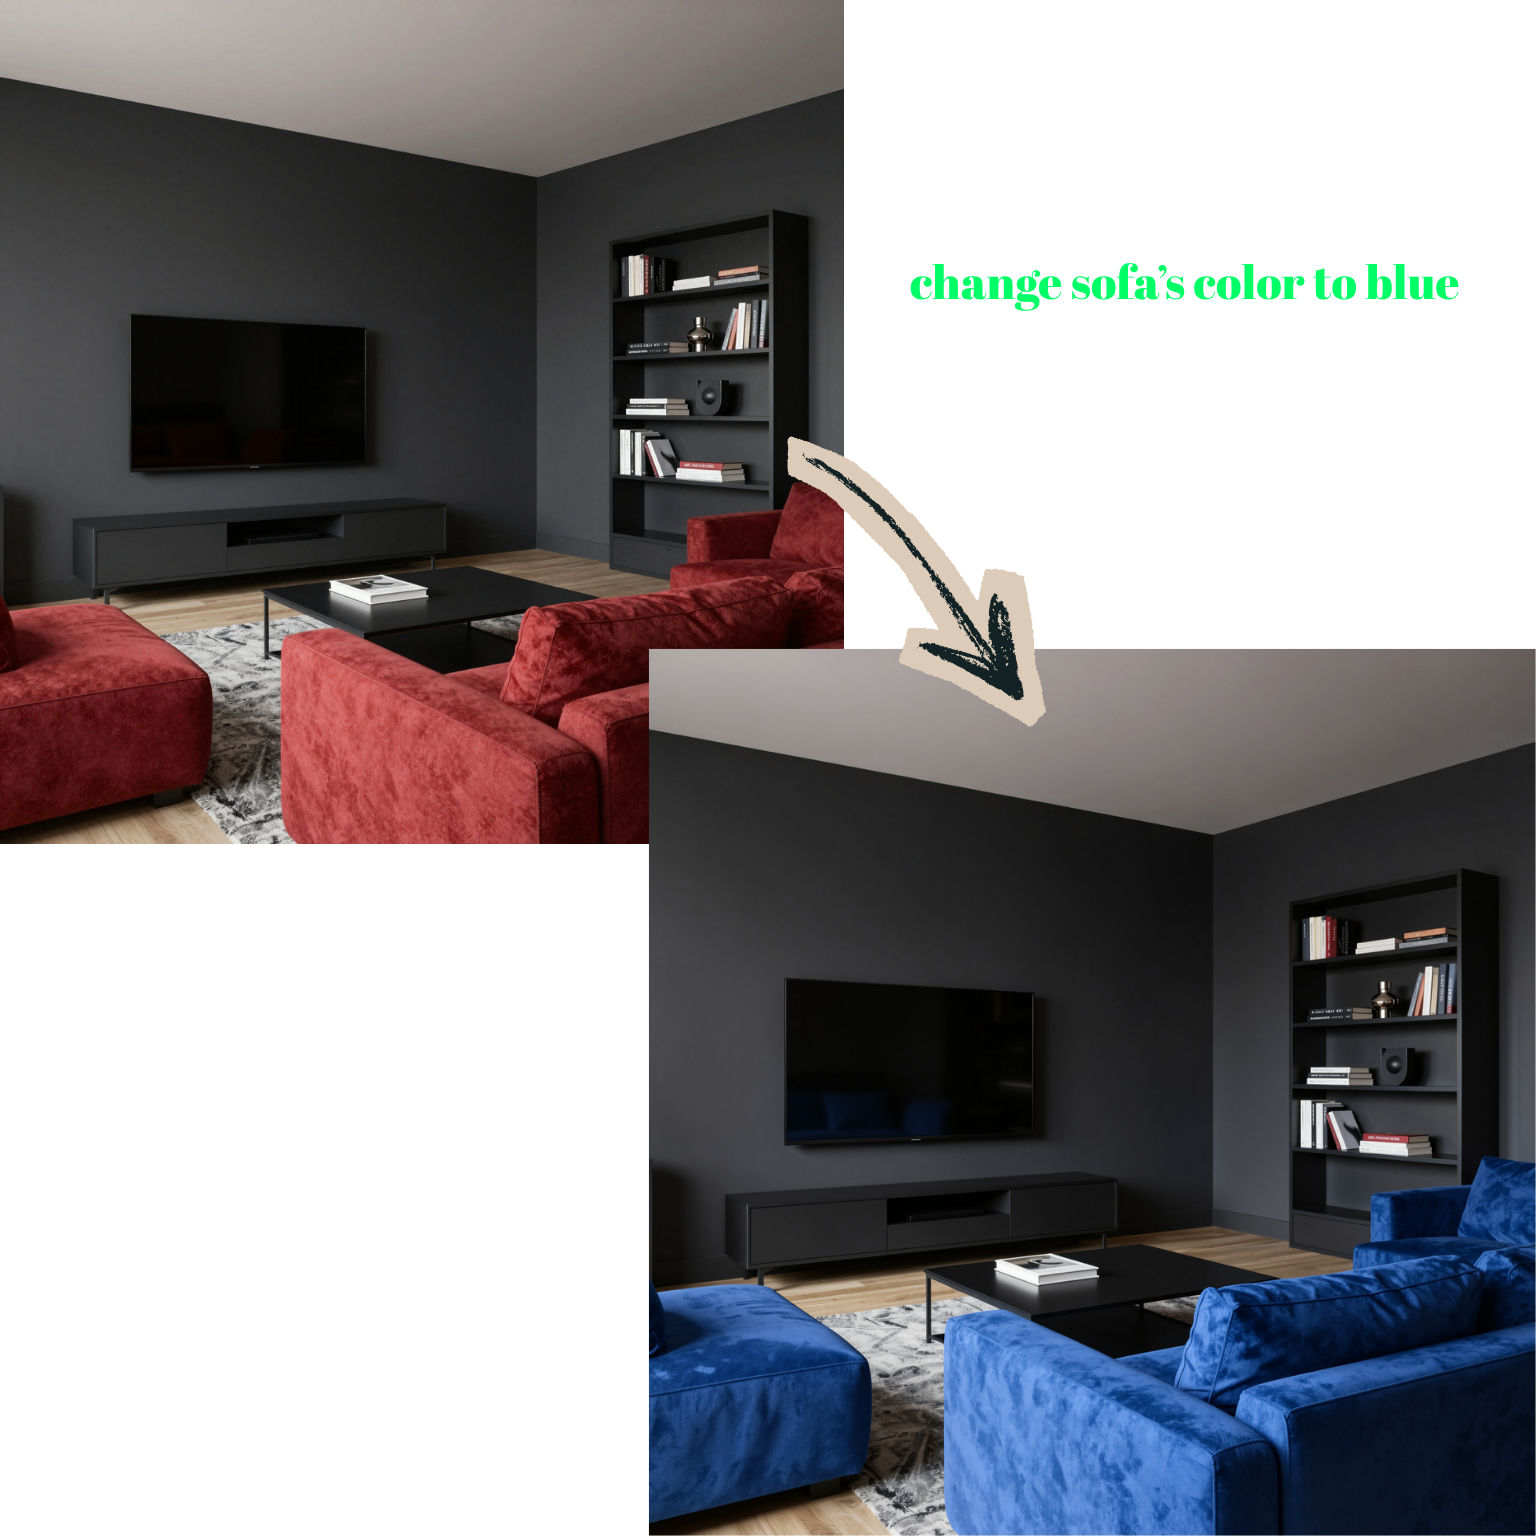
Here, no area was selected at all — the prompt "change sofa's color to blue" was enough for the system to change just the sofas, while the rest of the scene (the wall, the TV, the bookshelf) stayed exactly the same.
Who Is This For?
- Architecture studios — making last-minute fixes before a presentation
- Interior designers — quickly updating a specific material or color based on client feedback
- Real estate professionals — removing an unwanted object from a space
- Architecture students — making quick fixes to a render before a deadline
Conclusion
Making a small change to a render doesn't mean starting over. Whether you describe it in words (maskless) or mark it exactly (masked/inpainting), you can get the result you want in minutes.
Ready to edit your own render?
Try it free →