AI RENDERING GUIDE
How to Create Amenity and Lobby Renders for Residential Projects With AI
Published 8 min read
In a residential project, the shared spaces often do more selling than the apartments themselves. A welcoming lobby, a bright gym, a rooftop terrace or a planted courtyard tells buyers and tenants what everyday life in the building will feel like. Yet amenity spaces are usually the last to be rendered: the design is still changing, the budget for visuals has gone into the hero exterior, and each space needs its own model, materials and lighting.
AI amenity rendering makes it practical to visualize these spaces early and to update them as the design develops. In this guide you will learn how to plan an amenity shot list, prepare good starting images, generate each space, explore finish and lighting options, and present a consistent set of images.
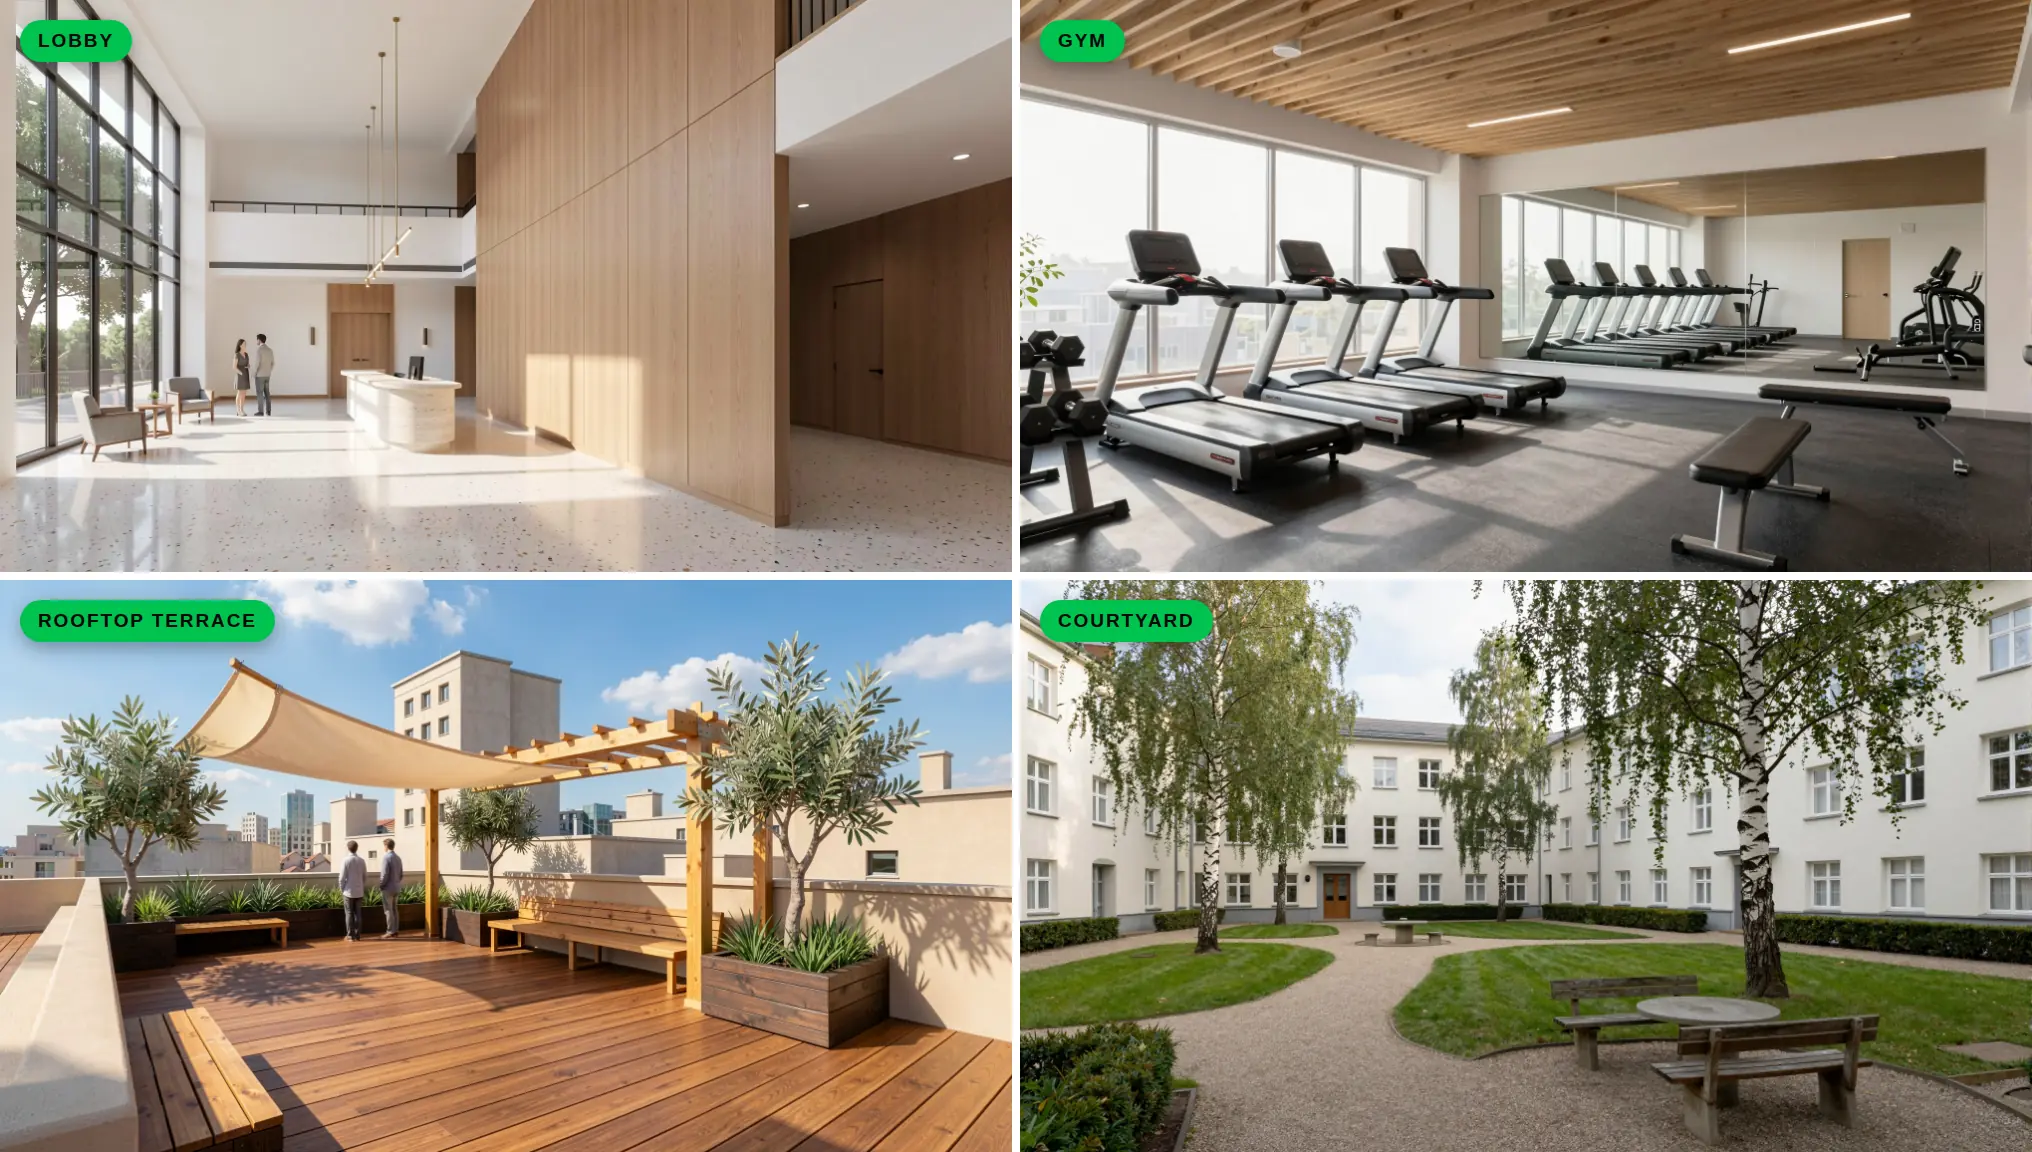
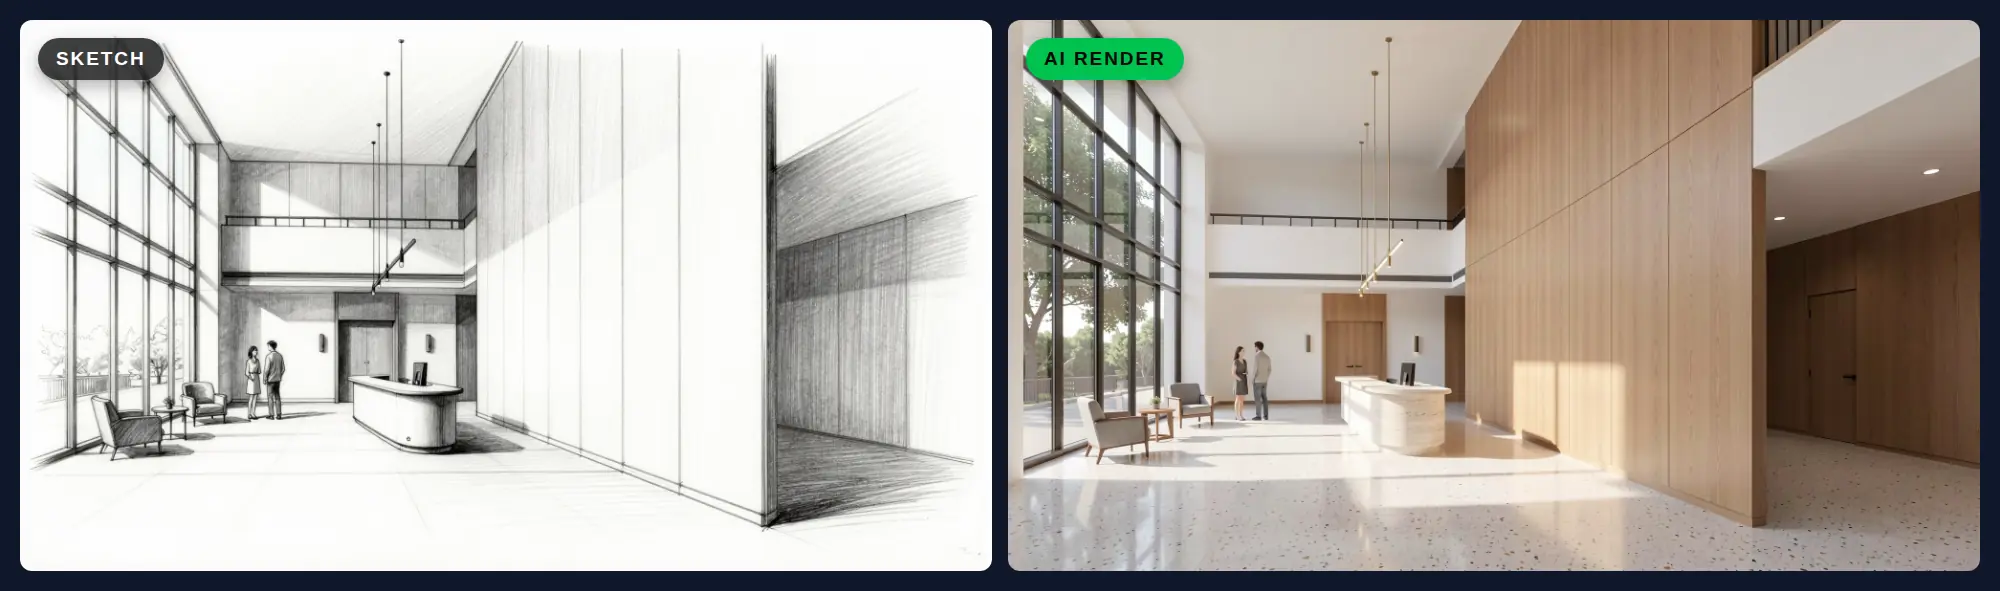
Every image in this guide was made in QUVIAI. The lobby and rooftop started as pencil sketches made with the text-to-image tool; the gym and courtyard were generated directly from text. The steps are the same with your own sketches and model views.
Why Render Amenity Spaces Separately?
- They show the lifestyle, not just the floor area. Buyers compare buildings by the shared spaces they will use every day.
- They are hard to imagine from plans. A ceiling height, a reception desk or a view from the roof rarely reads in a drawing.
- They help design decisions. Seeing the lobby or gym early helps the team and the client agree on materials, furniture and lighting before details are fixed.
- They change often. Operators, budgets and layouts shift during a project. Editing an existing image is quicker than rebuilding a full 3D scene each time.
Step 1: Make an Amenity Shot List
Start with a short list of spaces and one main view for each. A typical residential project might include:
| Space | Suggested view | What the image should communicate |
|---|---|---|
| Entrance lobby | From the entrance towards reception or the lift core | Arrival, height, quality of materials |
| Lounge or co-working room | Eye level, towards the windows | Comfort, daylight, a place to stay |
| Gym | Diagonal view across the room | Space, equipment zones, natural light |
| Rooftop terrace | Towards the best view | Outdoor living, seating, planting |
| Courtyard or garden | From a ground-floor doorway | Greenery, calm, connection to homes |
| Kids’ room or playground | Low, friendly angle | Safety, colour, families |
Keep the list realistic. Four to six well-made images are usually more useful than ten rushed ones.
Step 2: Prepare Your Starting Images
Each amenity render starts from an image you already have. Choose the type that matches how far the design has developed:
- Concept stage: a perspective sketch. A quick hand or digital sketch of the lobby or terrace is enough for Sketch → Render. Our sketch to render guide explains how to prepare it.
- Design stage: a model view. Take a screenshot from your 3D model at eye level. QUVIAI offers free AI render plugins for popular modelling tools; see also how to render a 3D model or BIM view.
- No model yet: text. For early mood images, Text → Image can create a first impression of a space from a written description. See our text to image guide.
Tips for better starting images:
- Use a human eye height of about 1.5–1.7 m for interiors and terraces.
- Show some ceiling and floor. Height is one of the main qualities of a lobby, so do not crop it out.
- Include the windows. Daylight and views make amenity spaces feel inviting.
- Keep the massing settled. Agree walls, openings and ceiling heights before you test finishes.
Step 3: Generate Each Space With a Clear Prompt
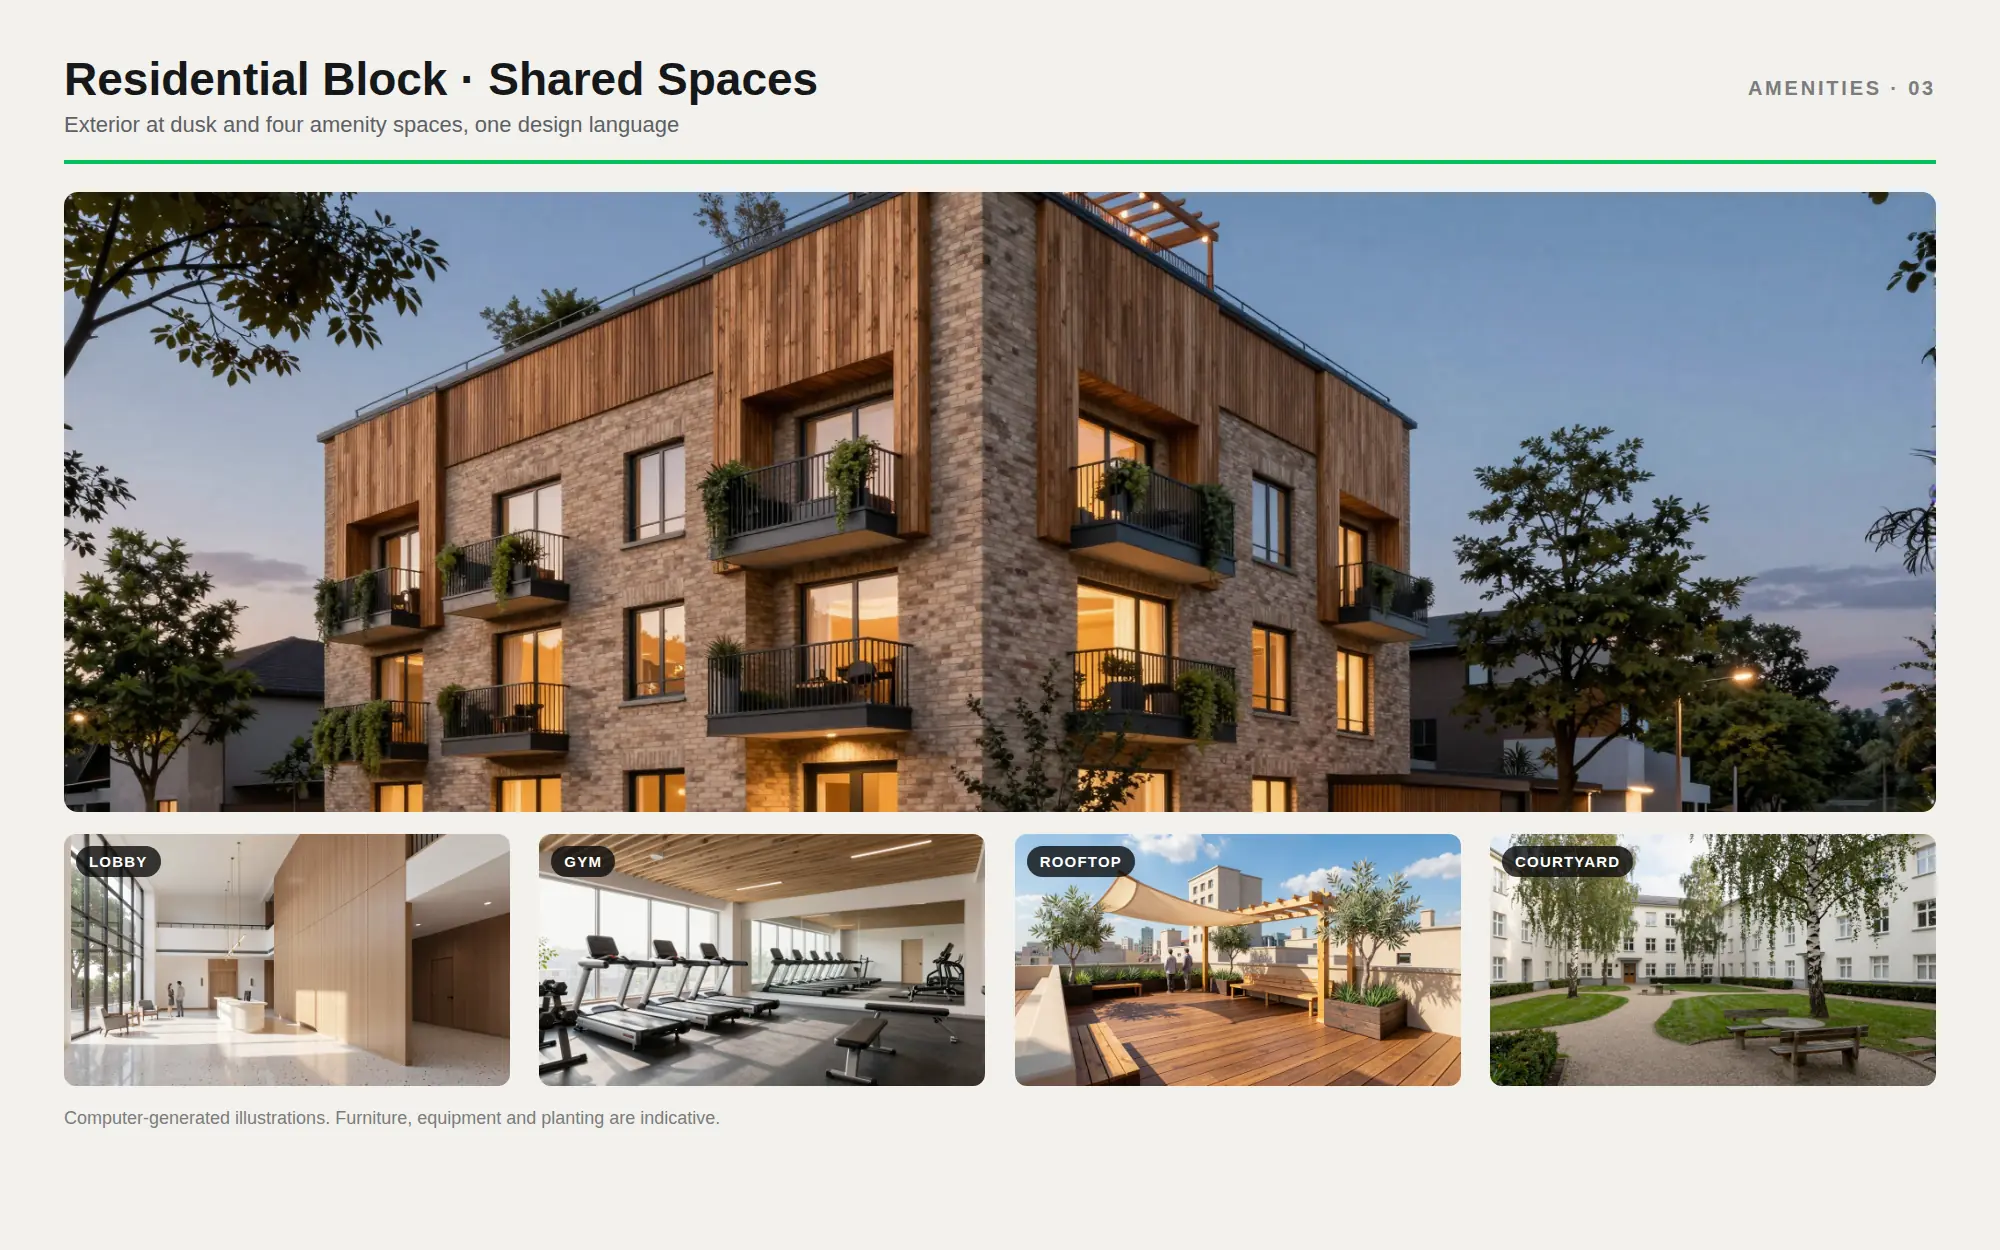
Describe the space, its materials, its light and its atmosphere. Be specific about the elements that matter to the client. These are the exact prompts behind the four spaces at the top of this article:
Lobby (rendered from the sketch):
“Double-height residential lobby, warm oak wall panels, light terrazzo floor, curved reception desk in travertine, linear pendant lights, large glazed entrance, soft daylight, calm and welcoming.”
Gym:
“Residential gym with floor-to-ceiling windows, a row of treadmills facing the view, weight benches and a dumbbell rack, rubber floor in dark grey, mirrored wall, light timber ceiling slats, morning daylight, clean and bright.”
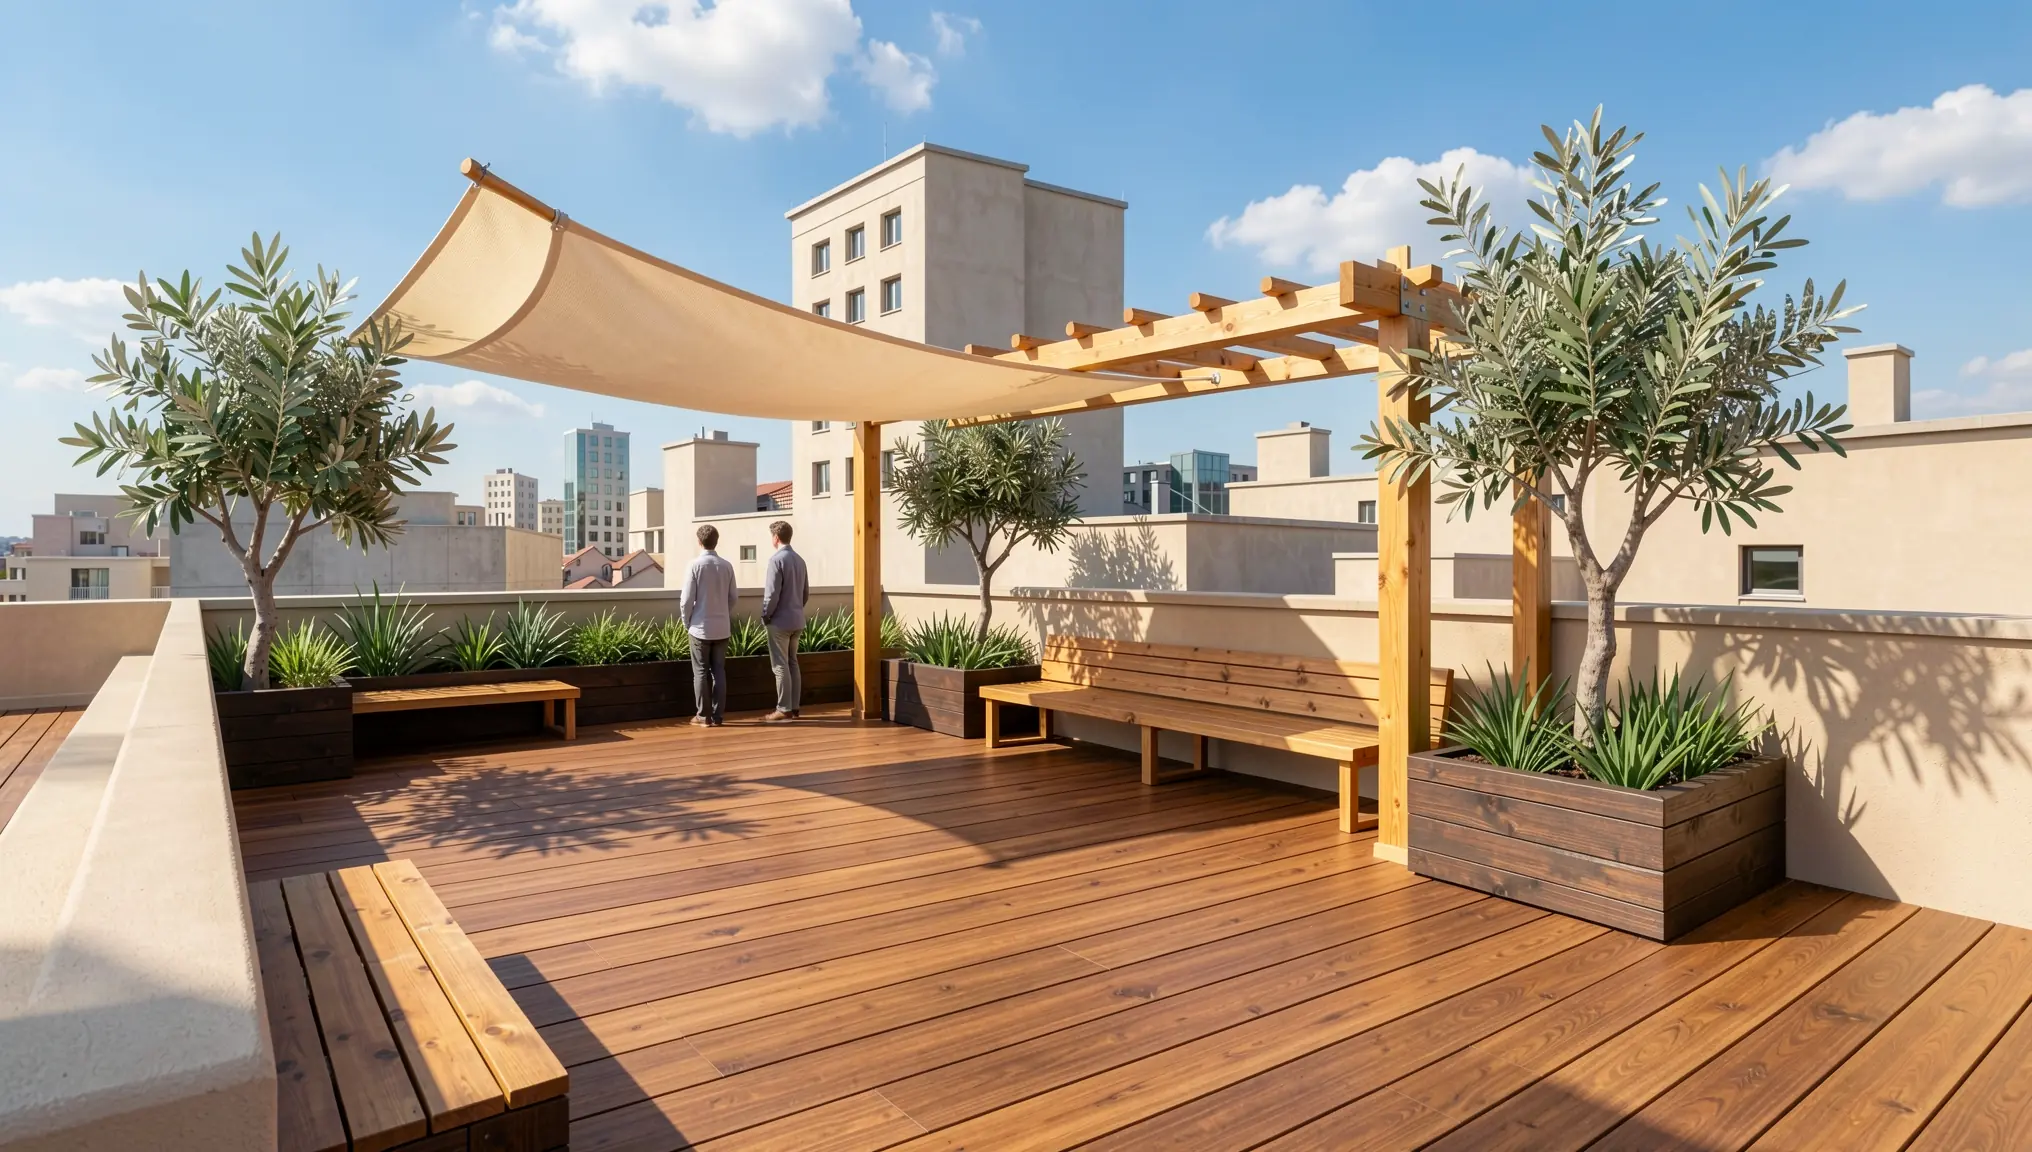
Rooftop terrace (rendered from a sketch):
“Rooftop terrace with timber decking, built-in benches, planters with grasses and olive trees, pergola with fabric shade, city skyline view, late afternoon.”
Courtyard:
“Inner courtyard of a residential block, gravel paths, lawn, birch trees, low hedges, outdoor seating, facades of the building around, soft daylight.”
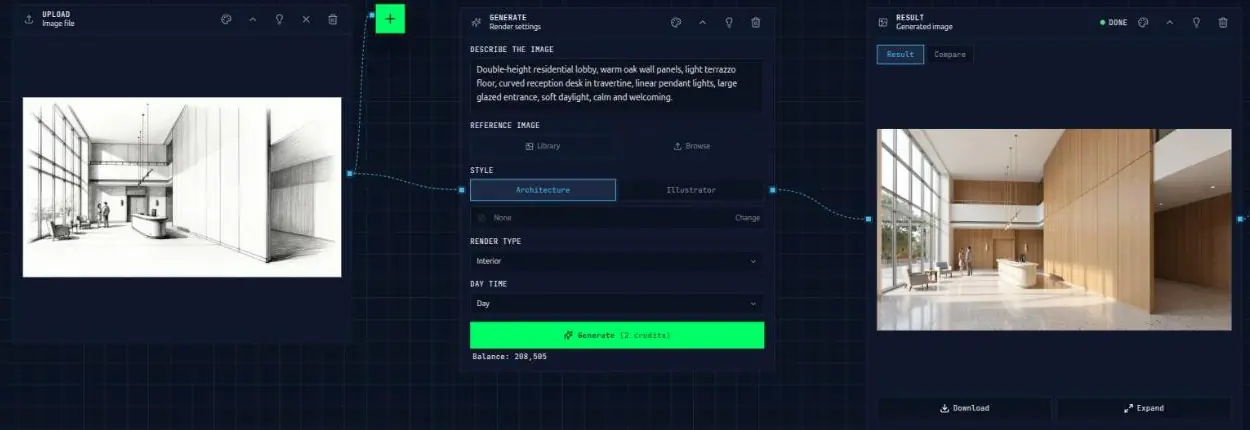
Generate a few versions of each space and choose the one that best matches the design intent. Our AI architecture prompts guide has more tips on writing prompts.
Step 4: Keep One Design Language Across the Set
Amenity images are usually shown together in a brochure, website or presentation. They should look like they belong to the same building.
- Repeat key materials. If the lobby uses oak and terrazzo, carry one of them into the lounge or the lift lobby.
- Use the same style words in every prompt, for example “warm, minimal, natural materials”.
- Match the time of day across interior images unless you are deliberately showing a contrast.
- Check the furniture style. Mixing very different furniture styles makes a set look random.
Step 5: Explore Finish and Furniture Options With AI Editing
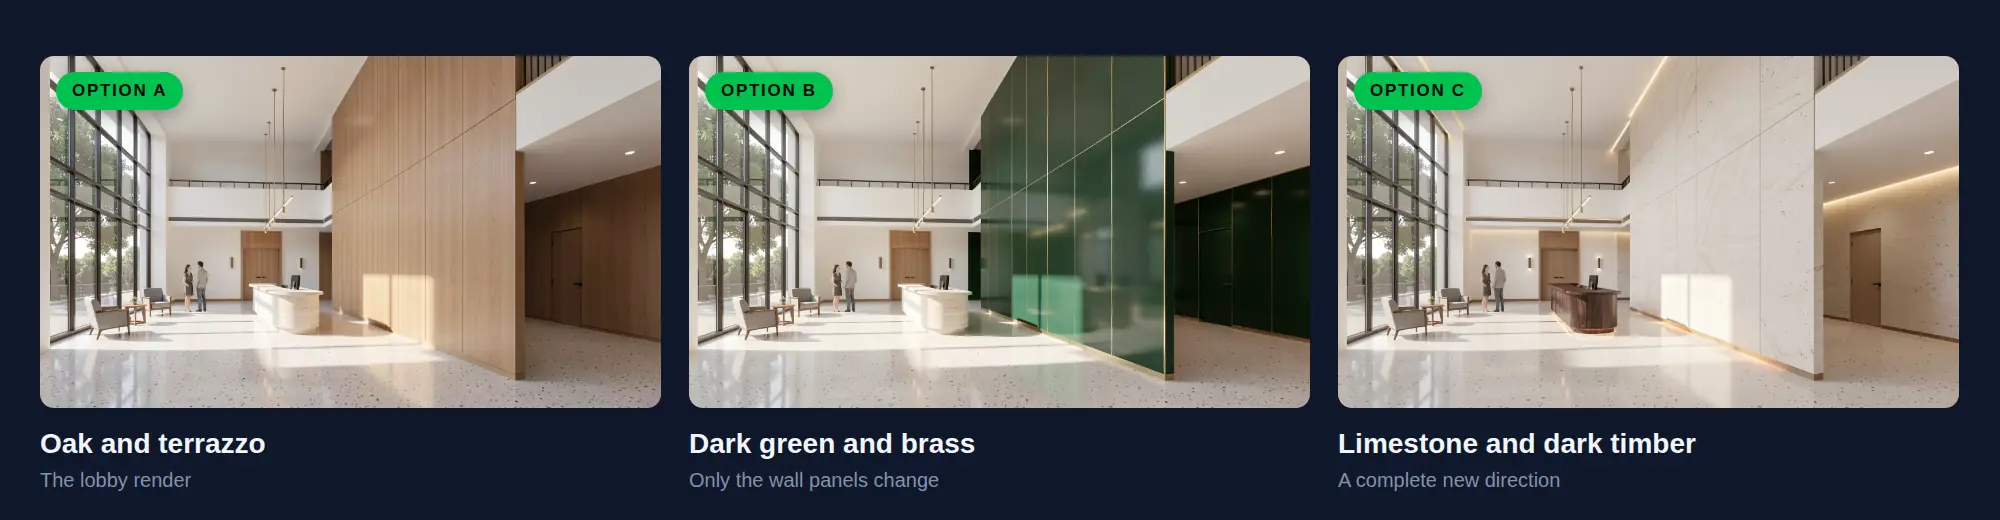
Clients and operators often ask: “What if the lobby were darker?” or “Could the gym feel warmer?” With QUVIAI’s AI render editing you can change any element of an image (materials and colours, furniture and decor, lighting, planting) and show several versions of the same space side by side.
- One element at a time: name a single element, such as the wall panels, the reception desk or the floor, and describe the new finish. For large surfaces like a whole wall, a maskless edit that names the element works best; keep masks for small, clearly bounded items.
- A complete direction: describe the whole scheme in one prompt to test a different mood in one step.
“Change only the oak wall panels to dark green lacquered wall panels with brass trims. Keep the terrazzo floor, travertine reception desk, pendant lights, glazed entrance, layout, camera angle and daylight exactly the same. Photorealistic.”
“Same lobby, same layout. Light limestone walls, dark timber reception desk, warm indirect lighting.”
Our masked vs maskless editing guide and the material options guide explain this workflow in more detail.
Step 6: Add Day and Night Versions
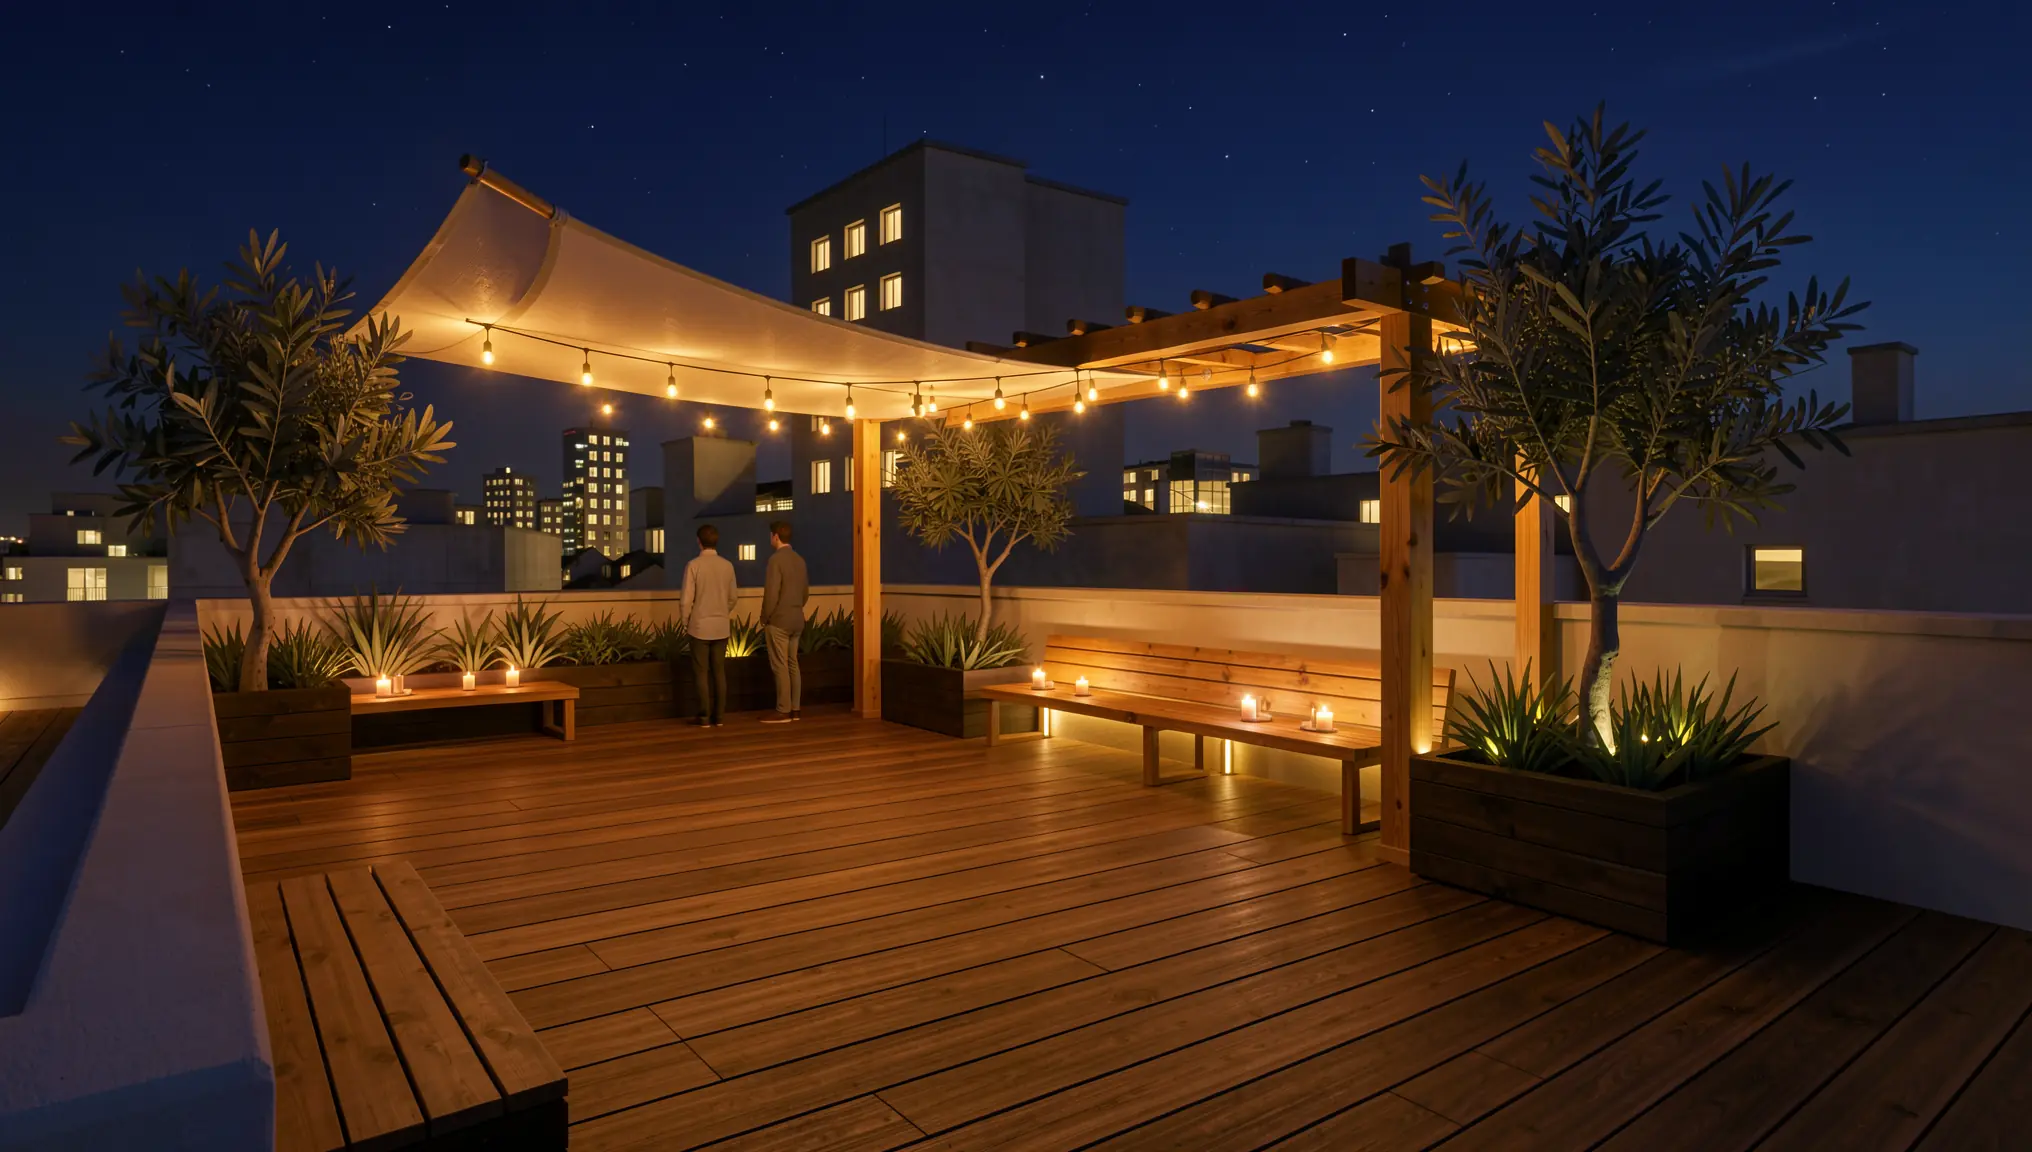
Many amenity spaces are used most in the evening: the rooftop terrace, the lounge, the courtyard with its garden lights. QUVIAI can create versions of the same render in different lighting conditions, such as day and night. A night view of the rooftop or a warmly lit lobby at dusk often becomes one of the strongest images in the set. See day to night render with AI for the steps.
“Change the scene to night: deep blue night sky with the city lights glowing in the skyline, warm string lights under the pergola, low warm lights in the planters and along the benches, soft candlelight on the tables. Keep the decking, benches, planters, pergola, layout and camera angle exactly the same. Photorealistic.”
Step 7: Turn Key Images Into Short Videos
Short clips work well on social media and project websites. With Render → Video you can turn a finished amenity render into a short video, for example a slow move through the lobby or across the rooftop terrace. Our AI video generation guide covers the options.
“Slow smooth camera dolly forward through the lobby towards the reception desk, a resident walking in, soft daylight from the glazed entrance. Keep the lobby, materials and furniture unchanged.”

Step 8: Check Accuracy Before You Share
Amenity images create expectations, so check them carefully before they go into marketing material.
- Compare with the current plans. Room sizes, window positions and ceiling heights should match the design.
- Show only what is planned. Equipment, furniture and planting should reflect what will actually be provided, or be clearly described as indicative.
- Label the images as computer-generated illustrations and follow the advertising rules for property marketing in your market.
- Keep versions organised. Note which image belongs to which design version, and replace outdated images when the design changes.
Quick Checklist
- A shot list of four to six amenity spaces with one main view each
- Starting images at human eye height: sketch, model view or text
- Clear prompts describing materials, light and atmosphere
- One consistent design language across all spaces
- Finish options created with AI render editing
- Day and night versions of evening spaces
- One or two short videos for social media
- Every image checked against the current design and labelled
Conclusion
Amenity and lobby renders help buyers, tenants and clients understand how a residential building will feel to live in. With AI rendering you can create them early from sketches and model views, test finishes and lighting quickly, and keep the whole set up to date as the design evolves.
You can try this workflow in QUVIAI with free daily credits, and no credit card is required. Start with a sketch or model view of your next lobby and create your first amenity render.