Architectural Sketch to Photorealistic Render: A Step-by-Step AI Guide
An architectural project sitting in front of you as a hand-drawn sketch or a quick concept drawing isn't always easy to communicate to a client or investor. To a trained eye, a sketch already says a lot — but the person across the table often can't see the same vision. It's hard for them to imagine how light will fall, what a facade material will actually look like, or what mood a space will carry throughout the day.
This is exactly where a photorealistic render comes in. The problem is that the traditional rendering process — building a 3D model, assigning materials, setting up lighting, rendering — can take hours, sometimes days. For a small studio or a solo architect, that kind of time isn't always available.
AI-powered rendering tools cut this process down dramatically: you upload the sketch you already have, and get a photorealistic result back in minutes.
Why Use AI to Turn a Sketch Into a Render?
The real difference between the traditional workflow and the AI-assisted one comes down to the number of steps involved:
Traditional path: Sketch → build 3D model → assign materials/textures → set up lighting → position camera → render (hours)
AI-assisted path: Sketch → upload → render (minutes)
This doesn't mean 3D modeling becomes unnecessary — for projects that require technical precision and detail, it's still essential. But at the concept stage — quickly visualizing an idea to share with a client, testing different style or material options, or needing a compelling image a few hours before a presentation — AI rendering delivers the same persuasive power without the time cost.
Step by Step: Turning Your Sketch Into a Photorealistic Render
- Upload your sketch. A hand drawing, a digital rough, or a simple CAD export all work — what matters is that the core lines (walls, windows, roof, massing) are clearly readable.
- Optionally, specify a material or style preference. If your sketch already has a texture or pattern (like a brick pattern), the system interprets it on its own. If you want a different material — say, "wood cladding" — you can specify it separately, and the system applies it without altering the massing or pattern in your sketch.
- Generate the render. The AI preserves the massing and composition from your sketch while adding photorealistic light, material, and texture on top.
- Not happy with the result? Try again. You can regenerate with a different prompt or a small change — each attempt takes just a couple of minutes.
A Real Example: From Sketch to Render
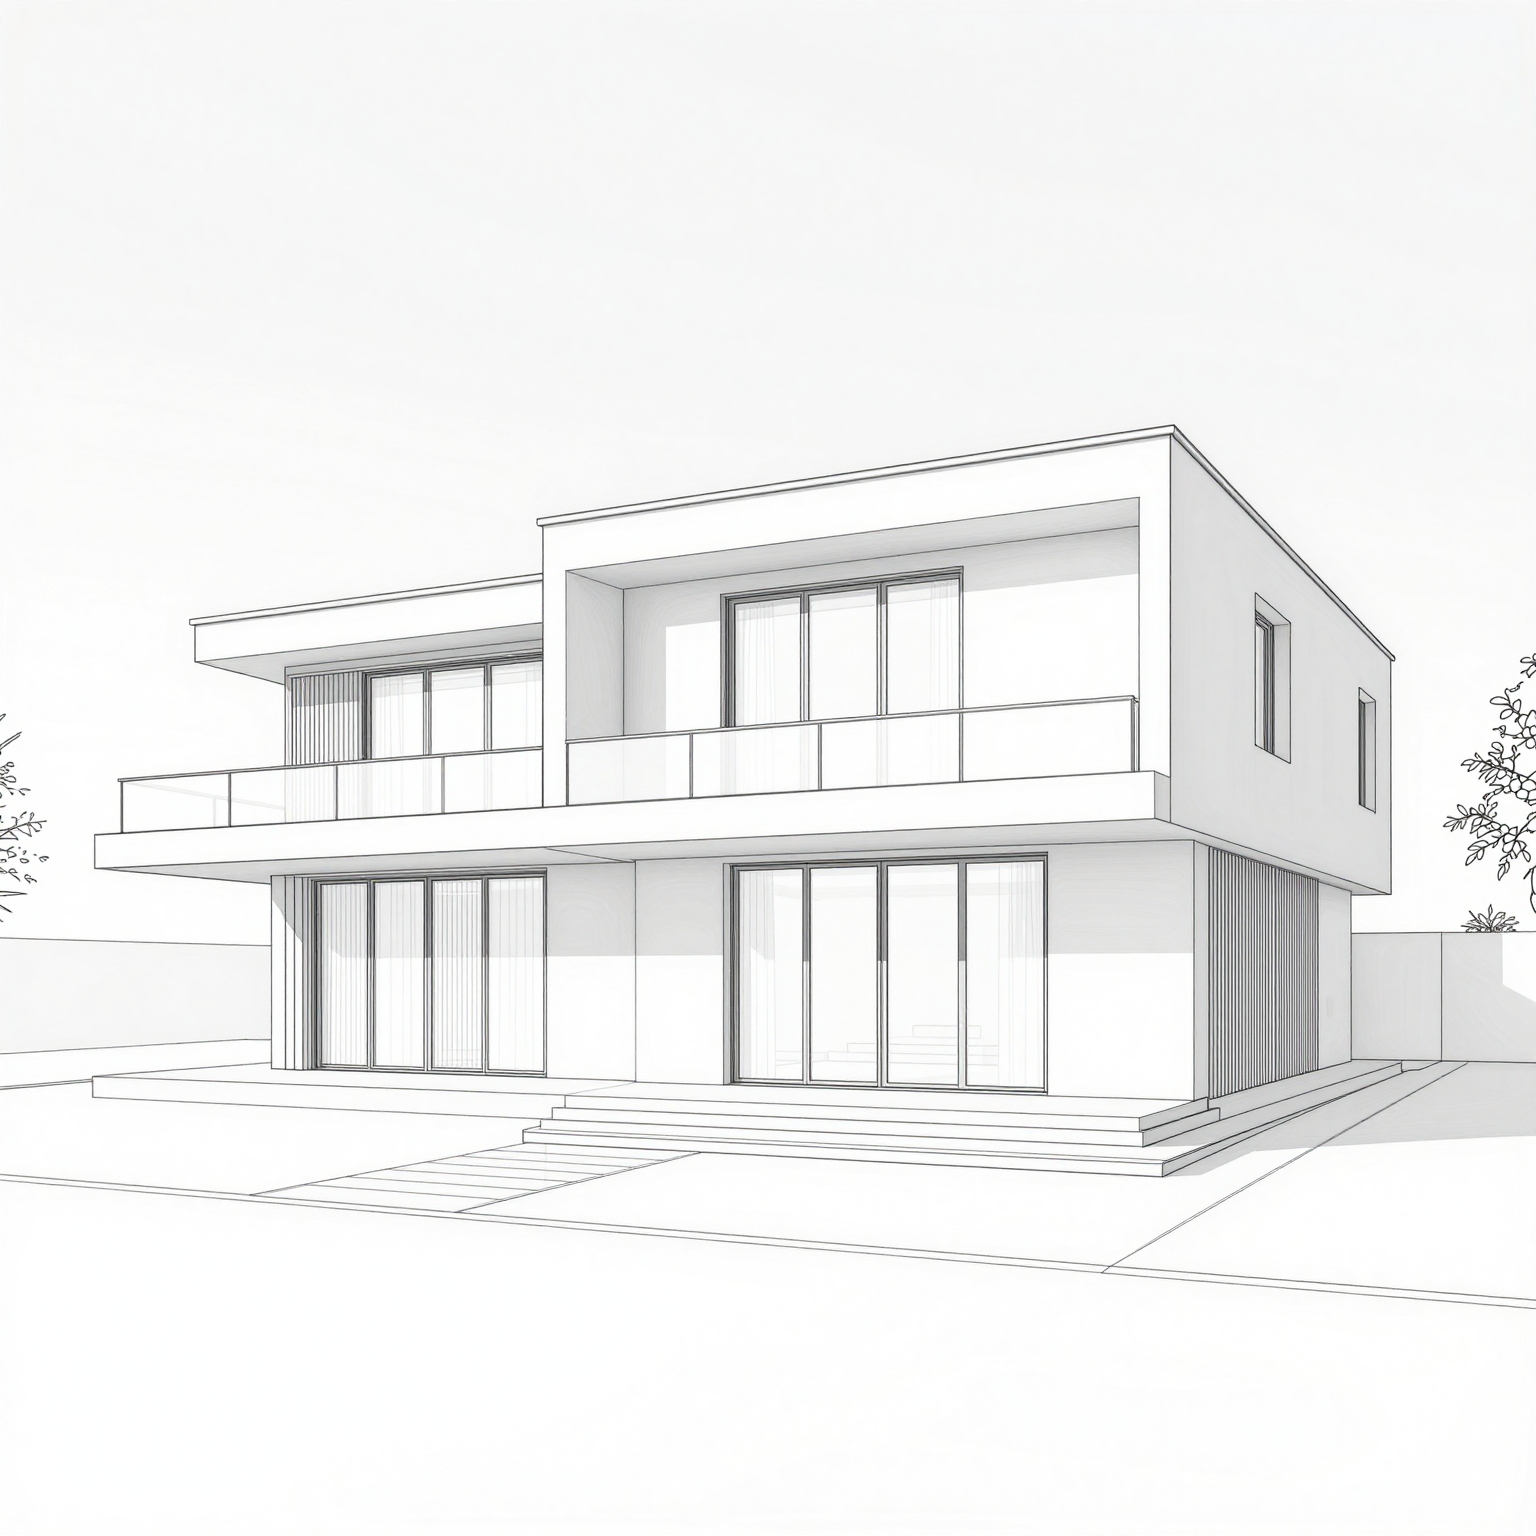
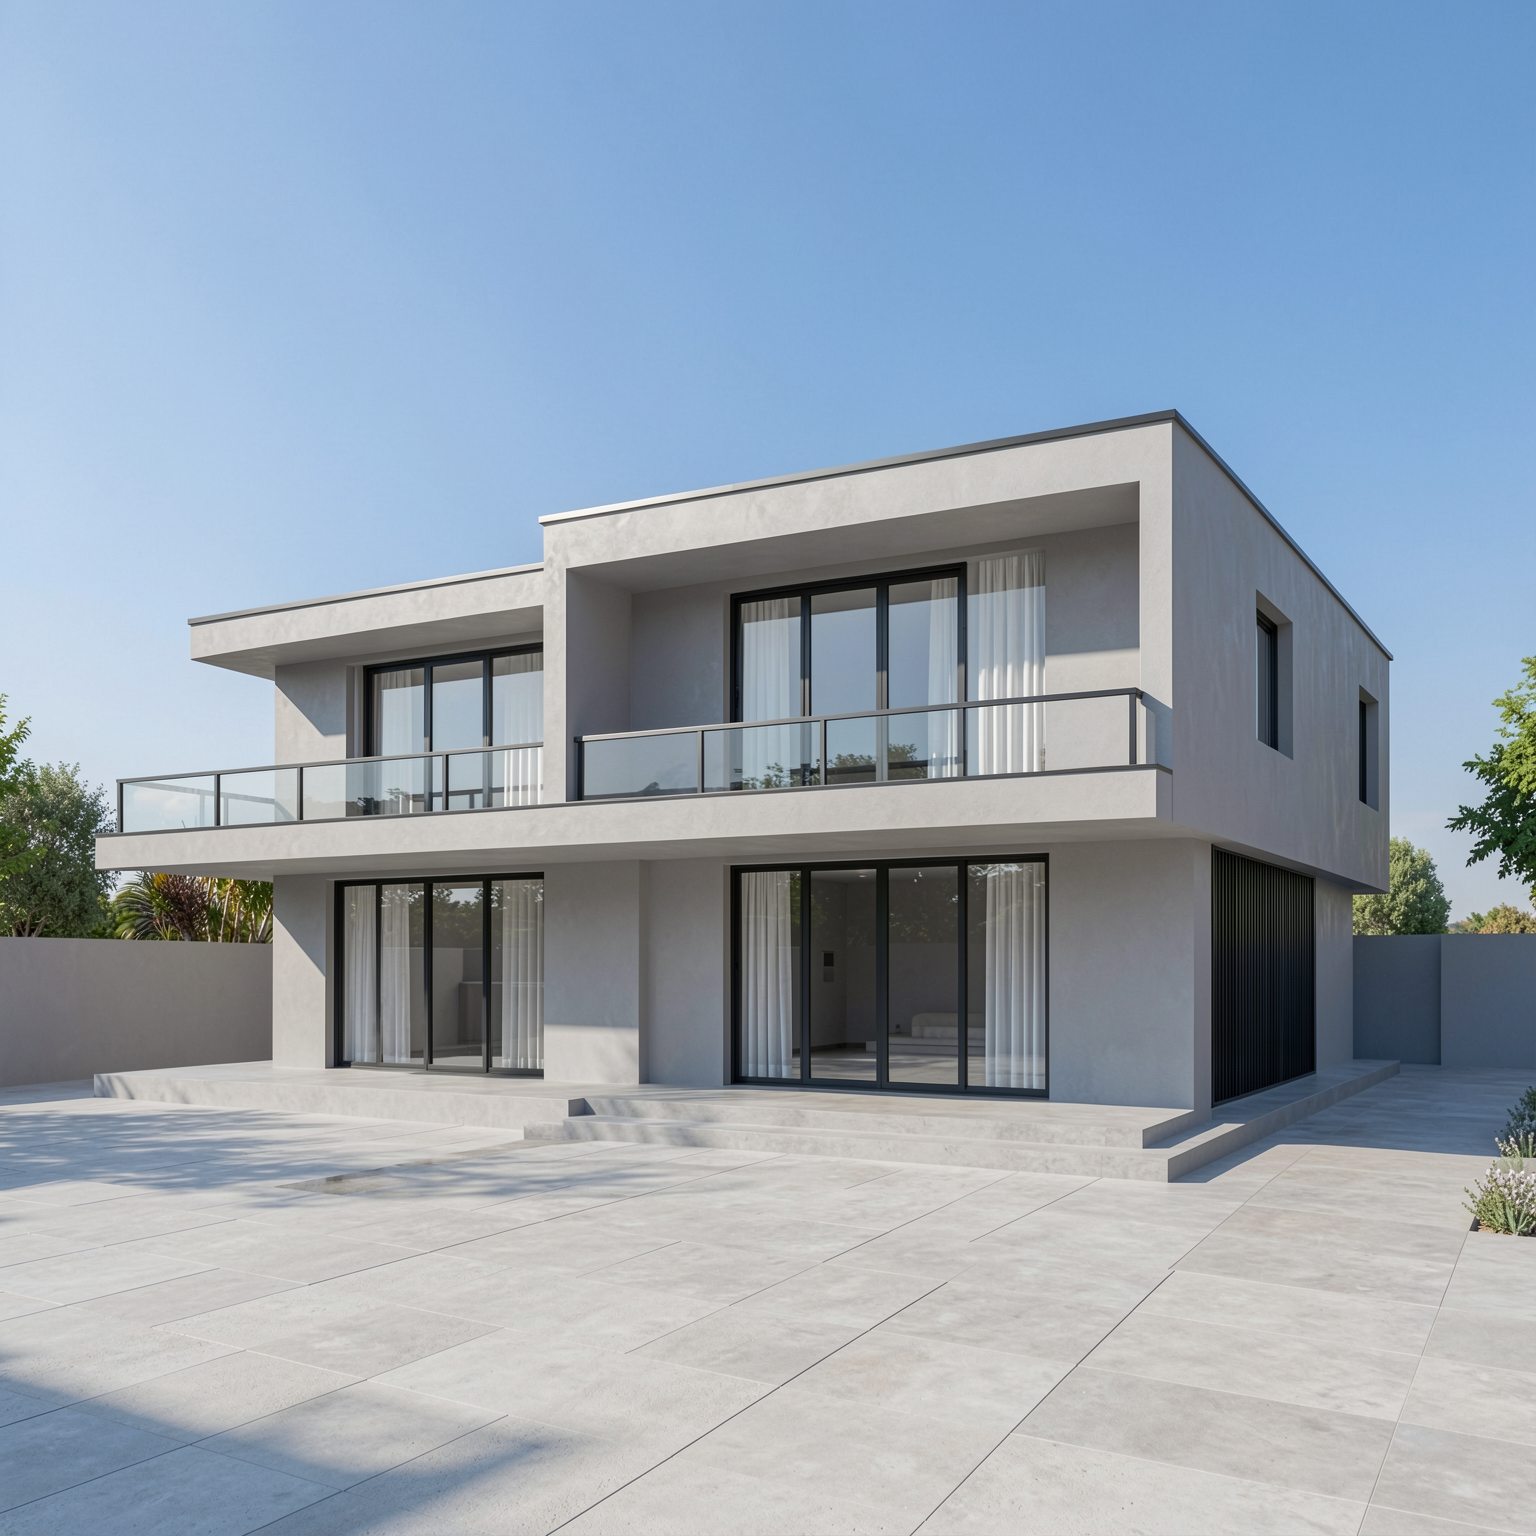
As this example shows, the core massing and window layout from the sketch are preserved, while material, lighting, and environmental detail — vegetation, sky, shadows — are added by the AI. The result is a presentation-ready image.
Practical Tips for Better Results
- Use clear lines. Bold, well-defined outlines make it easier for the AI to read the massing correctly.
- Keep the sketch clean. Avoid adding text, dimension notes, or shading — draw only the essential lines (walls, windows, roof, massing) clearly. The AI works best from a clean drawing.
- Preserve scale and proportion. Reference elements like doors and windows help the model interpret the building's scale correctly.
- Think about the angle. Show the angle you plan to use in your presentation clearly in the sketch — the clearer the perspective, the more consistent the render.
Who Is This For?
- Architecture studios — preparing concept presentations in minutes instead of hours
- Interior designers — quickly visualizing a spatial idea to get client sign-off
- Architecture students — producing compelling visuals under project deadline pressure
- Real estate professionals — showing an unbuilt project realistically to a potential buyer
Already Have a 3D Model?
This guide is for hand-drawn sketches. If you already have a 3D model, getting a photorealistic render from it follows a slightly different process — we'll cover that in a separate guide.
Conclusion
Turning a sketch into a photorealistic render no longer has to take hours. With the right tool, a drawing you already have can become a presentation-ready image in minutes — saving time and making a real difference in how you communicate with clients.
Ready to see what your own sketch looks like rendered?
Try it free →