AI RENDERING GUIDE
Landscape Design Visualization With AI: From Sketch or Site Photo to Render
Published 9 min read
Landscape projects are hard to show. A planting plan full of circles and species codes means a lot to a landscape architect and very little to a homeowner, a developer or a planning committee. Hard landscaping, levels, trees and light all change how a space feels, and building a full 3D model of every garden, courtyard or terrace at the concept stage is rarely worth the time.
AI rendering gives you a faster way to show the idea. You can start from a quick sketch, from a screenshot of a simple model, or from a photo of the site as it is today, and turn it into a photorealistic image a client can understand at a glance. In this guide you will learn which starting point to choose, how to prepare it, how to describe planting and materials, and how to refine the result before you present it.
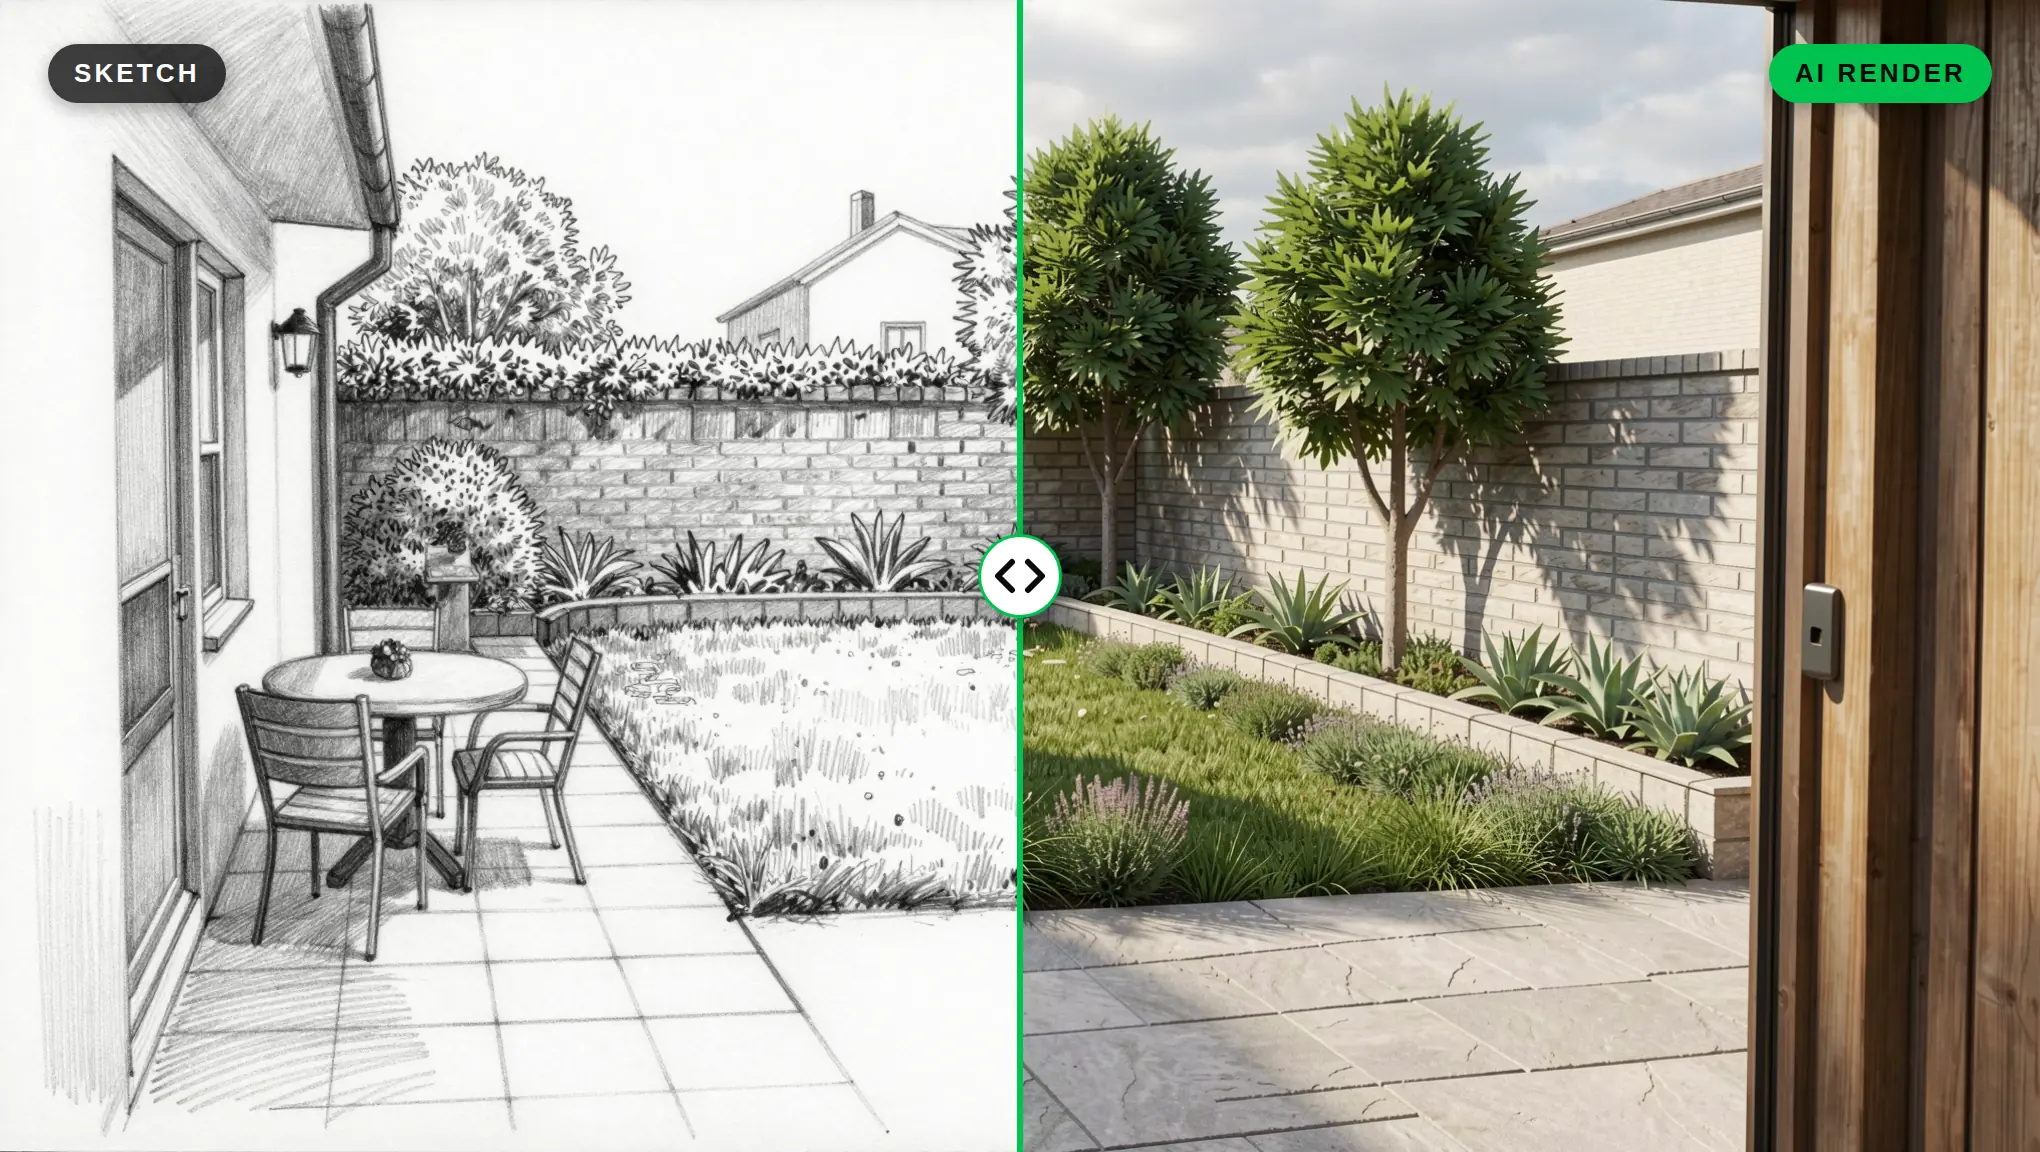
Every image in this guide was made in QUVIAI. To show the full workflow, the sketch and the “before” site photo were also created with QUVIAI’s text-to-image tool. The steps are the same with your own sketch or photo.
Why Use AI for Landscape Visualization?
- Speed at the concept stage. You can test a layout or a planting mood in minutes, while the design is still changing.
- Clients understand images, not symbols. A render shows what a plan cannot: height, texture, shade and atmosphere.
- The existing site is already in the photo. When you start from a site photo, the house, the boundary walls, neighbouring trees and the view stay in the picture. You do not need to model them.
- Cheap to compare options. Generating two or three directions for the same space is quick, so you can show alternatives instead of a single answer.
AI renders are best used as concept images. They communicate an idea; they do not replace planting schedules, levels drawings or construction details.
Step 1: Choose Your Starting Point
There are three common starting points. Pick the one that matches the stage of your project.
A sketch or line drawing. Best for new layouts and early ideas. A perspective sketch works better than a plan, because the AI needs to see the space from a human viewpoint. Hand sketches, tablet drawings and clean line drawings all work. QUVIAI’s Sketch → Render tool is built for this. For a general walkthrough, see our sketch to render guide.
A photo of the existing site. Best for garden makeovers, courtyard upgrades and front-yard redesigns. Take the photo from the place where the client will usually stand or look from: the back door, the terrace, the street.
A view of a 3D model. If you already have a simple massing or terrain model in your 3D modelling software, a screenshot of the right view is an excellent starting point, because the geometry and levels are already correct. QUVIAI also offers free AI render plugins for popular modelling tools, so you can render the view without leaving your model.
Step 2: Prepare the Image
A few minutes of preparation saves many regenerations.
- Keep the important lines clear. Paths, terrace edges, steps, walls and bed outlines should be easy to read. Faint or broken lines are easy for the AI to ignore or reinterpret.
- Show levels and scale. Draw a person, a bench or a door in the sketch. It helps the AI read the size of the space and stops a small courtyard turning into a park.
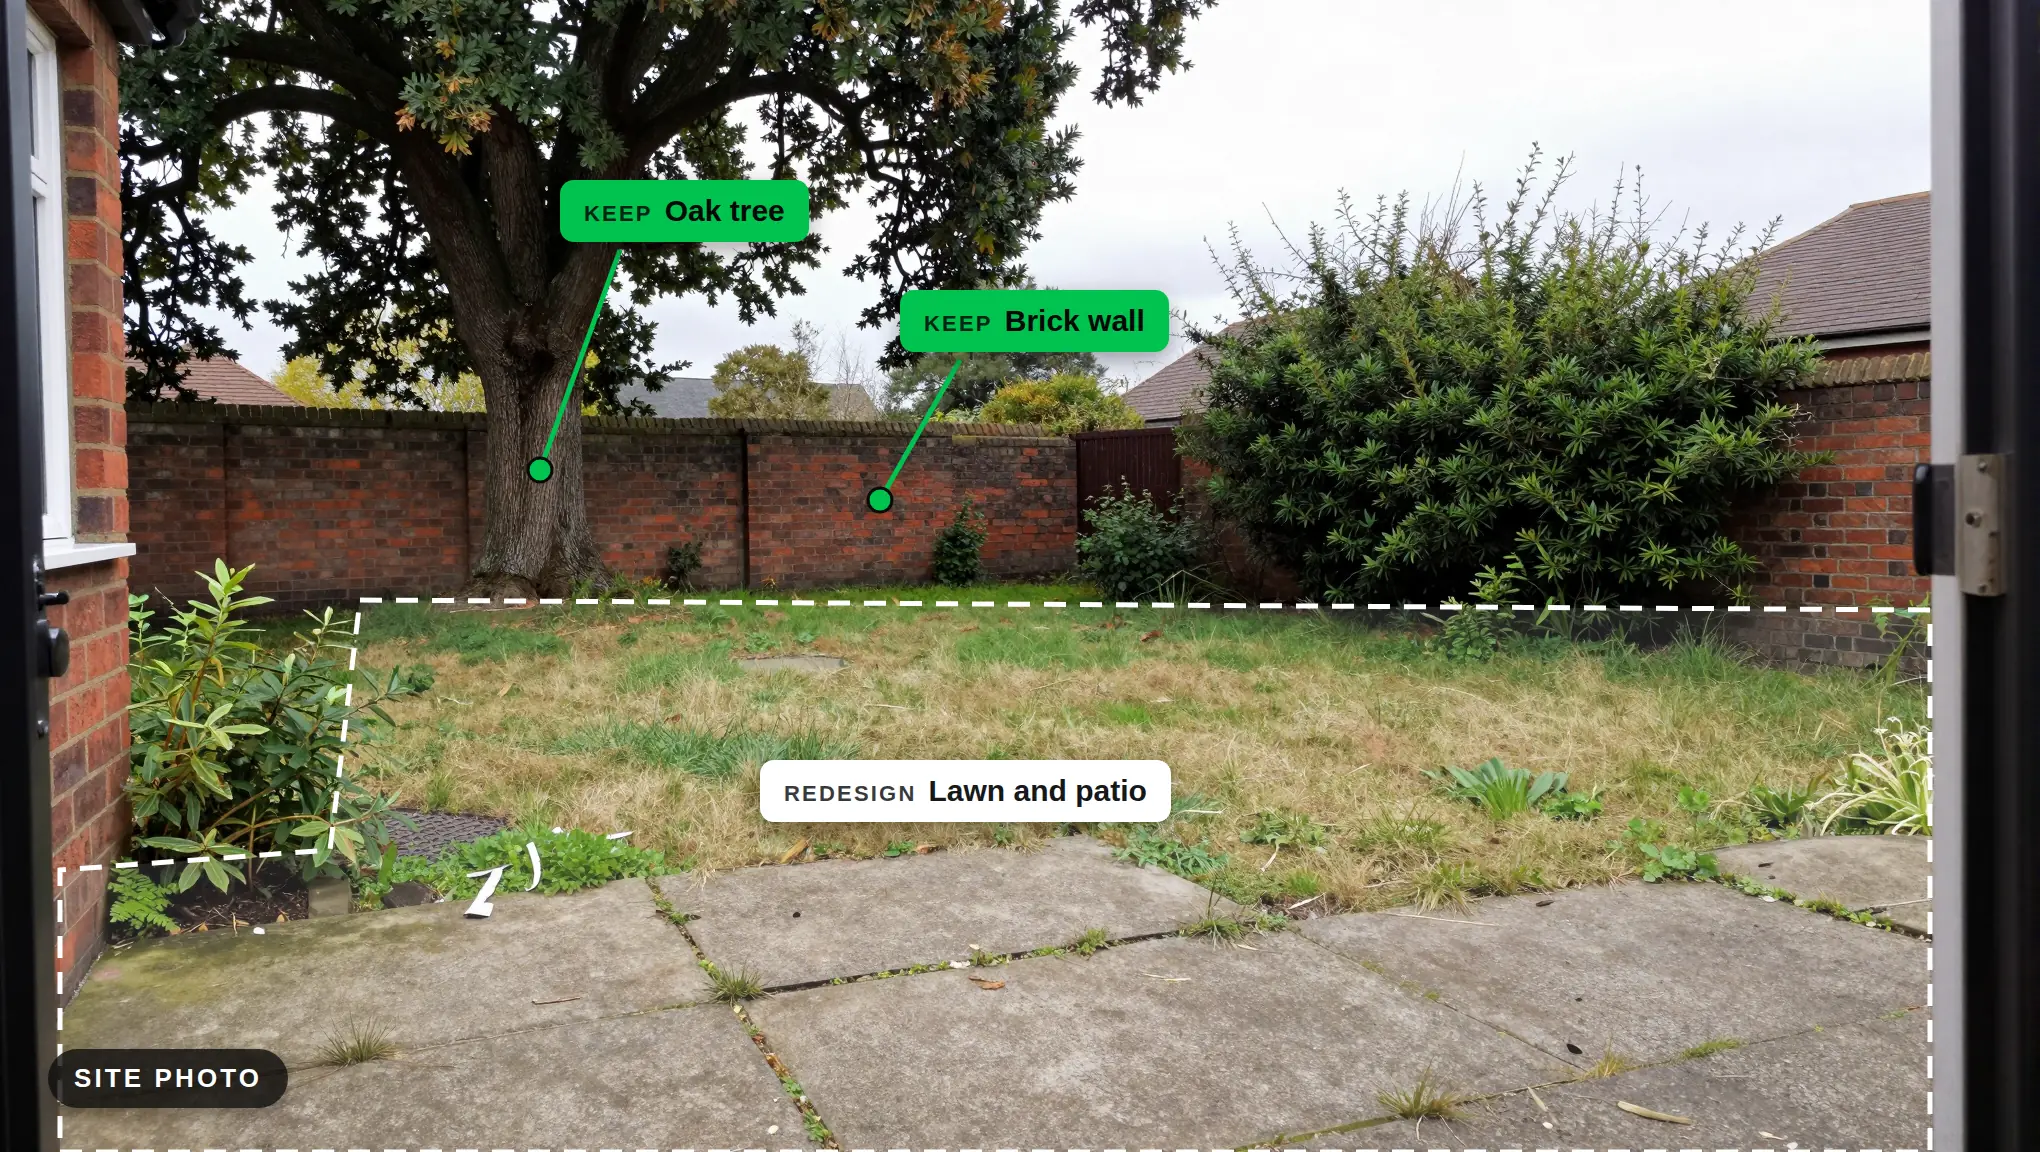
- Mark what stays. In a site photo, decide which elements must not change: the house facade, a mature tree, a boundary wall. You will name them in your prompt and work around them in Step 4.
- Use a good site photo. Shoot in even daylight, keep the horizon straight, and avoid strong lens distortion. Clear away bins, hoses and parked cars if you can; anything in the frame may influence the result.
Step 3: Describe the Landscape in Your Prompt
The image controls the layout; the prompt controls the materials, planting and mood. Be specific about what a landscape designer would specify.
A useful prompt structure:
- Space and use: “Small urban back garden with a dining terrace and a lawn.”
- Hard landscaping: “Large-format light grey stone paving, a low corten steel edge to the planting bed, a timber bench.”
- Planting: “Layered planting with ornamental grasses and low perennials in the front, multi-stem trees at the back, a clipped hedge along the boundary.”
- Light and atmosphere: “Soft late afternoon light, natural and calm.”
- Style of image: “Photorealistic, eye-level view, natural colours.”
Describe planting by character (height, form, colour, density) rather than relying only on botanical names. More tips on wording are in our prompt guide for architectural renders.
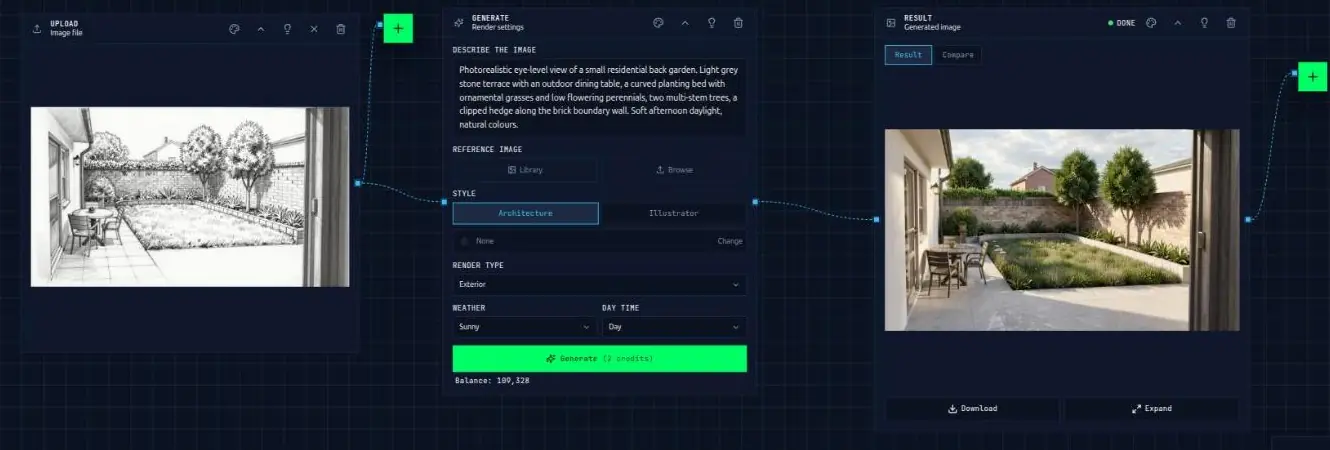
This is the prompt behind the garden at the top of this article:
“Photorealistic eye-level view of a small residential back garden. Light grey stone terrace with an outdoor dining table, a curved planting bed with ornamental grasses and low flowering perennials, two multi-stem trees, a clipped hedge along the brick boundary wall. Soft afternoon daylight, natural colours.”
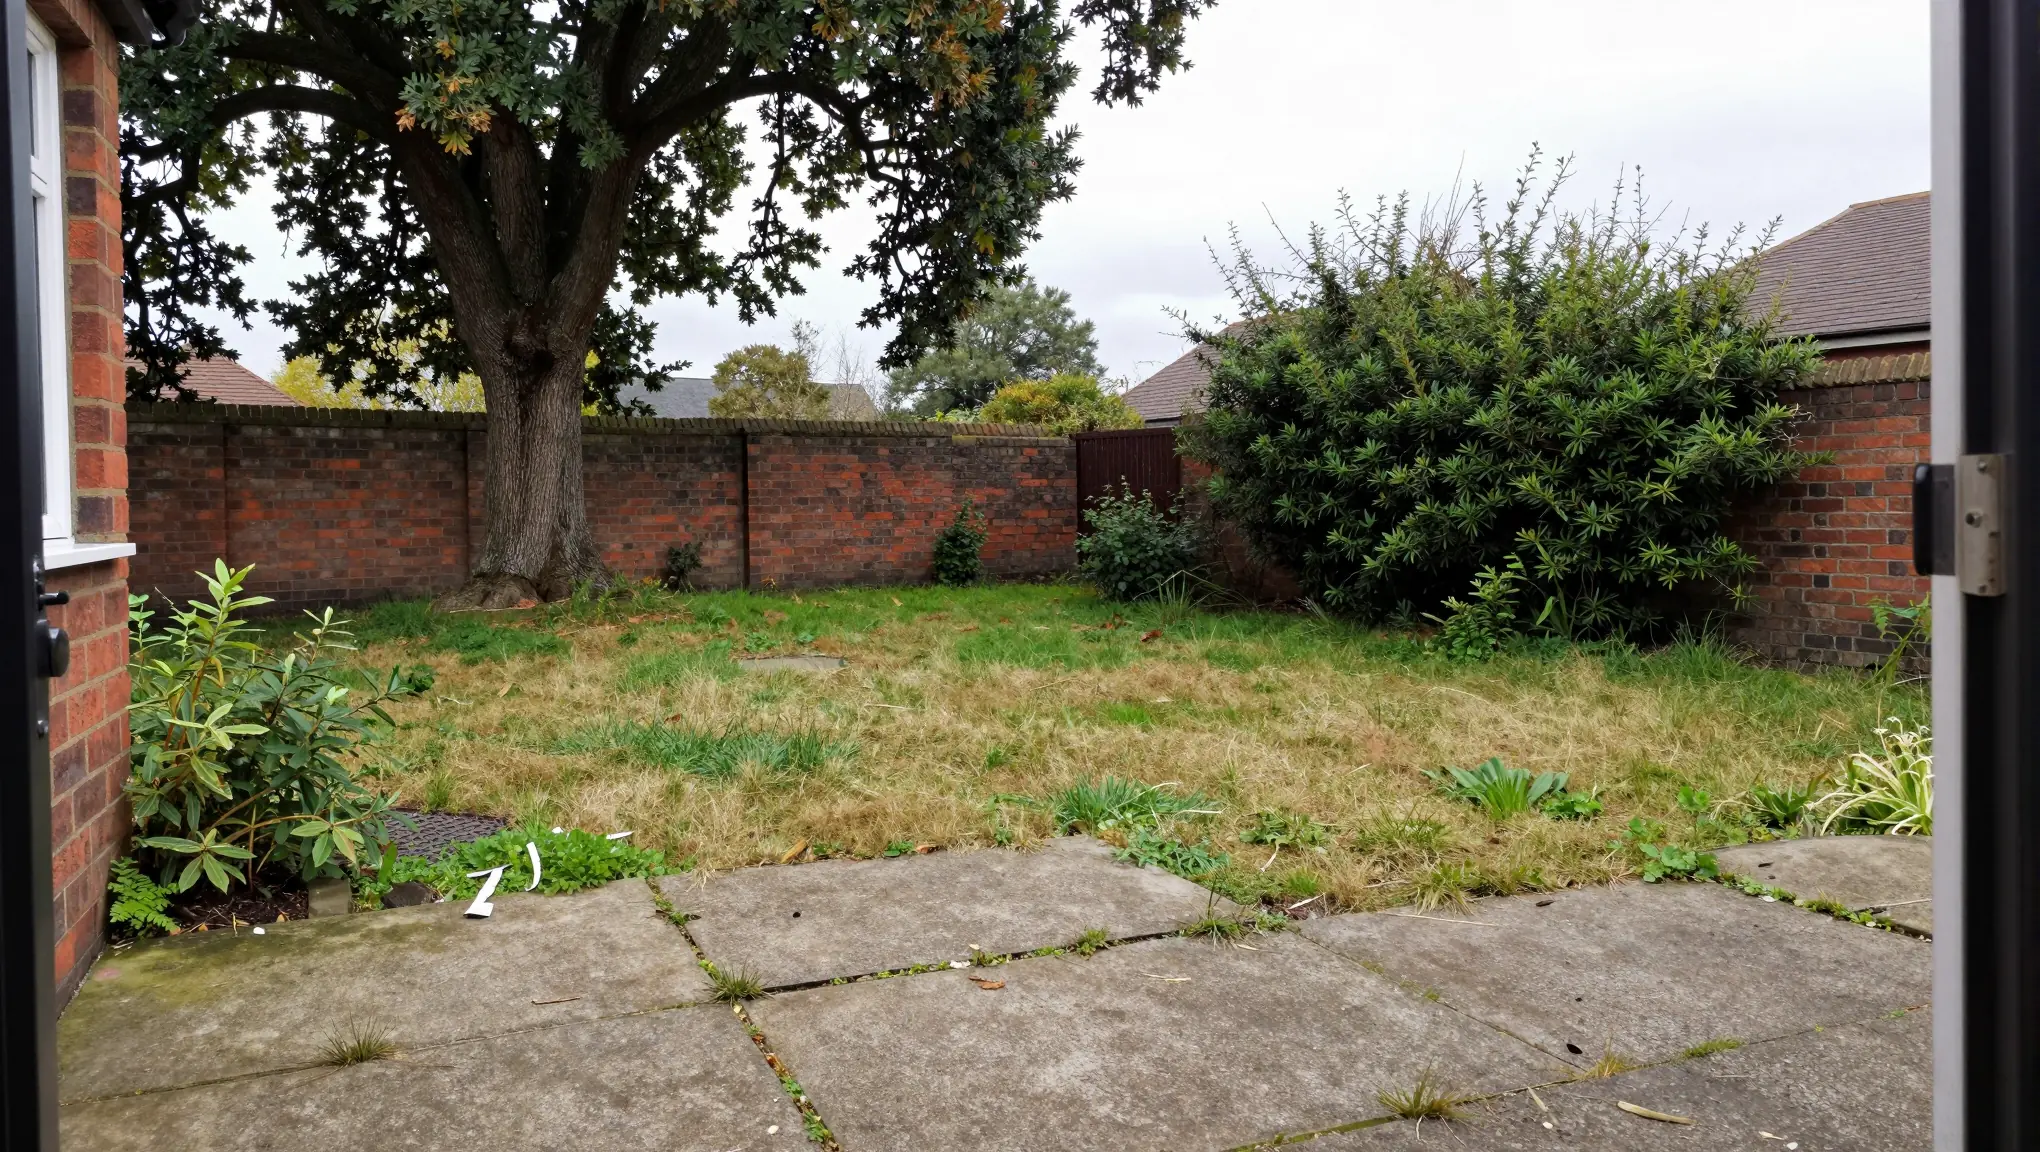
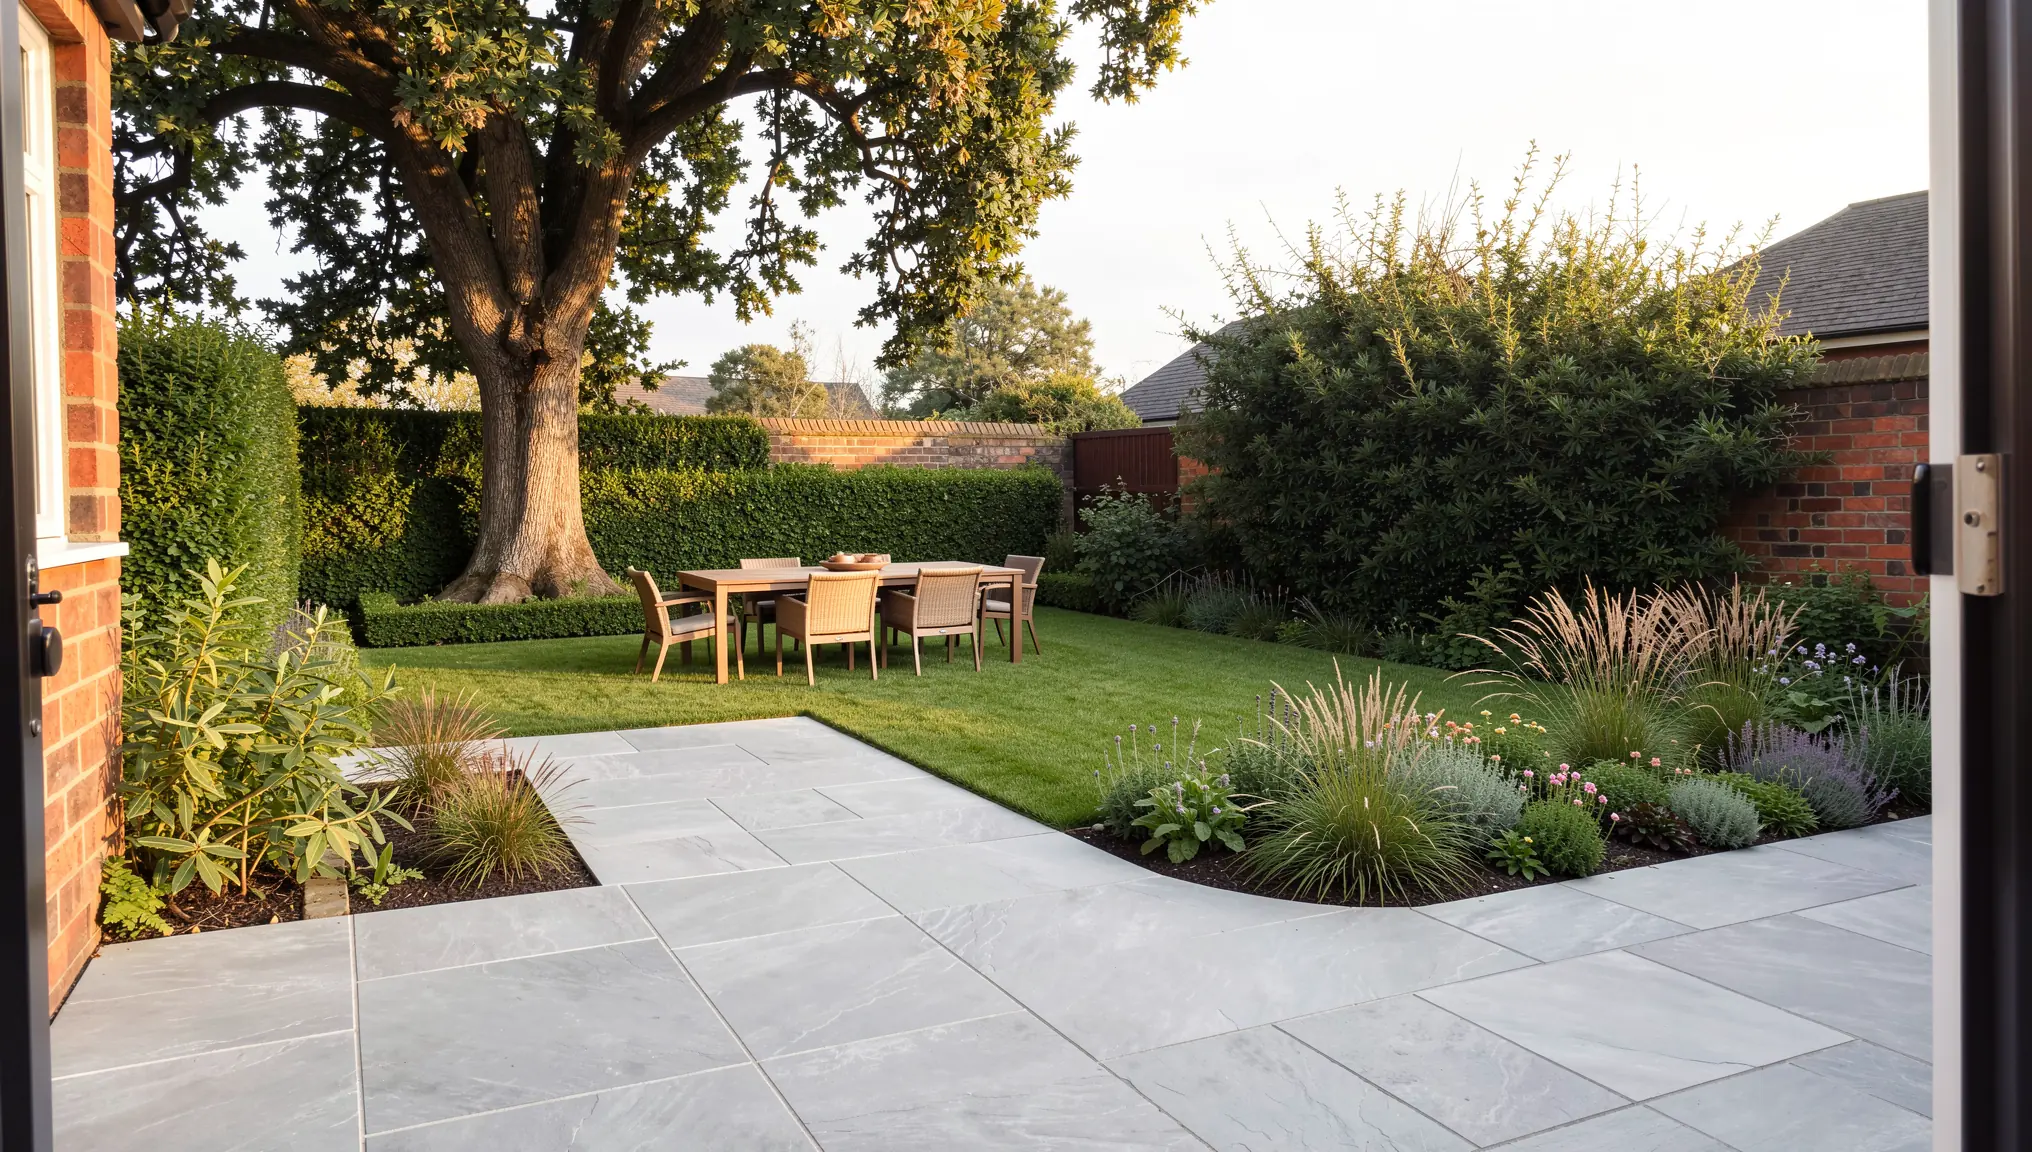
The same structure works for a site photo. Add the elements you marked in Step 2, so the AI knows what must stay:
“Redesign this back garden: replace the cracked concrete with a light grey large-format stone terrace with an outdoor dining table and chairs, a neat rectangular lawn, a curved planting bed with ornamental grasses and low flowering perennials, a clipped hedge along the brick wall, soft afternoon light, photorealistic. Keep the oak tree, the brick boundary wall, the house wall and the camera angle exactly the same.”
Step 4: Generate, Then Refine
Generate a few versions and pick the one with the best overall layout and mood. Then refine it rather than starting again.
- Edit only one area. With masked editing in QUVIAI, you select a region (a planting bed, the paving, the pergola) and change only that part. This also helps you keep the elements you marked in Step 2 as they are.
- Adjust the whole image. Maskless editing is useful for broader changes, such as making the planting denser everywhere or changing the overall tone. Our masked vs maskless editing guide explains when to use each.
- Check the planting. AI generates plants that look plausible, not plants from your schedule. Look closely and correct anything that would mislead the client, such as a tree that is far too large for a small garden.
Here, a masked edit changes only the raised planting bed along the wall. The terrace, the lawn and the other beds stay as they were:
“Replace the spiky plants in this raised planting bed with a soft mix of flowering shrubs: white hydrangeas, pink roses and low lavender, natural and lush. Keep the raised bed edge, the brick wall and the daylight. Photorealistic.”
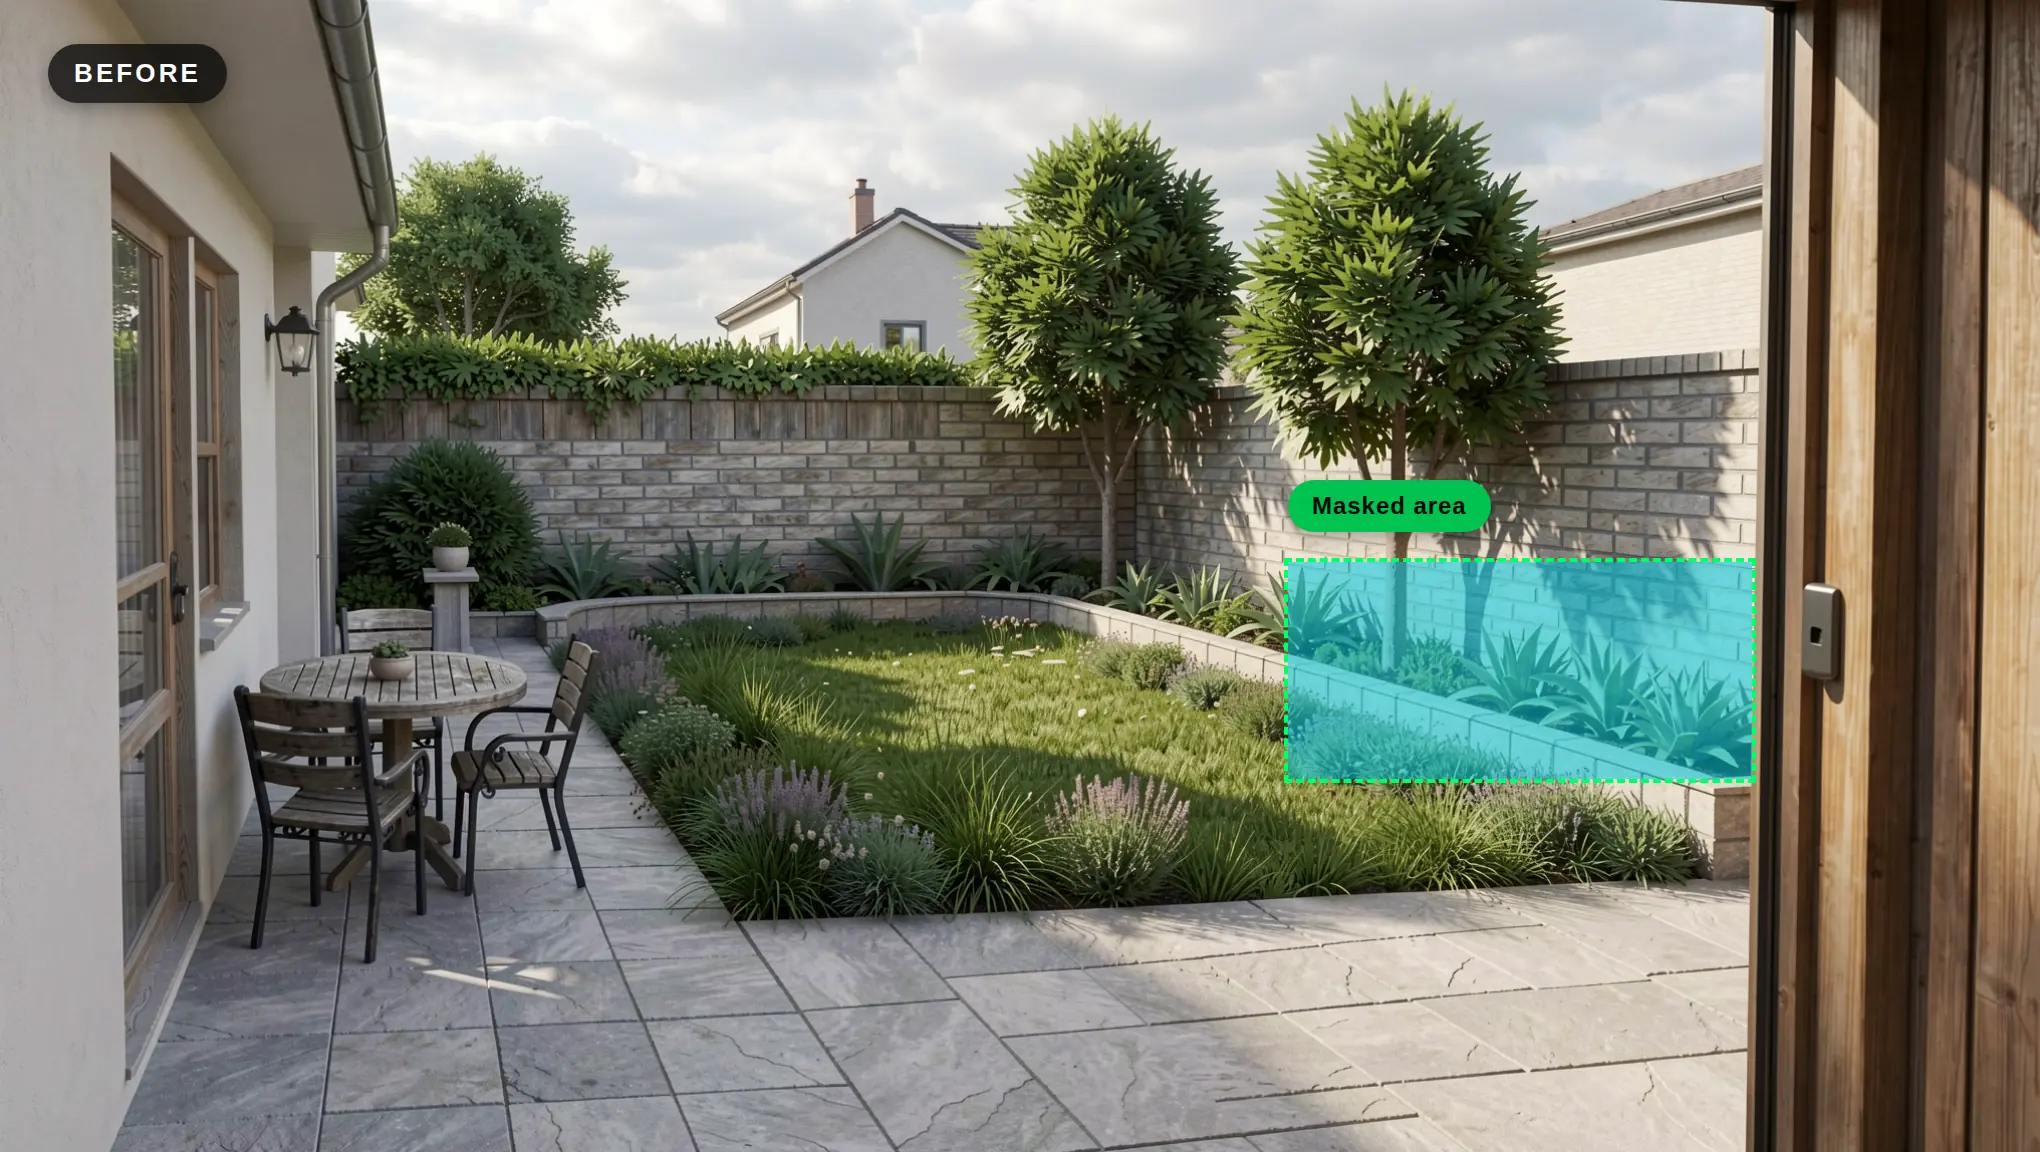
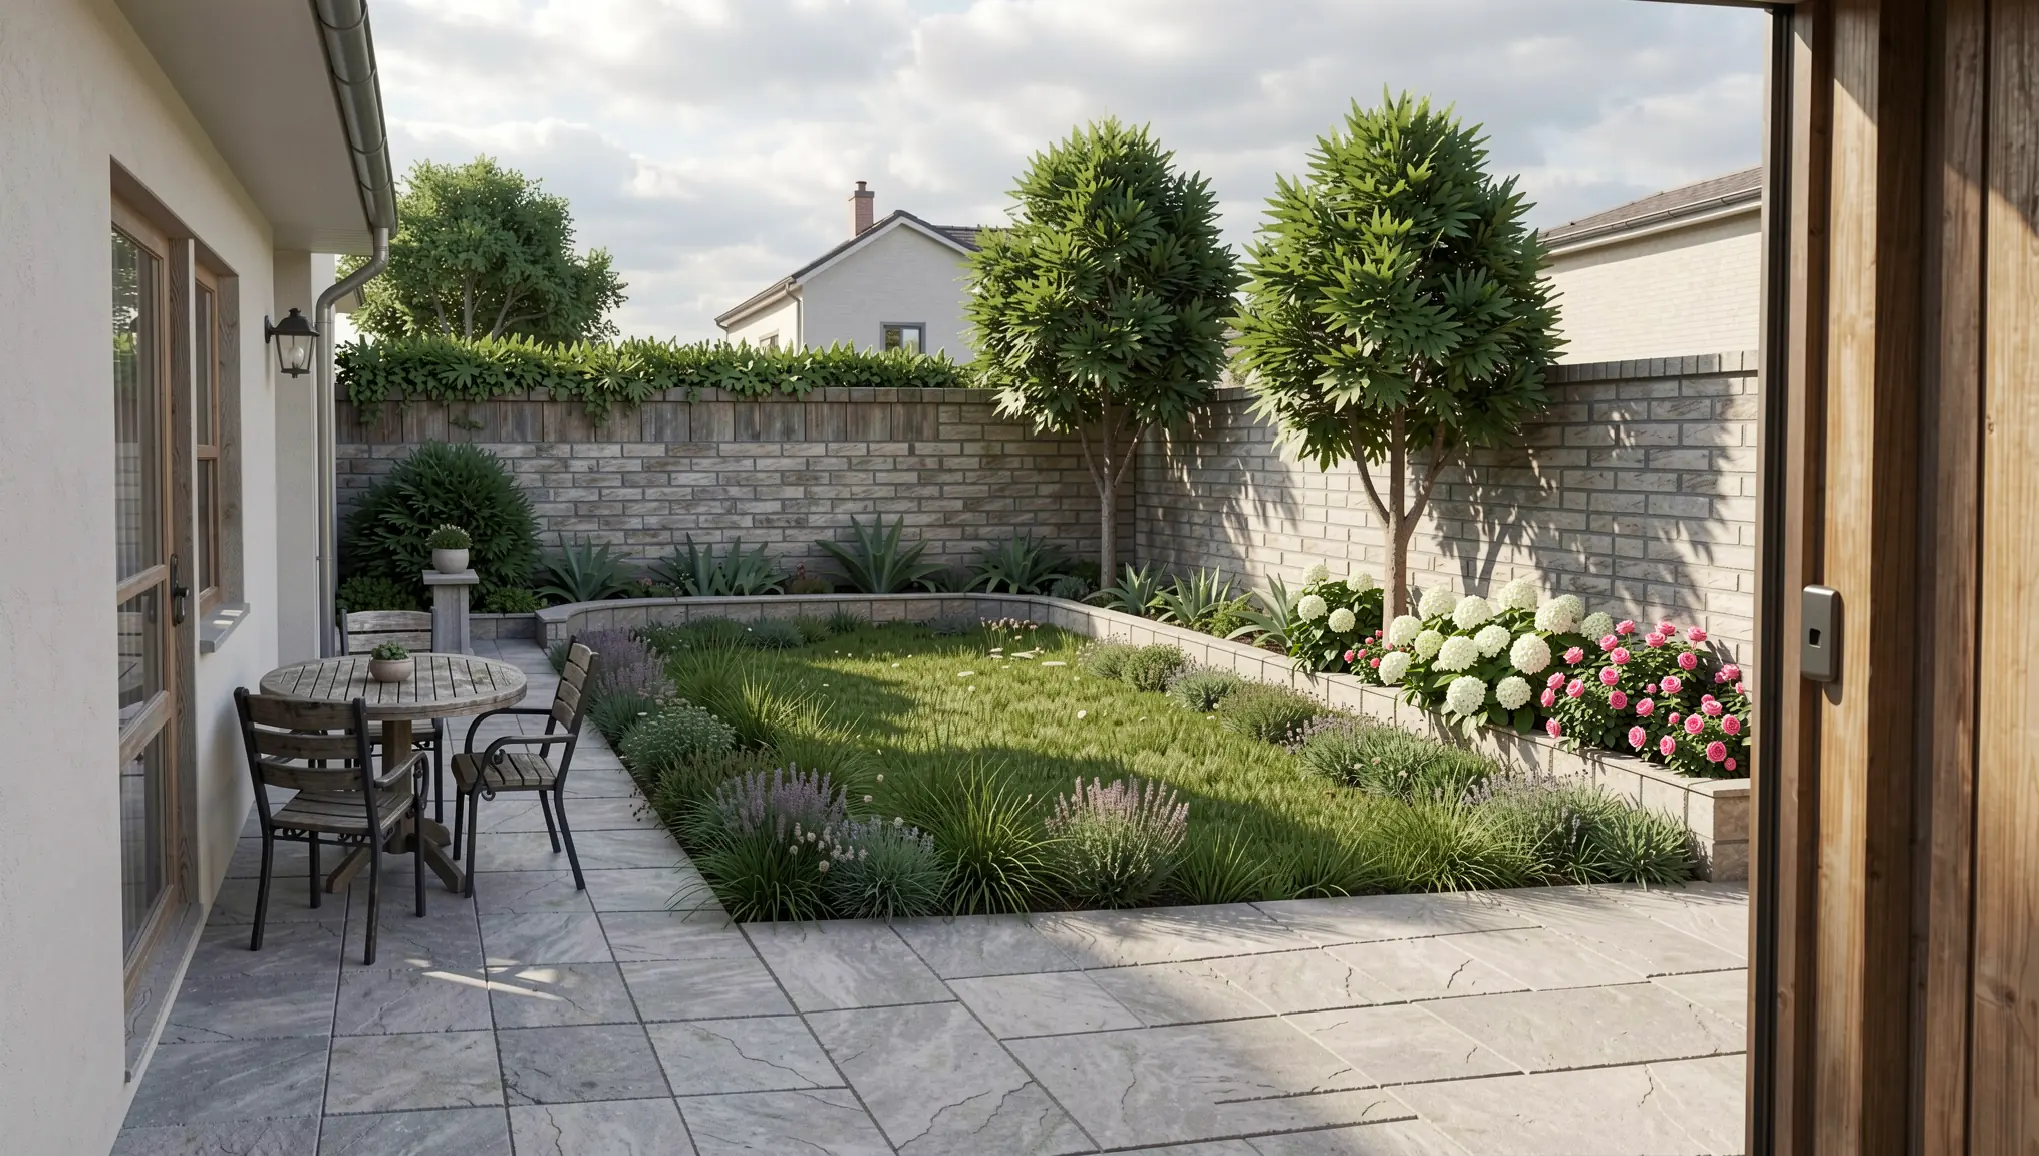
Tip: Keep the mask tight around the area you want to change. A small, clearly bounded selection gives the most predictable result.
Step 5: Show Options and Light Conditions
Landscape design is often about choices, and images make those choices easier.
- Material options. QUVIAI can produce renders of the same space with different material options, so you can place two paving or finish directions side by side for the client.
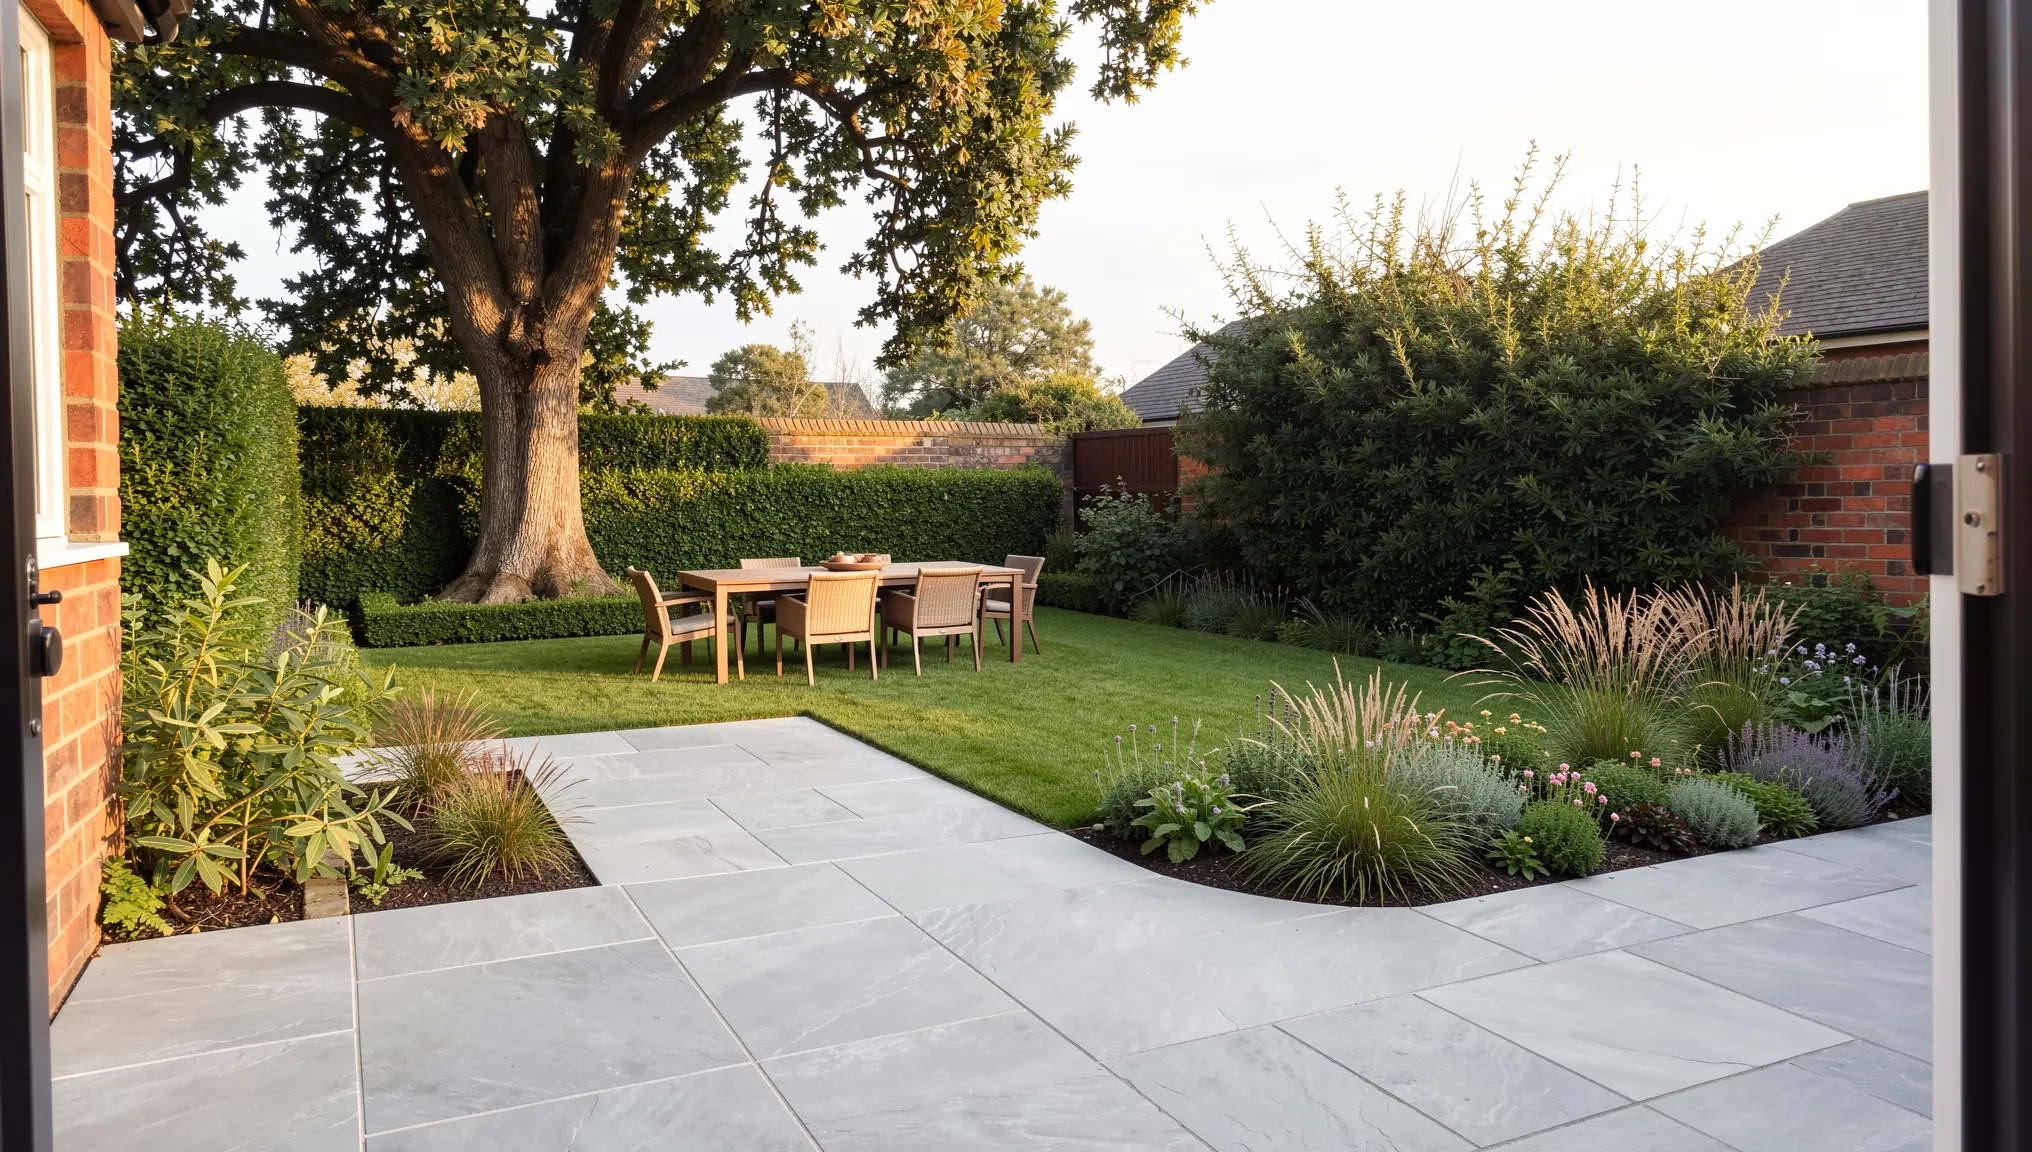
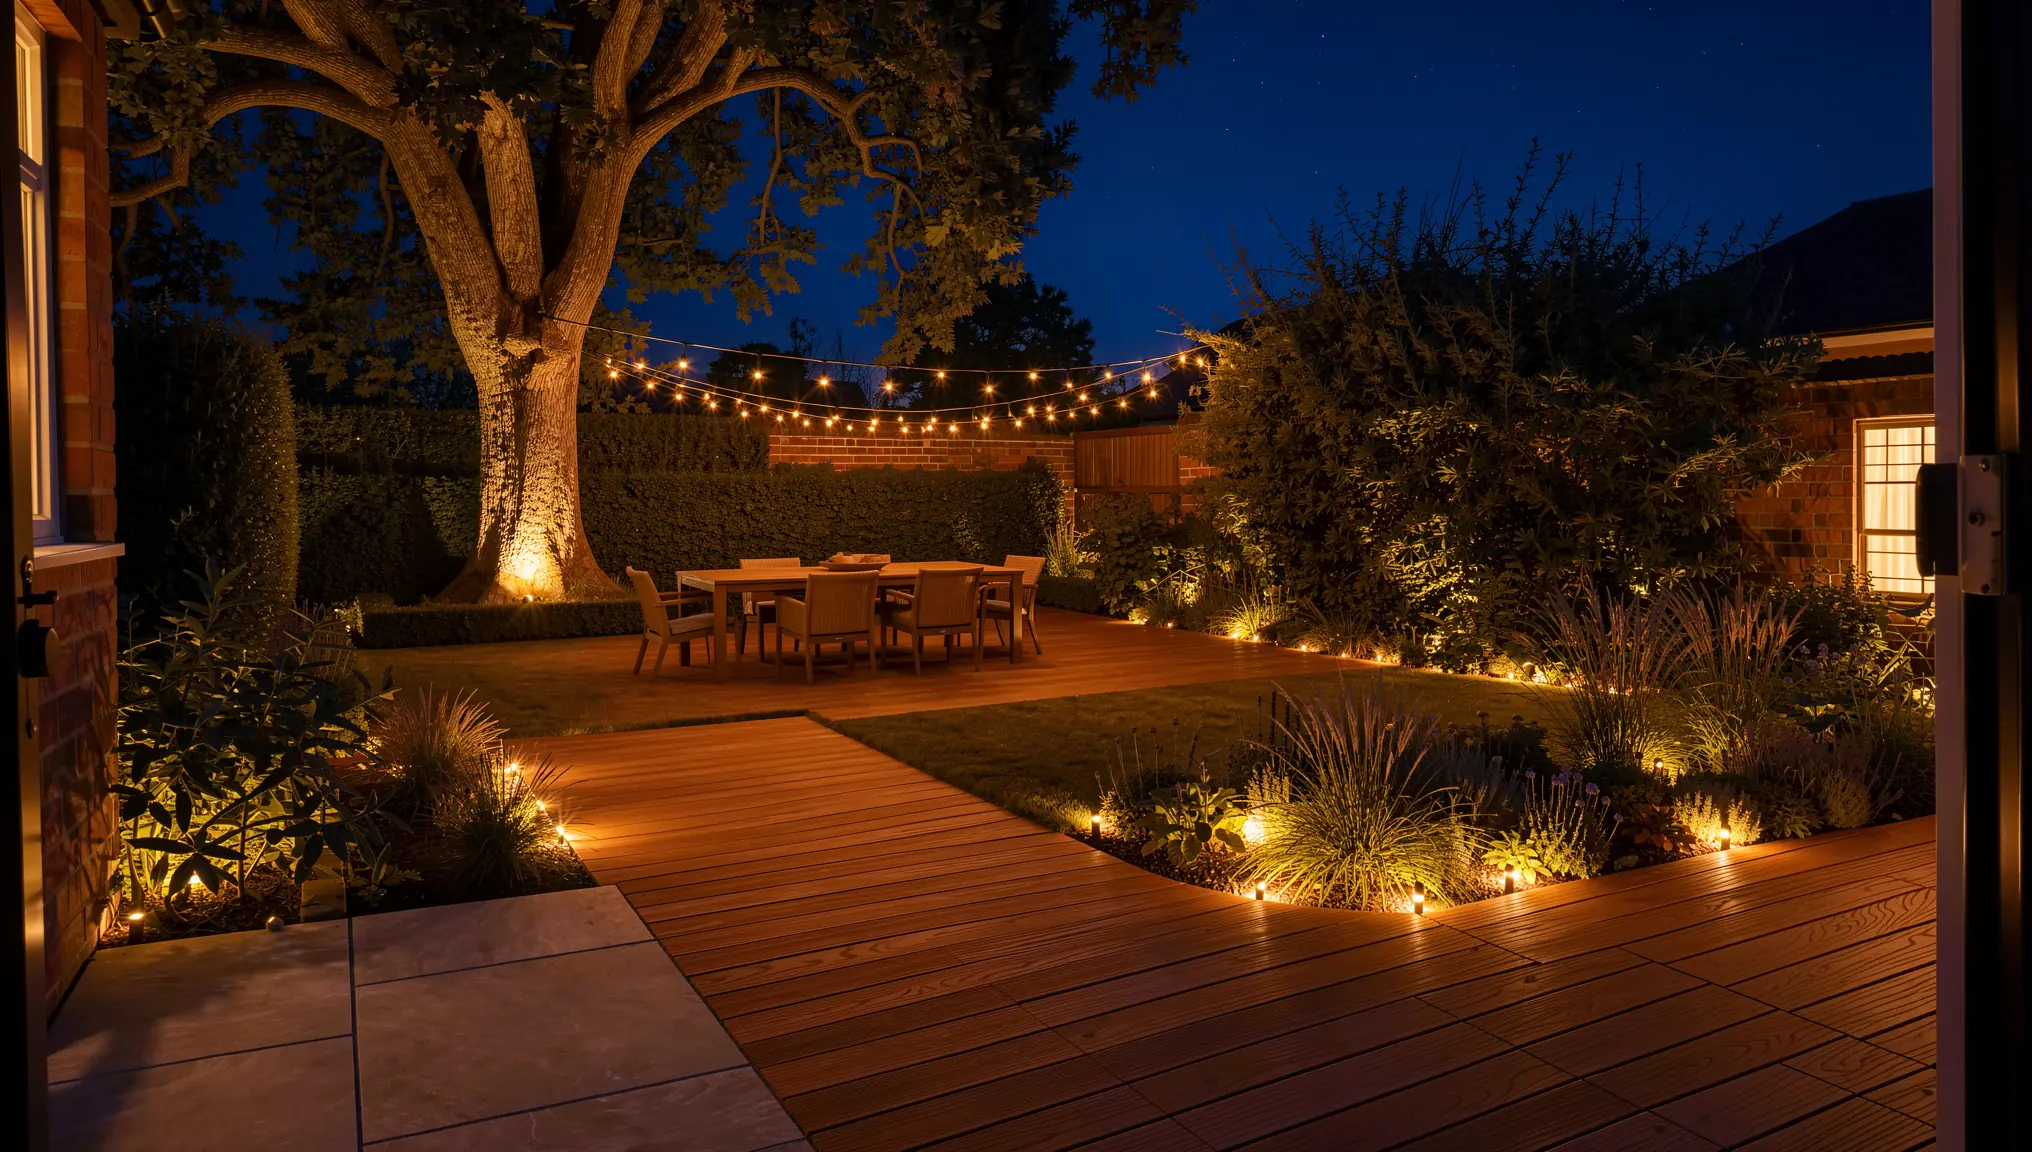
- Different lighting. You can also generate the same scene in different lighting conditions, for example day and night. A night view is a good way to discuss garden lighting and how the terrace will feel in the evening. See Day to Night Render With AI for the workflow.
- Add motion. With Render → Video, a finished image can become a short clip, which works well for presentations and social media.
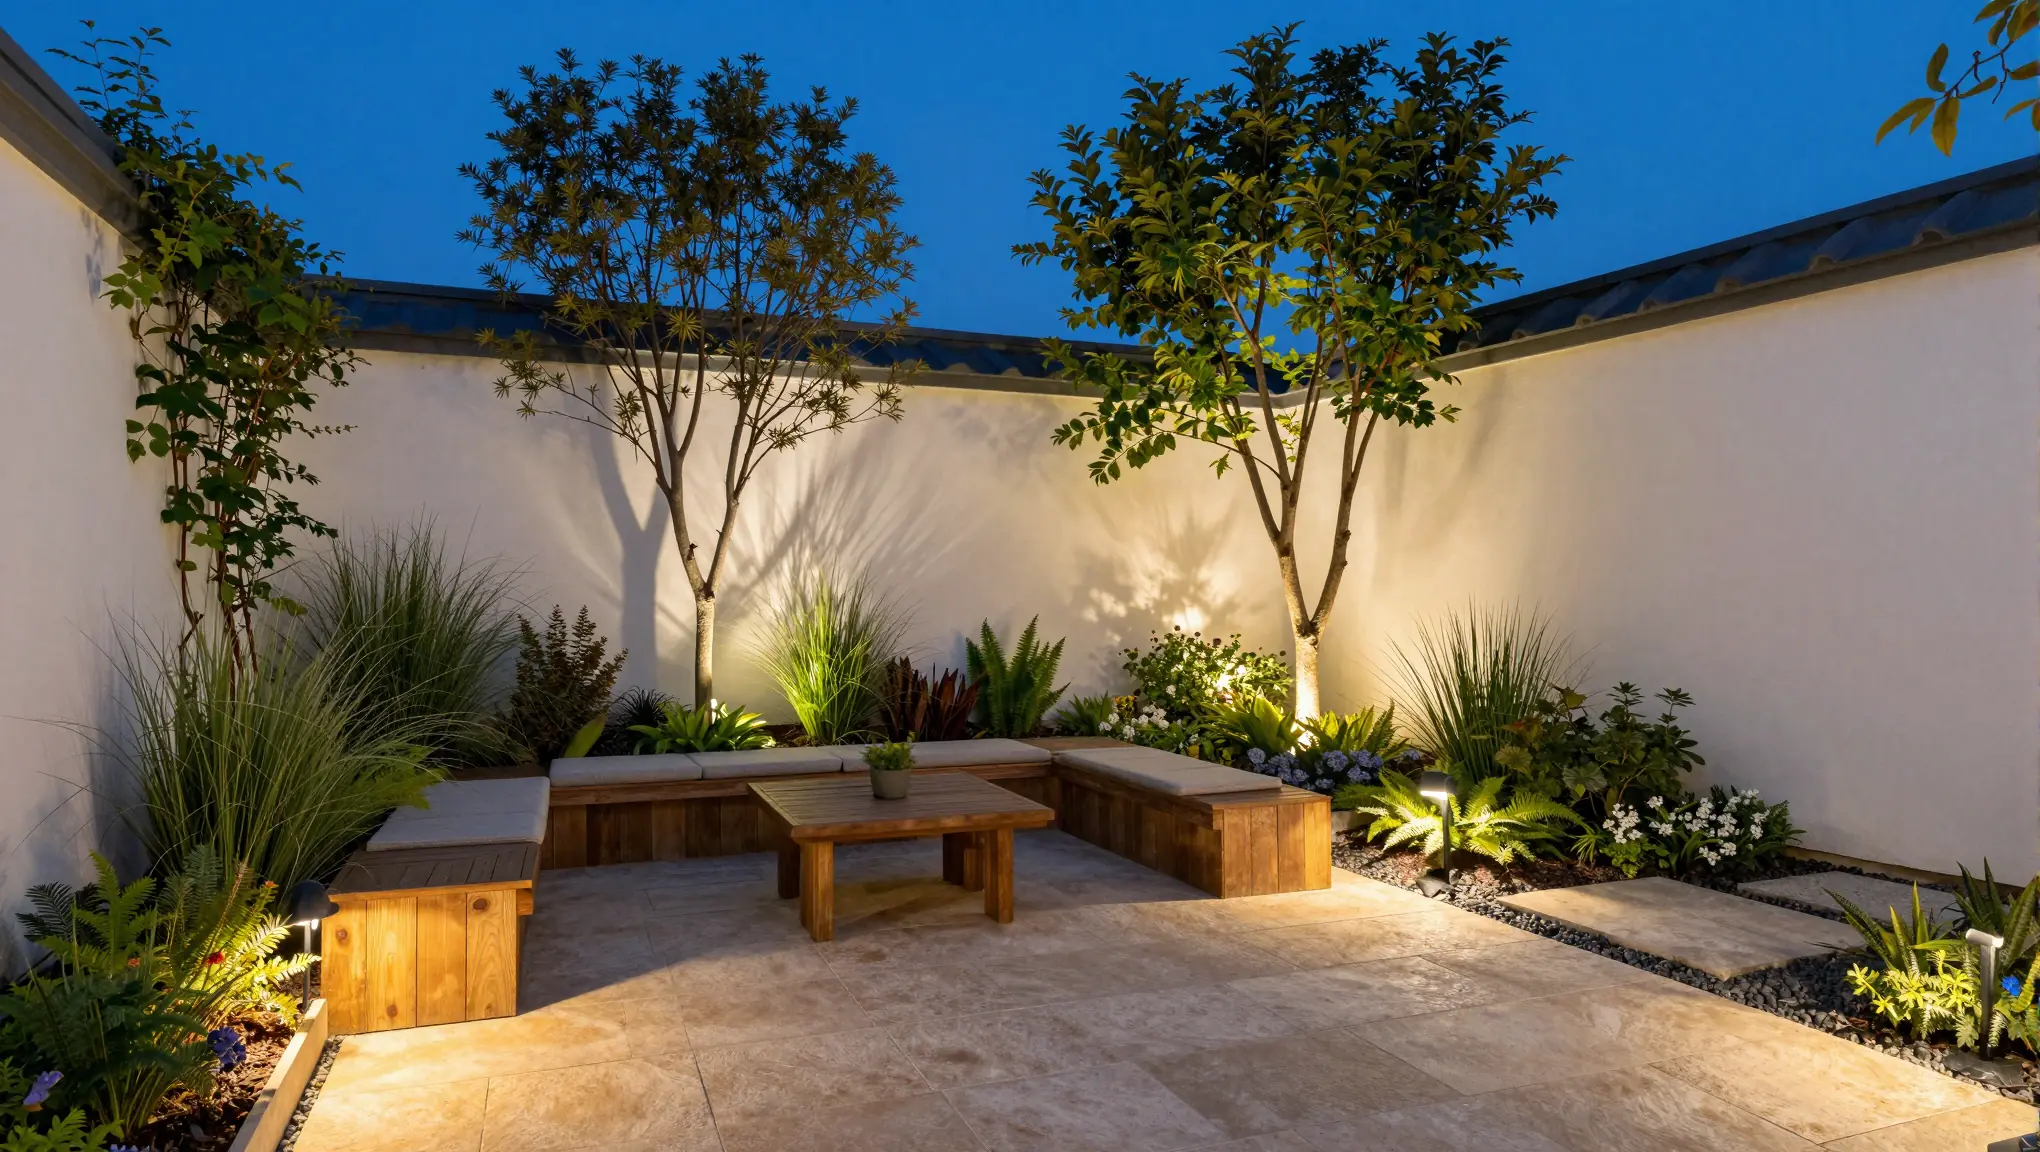
“Change the stone terrace to warm timber decking and change the scene to night: deep blue evening sky, low warm garden lights along the planting beds and the deck edge, an uplight on the oak tree, soft light from the house windows, string lights above the dining table. Keep the layout, the oak tree, the brick wall, the planting and the camera angle exactly the same. Photorealistic.”
Practical Tips for Better Landscape Renders
- Start with one viewpoint. Get one key view right before producing others.
- Keep scale honest. If the result looks too grand, add “small”, “compact” or the real dimensions to the prompt, and include a human figure in the sketch.
- Don’t over-promise maturity. Make it clear to clients whether an image shows planting at installation or after several years of growth.
- Label concept images. Mark renders as “concept visualization” in client documents, so no one reads them as a construction drawing.
- Save your best prompts. Reuse wording that works for paving, planting and light across projects to keep a consistent style.
Who Is This Workflow For?
- Landscape architects and garden designers presenting early concepts.
- Architects who want to show the outdoor spaces around a building, not just the facade.
- Real estate teams showing the potential of an unused garden or courtyard.
- Students preparing site proposals for studio reviews.
Conclusion
You do not need a detailed 3D model to show a landscape idea convincingly. A clear sketch, a well-taken site photo or a simple model view, combined with a specific prompt and a few targeted edits, is enough to turn a planting plan into an image clients understand.
You can try the workflow in QUVIAI with the free daily credits, and no credit card is required. Start with a sketch or a photo of a garden you are working on, and see how quickly the concept comes to life.