Day to Night Render With AI: Create Lighting Variations
The daytime render is approved, and then the client asks: "What does it look like at night?" Or in winter, or on a rainy day. Traditionally, every one of those questions means a new lighting setup, a new sky, new materials for wet or snowy surfaces, and another round of rendering.
With AI, a day to night render takes a single instruction. You start from the render you already have, describe the new light or season, and get the same building in a completely different mood.
What Changes and What Stays
A lighting variation should feel like the same photo taken at a different moment. That means some things change and others must stay exactly as they are:
- What changes: the sky, the direction and color of light, interior lights, shadows, weather, and seasonal details like snow or wet surfaces.
- What stays: the building, its materials, the landscape layout, and the camera angle.
Keeping these two lists clear in your instruction is the key to believable results.
How to Create a Day to Night Render With AI
- Start from your daytime image. Any render works — one you generated from text, one you created from a sketch, or one you already had.
- Open the image editor in QUVIAI. Upload the render you want to change.
- Describe the new light. Write what the sky, the light sources, and the atmosphere should look like, and ask for the building, materials, and camera angle to stay unchanged.
- Use maskless editing. Lighting affects the whole scene, so editing the full image without a mask gives the most natural result. Our masked vs maskless editing guide explains why.
- Generate each variation from the original. For night, winter, or any other variation, always go back to the original daytime render instead of editing the previous result. This keeps every version consistent.
A Real Example: One House, Three Moods
Here is the original daytime render, generated with QUVIAI's text-to-image tool in the "Modern" style:
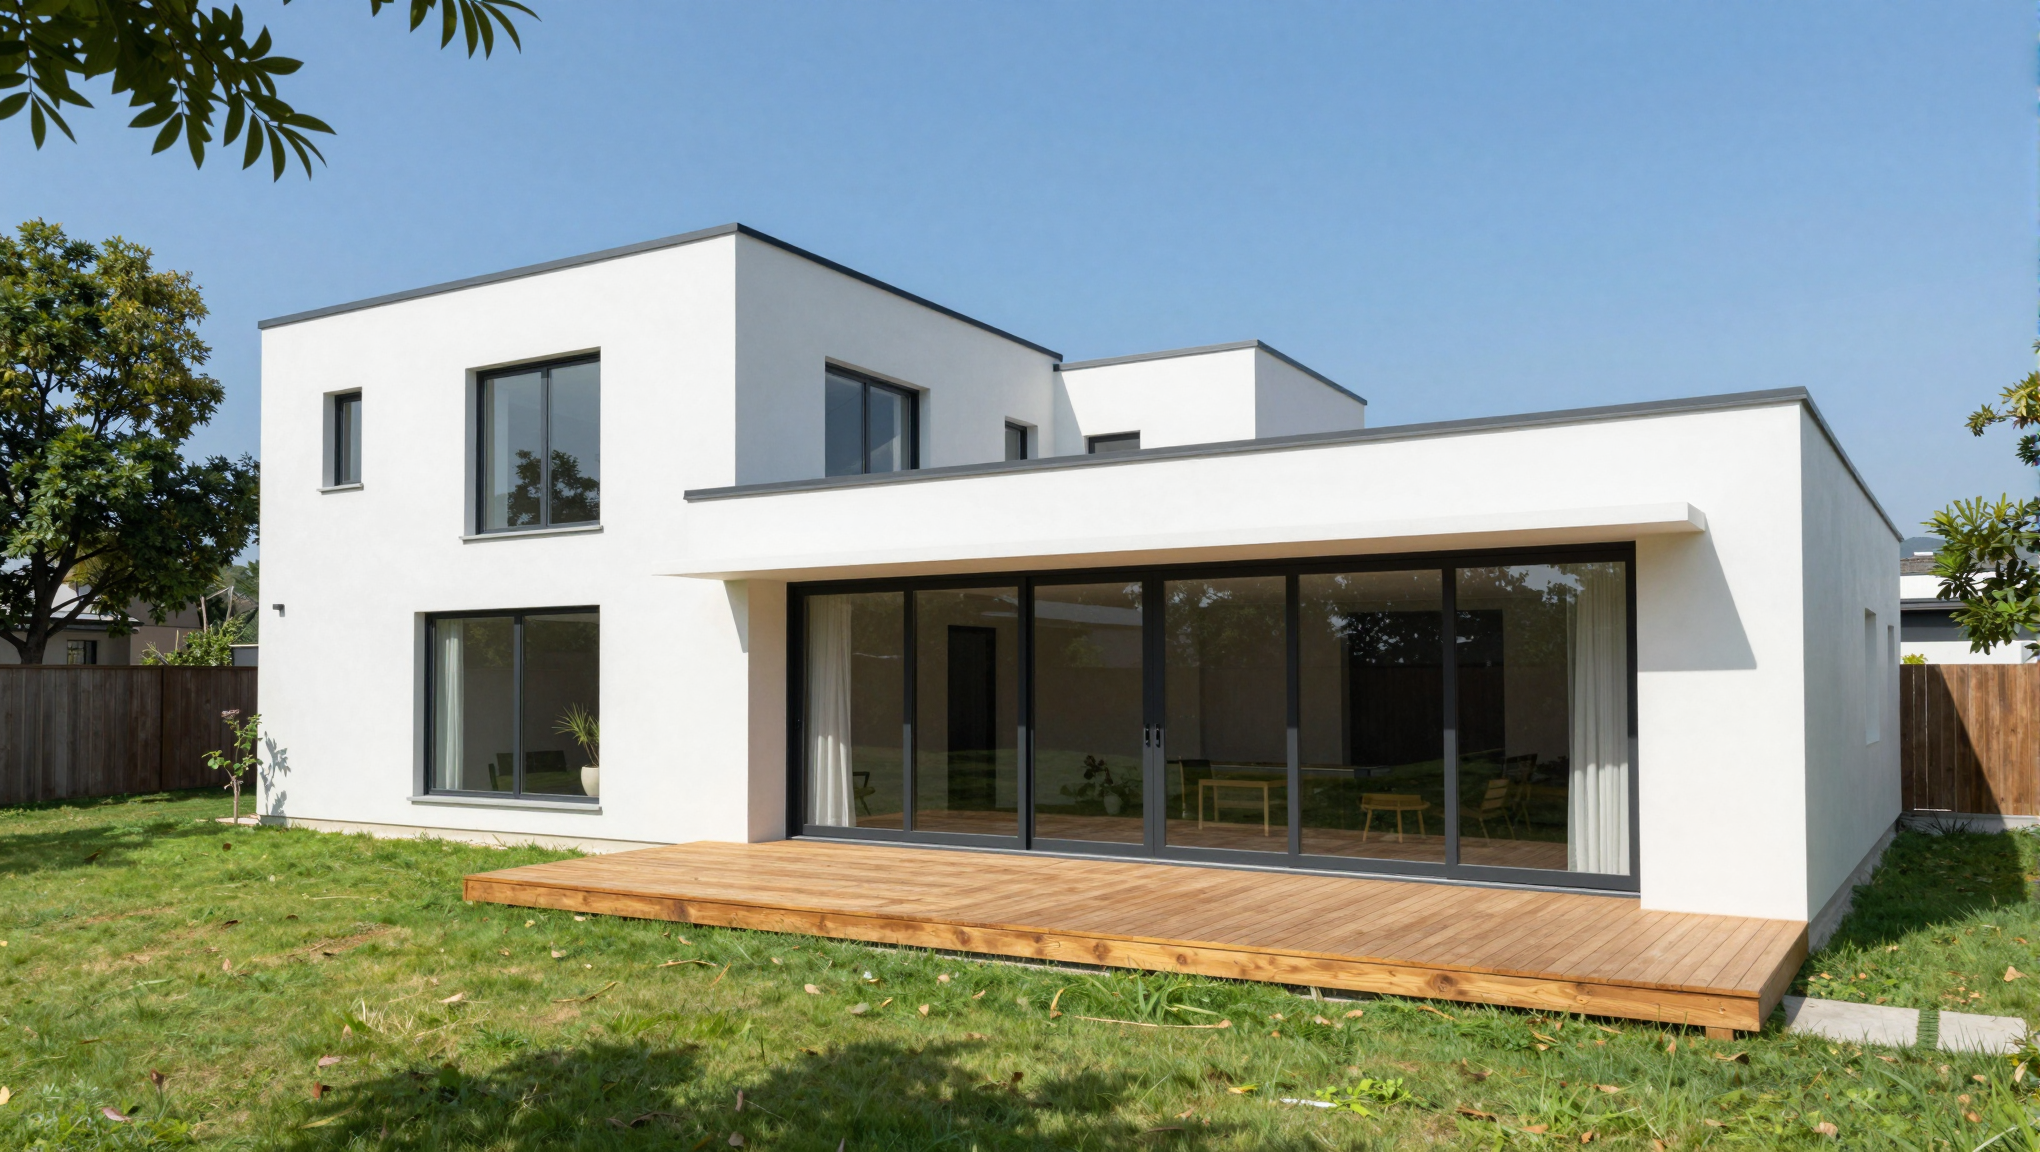
Day to night
"Change the scene to night: dark blue night sky with a few stars, warm light glowing from all the windows, soft uplights on the facade and small garden lights along the path. Keep the building, materials, and camera angle unchanged."
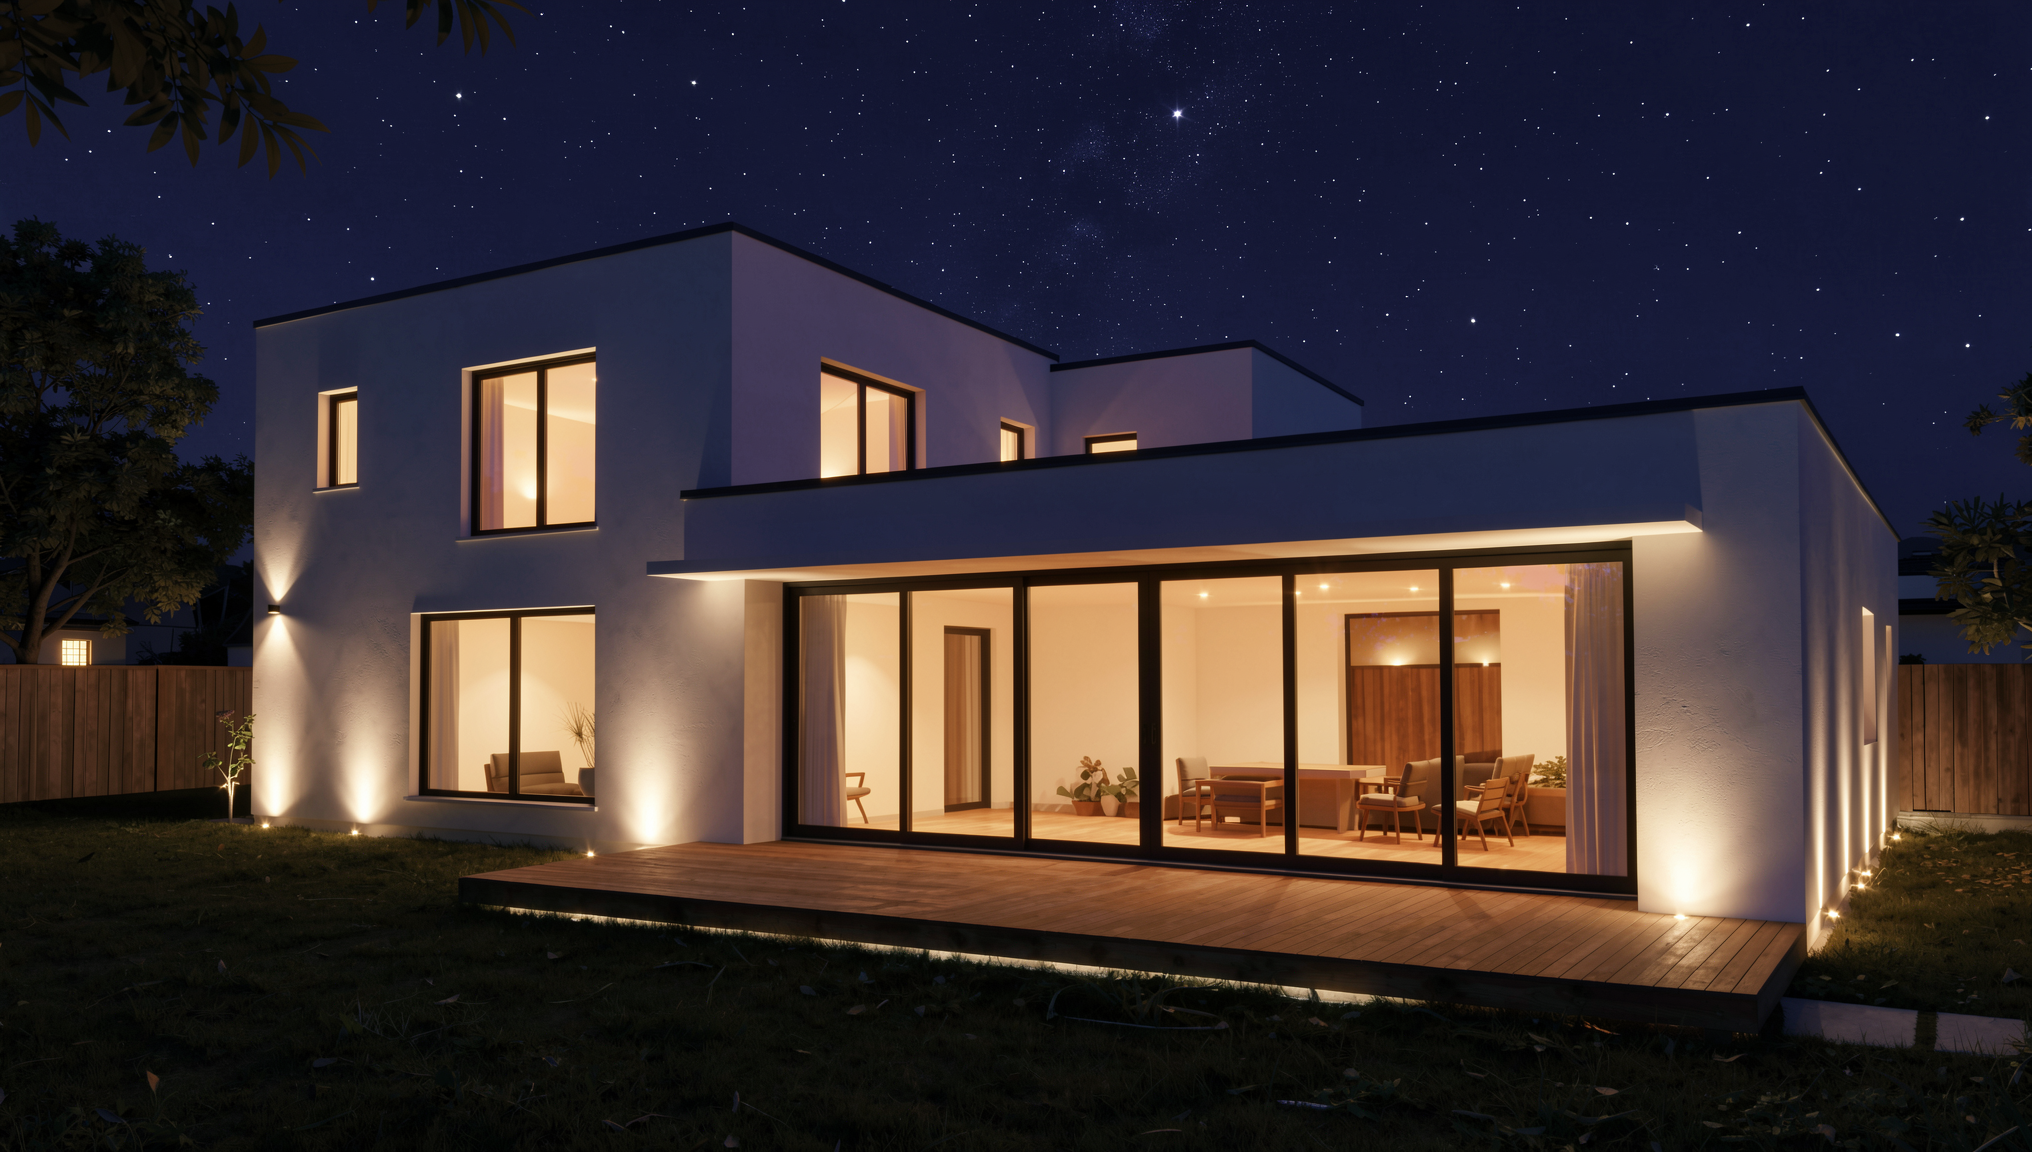
The windows now glow with warm interior light, the facade is lit from below, and the garden path is traced by small lights — but the house itself, its materials, and the view are exactly the same.
Day to winter
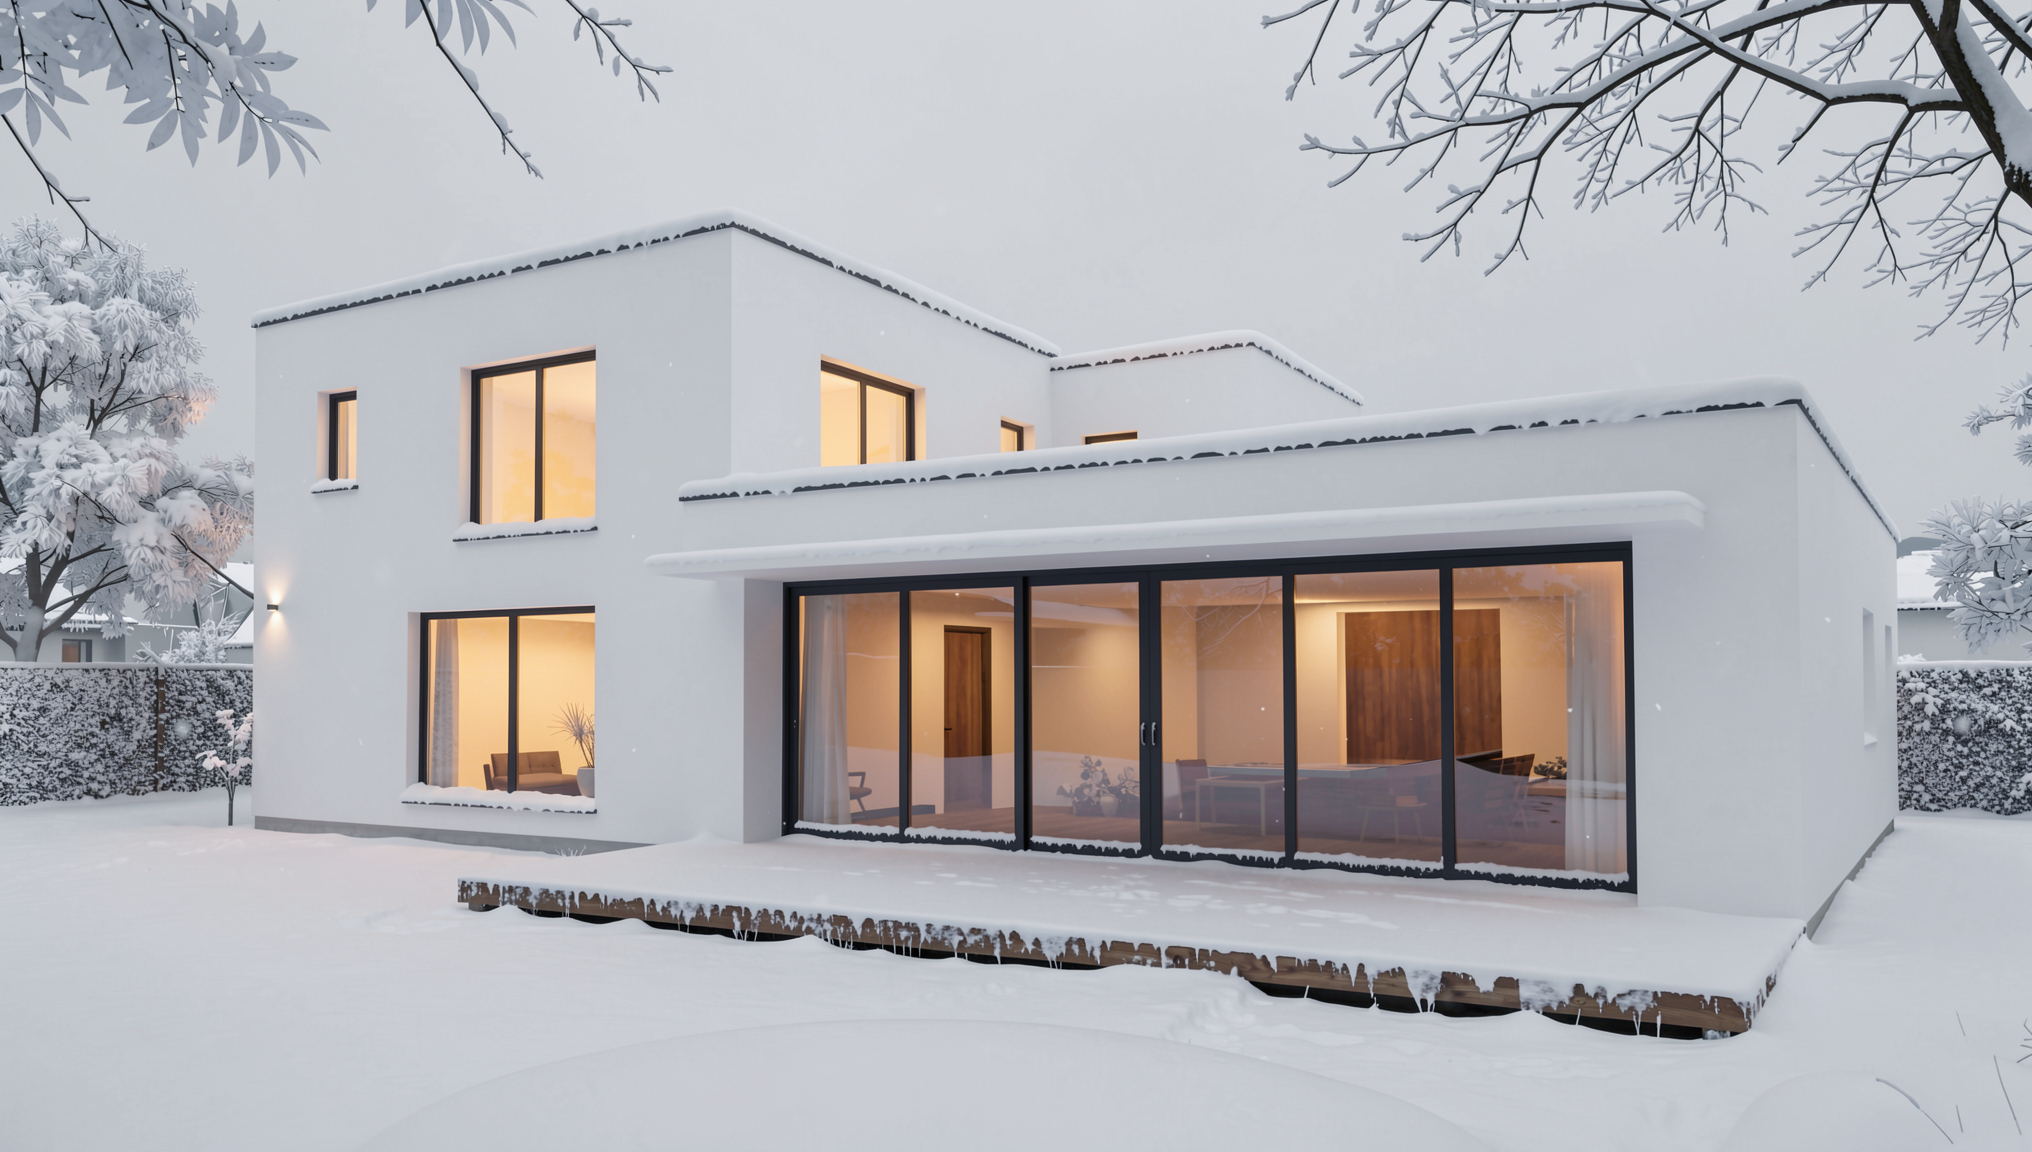
The same approach works for seasons and weather. This version was also generated from the original daytime render:
"Change the season to winter: snow covering the roof, the lawn, and the tree branches, a pale overcast sky, soft diffused light, and warm light in a few windows. Keep the building, materials, and camera angle unchanged."
Which Variation for Which Purpose?
- Night: the strongest mood image for residential, hospitality, and restaurant projects. It shows how the interior lighting brings the building to life.
- Golden hour or blue hour: ideal hero images for websites, brochures, and competition boards.
- Winter: useful for projects in cold climates and for seasonal marketing campaigns.
- Overcast or rain: an honest, everyday view of the building — and surprisingly atmospheric thanks to reflections on wet surfaces.
Tips for Believable Lighting Variations
- Name the light sources. For night scenes, say where the light comes from: windows, facade uplights, garden lights, street lamps.
- Always say what to keep. "Keep the building, materials, and camera angle unchanged" should be part of every instruction.
- Change one thing at a time. Night and snow in one step is harder to control than two separate variations.
- Mention surfaces. Wet paving, snow on branches, or frost on glass make weather changes feel real.
Take It Further: Day to Night Video
Once you have a daytime and a nighttime version, you can use them as the first and last frame of a video. QUVIAI's first-last frame video generation creates the transition between them — a short day-to-night time-lapse of your building, ready for social media or a presentation.
Who Is This For?
- Architecture studios — showing a project in several moods for the same presentation
- Real estate developers — creating evening and seasonal visuals for marketing campaigns
- Hospitality and restaurant designers — presenting the night atmosphere that matters most to their clients
- Architecture students — adding variety to a portfolio from a single render
Frequently Asked Questions
Can AI turn a day render into a night render?
Yes. Upload the daytime render to an AI image editor like QUVIAI, describe the night lighting you want, and ask for the building and camera angle to stay unchanged.
Will the building change when I change the lighting?
Not if you say what to keep. Adding "keep the building, materials, and camera angle unchanged" to your instruction keeps the design the same while the light changes.
Should I use masked or maskless editing for lighting changes?
Maskless editing usually works best, because lighting affects the entire scene, including the sky, shadows, and reflections.
Can I make a day-to-night video from my render?
Yes. Use the day and night versions as the first and last frames in QUVIAI's first-last frame video generation to create a smooth transition.
Conclusion
One approved render can become a whole set of images: day, night, winter, and rain, all consistent with each other. In QUVIAI, each variation is a single instruction away — and with first-last frame video, you can even show the transition between them.
Ready to see your render at night?
Try it free →