AI RENDERING GUIDE
AI Rendering for Real Estate Developers: Pre-Sale Visuals From Sketches and Model Views
Published 8 min read
When a project is sold before it is built, the images are the product. Buyers cannot walk through the apartment, stand on the balcony or see the lobby, so they decide on what the brochure, the website and the sales office show them. That puts real pressure on developers and their architects: the visuals need to be ready early, they need to look convincing, and they often need to change as the design, the unit mix or the marketing plan changes.
In the months before launch, many visual questions come up quickly: Which facade colour works best? What does the show apartment look like with a lighter finish package? Can we have an evening view for the website? AI rendering can help the team answer these questions faster (see our comparison of AI and traditional rendering).
In this guide you will learn which images a pre-sale campaign needs, how to produce them with AI from the material you already have, and how to keep them accurate and consistent.
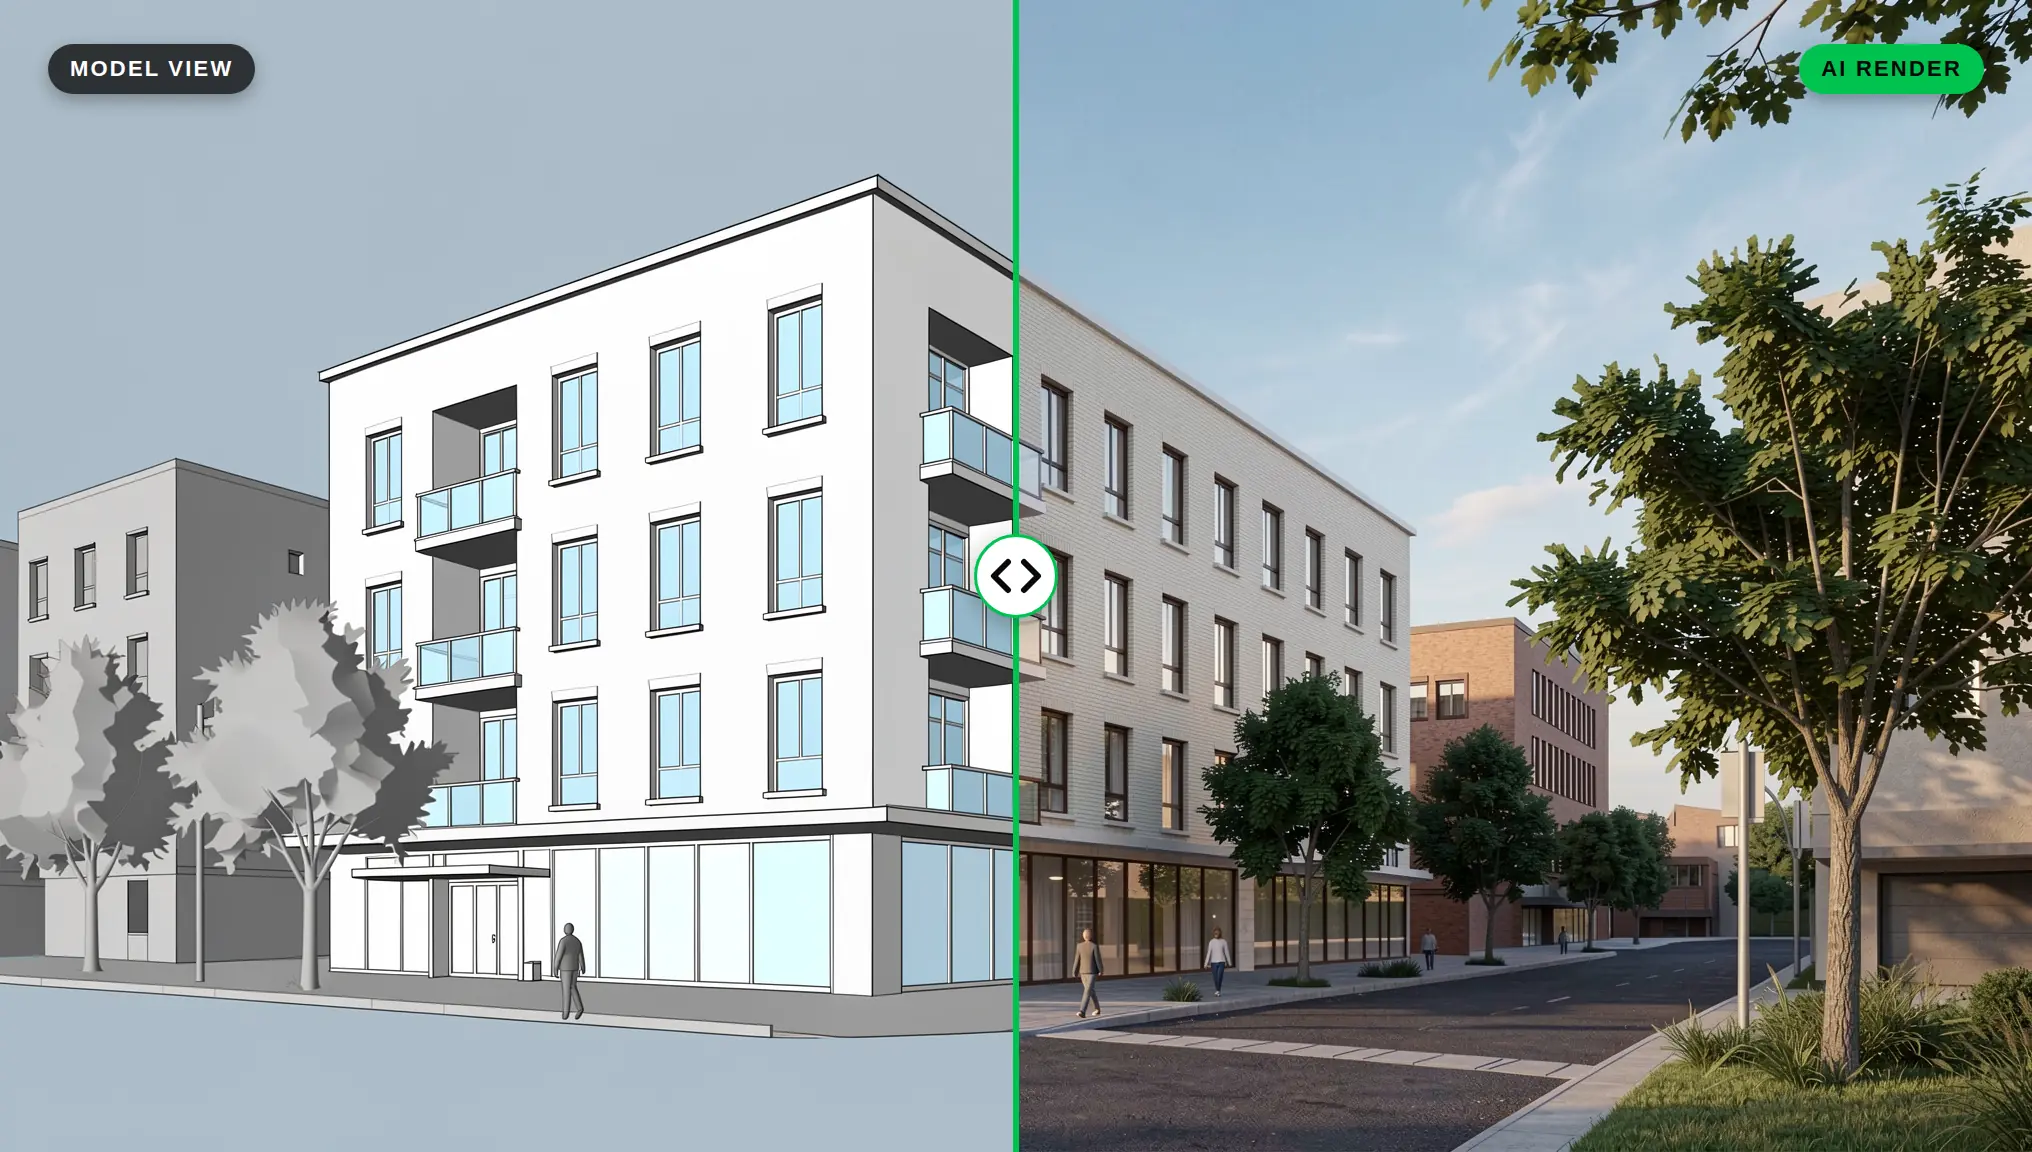
Every image in this guide was made in QUVIAI for one example project, a six-storey residential block. The sketch, the model view and the apartment interior were created with the text-to-image tool and AI editing; the steps are the same with your own sketches and model views.
Which Visuals Does a Pre-Sale Campaign Need?
Before you generate anything, list the images the sales and marketing team will actually use. A typical set:
- Hero exterior: The main view of the building from street level, used on the website, hoarding and brochure cover.
- Secondary exteriors: Entrance, courtyard, rooftop or the view from a nearby street.
- Typical interiors: Living room, kitchen and bedroom of the most important unit types.
- Amenities: Lobby, gym, pool or shared garden, if the project has them.
- Day and night versions: An evening view of the facade or the balcony often becomes a key social media image.
- Short videos: A few seconds of movement for social media, the website header or a screen in the sales office.
Agreeing on this list early avoids ending up with lots of images, but not the ones the sales team needs.
Step 1: Gather Your Starting Material
AI rendering works from what the design team already has. You rarely need a fully detailed 3D model.
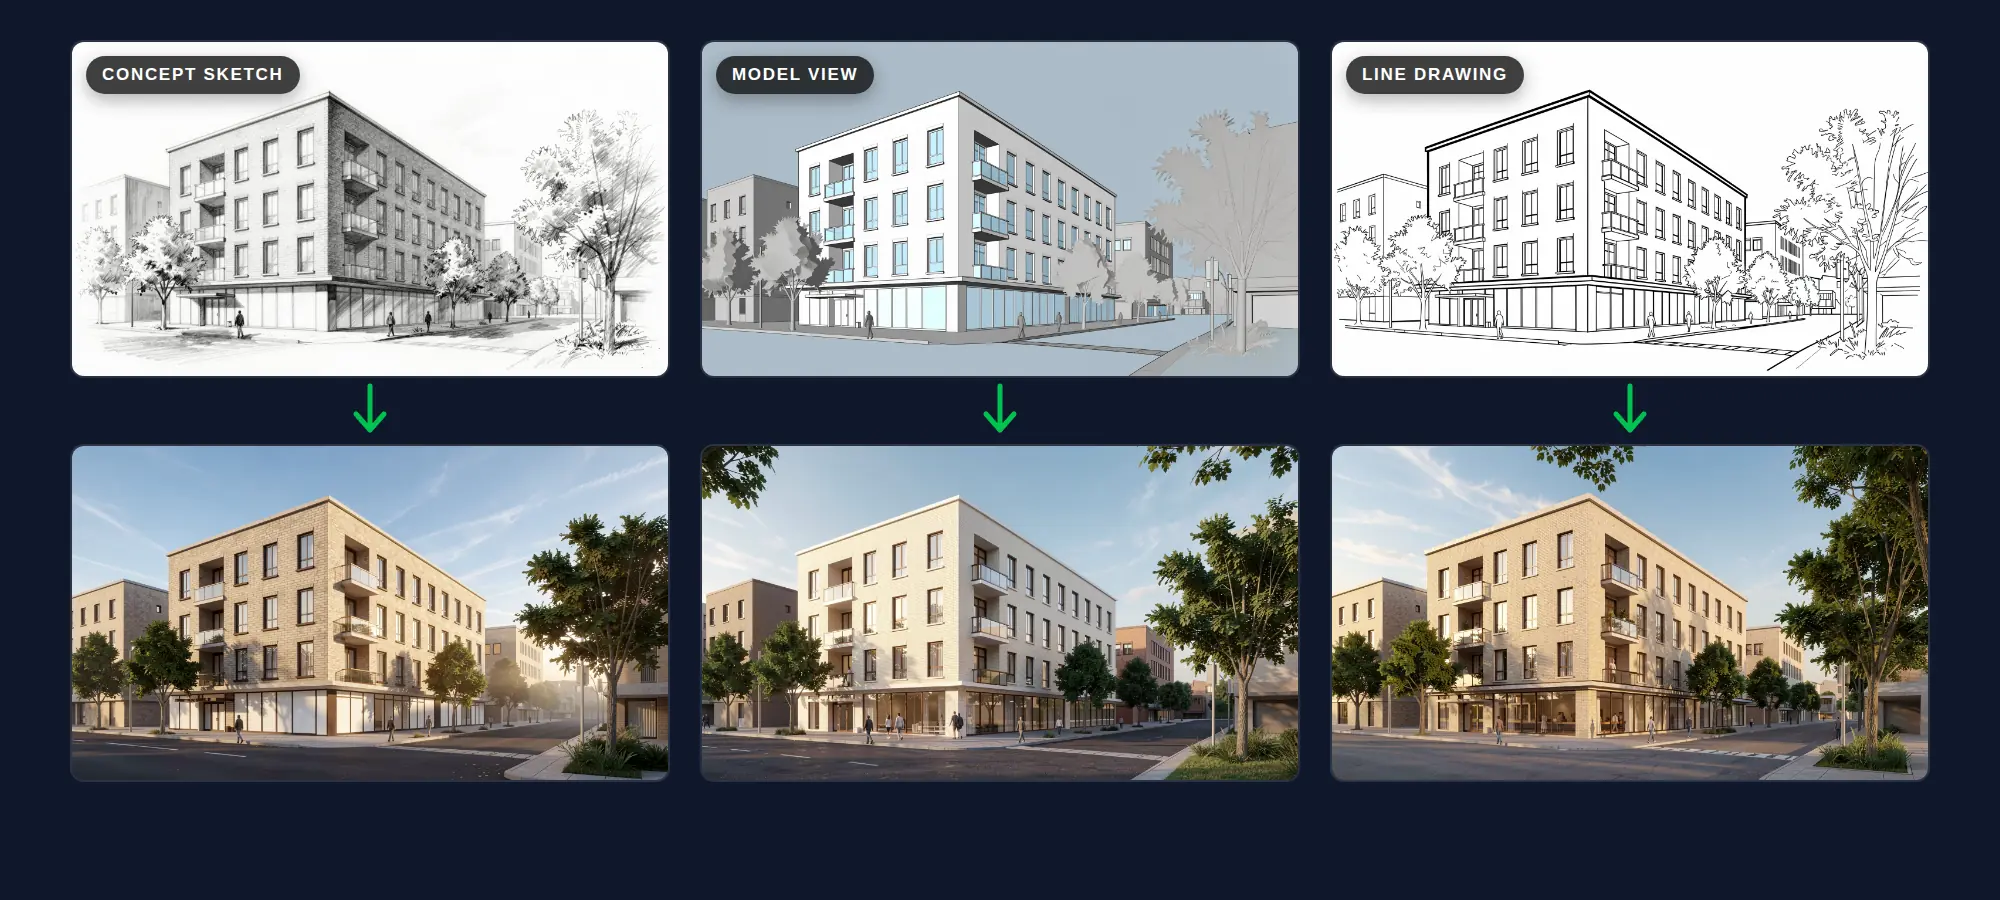
- Sketches: Early concept sketches or perspectives can become photorealistic images with Sketch → Render. This is useful for land acquisition, early investor talks or a first teaser.
- Model views: A screenshot from your 3D modelling or BIM software keeps the real geometry. QUVIAI offers free AI render plugins for popular modelling tools, and our guide to rendering a 3D model or BIM view covers the rest.
- Elevations and line drawings: Elevations and line drawings can be used like sketches as a starting point. See our AutoCAD drawings guide.
- Site photos: A photo of the plot or the street helps you describe the real context in your prompt.
For marketing images, model views are usually the best choice, because they keep proportions, window positions and floor counts close to the real design.
Step 2: Create the Hero Exterior
Start with the most important image and use it as the reference for everything else.
- Choose the camera carefully. Use an eye-level view from a real point on the street. Buyers trust views that look like something they could actually see.
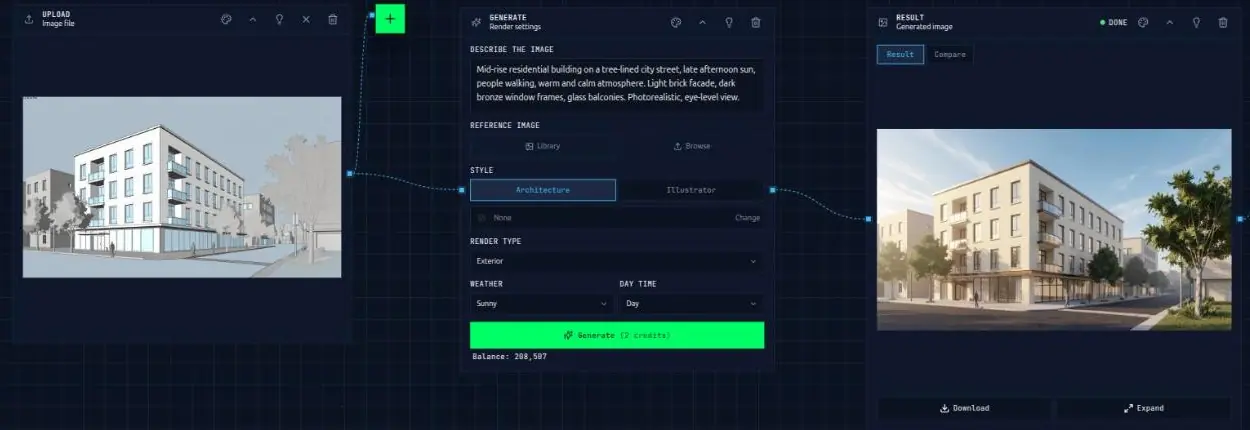
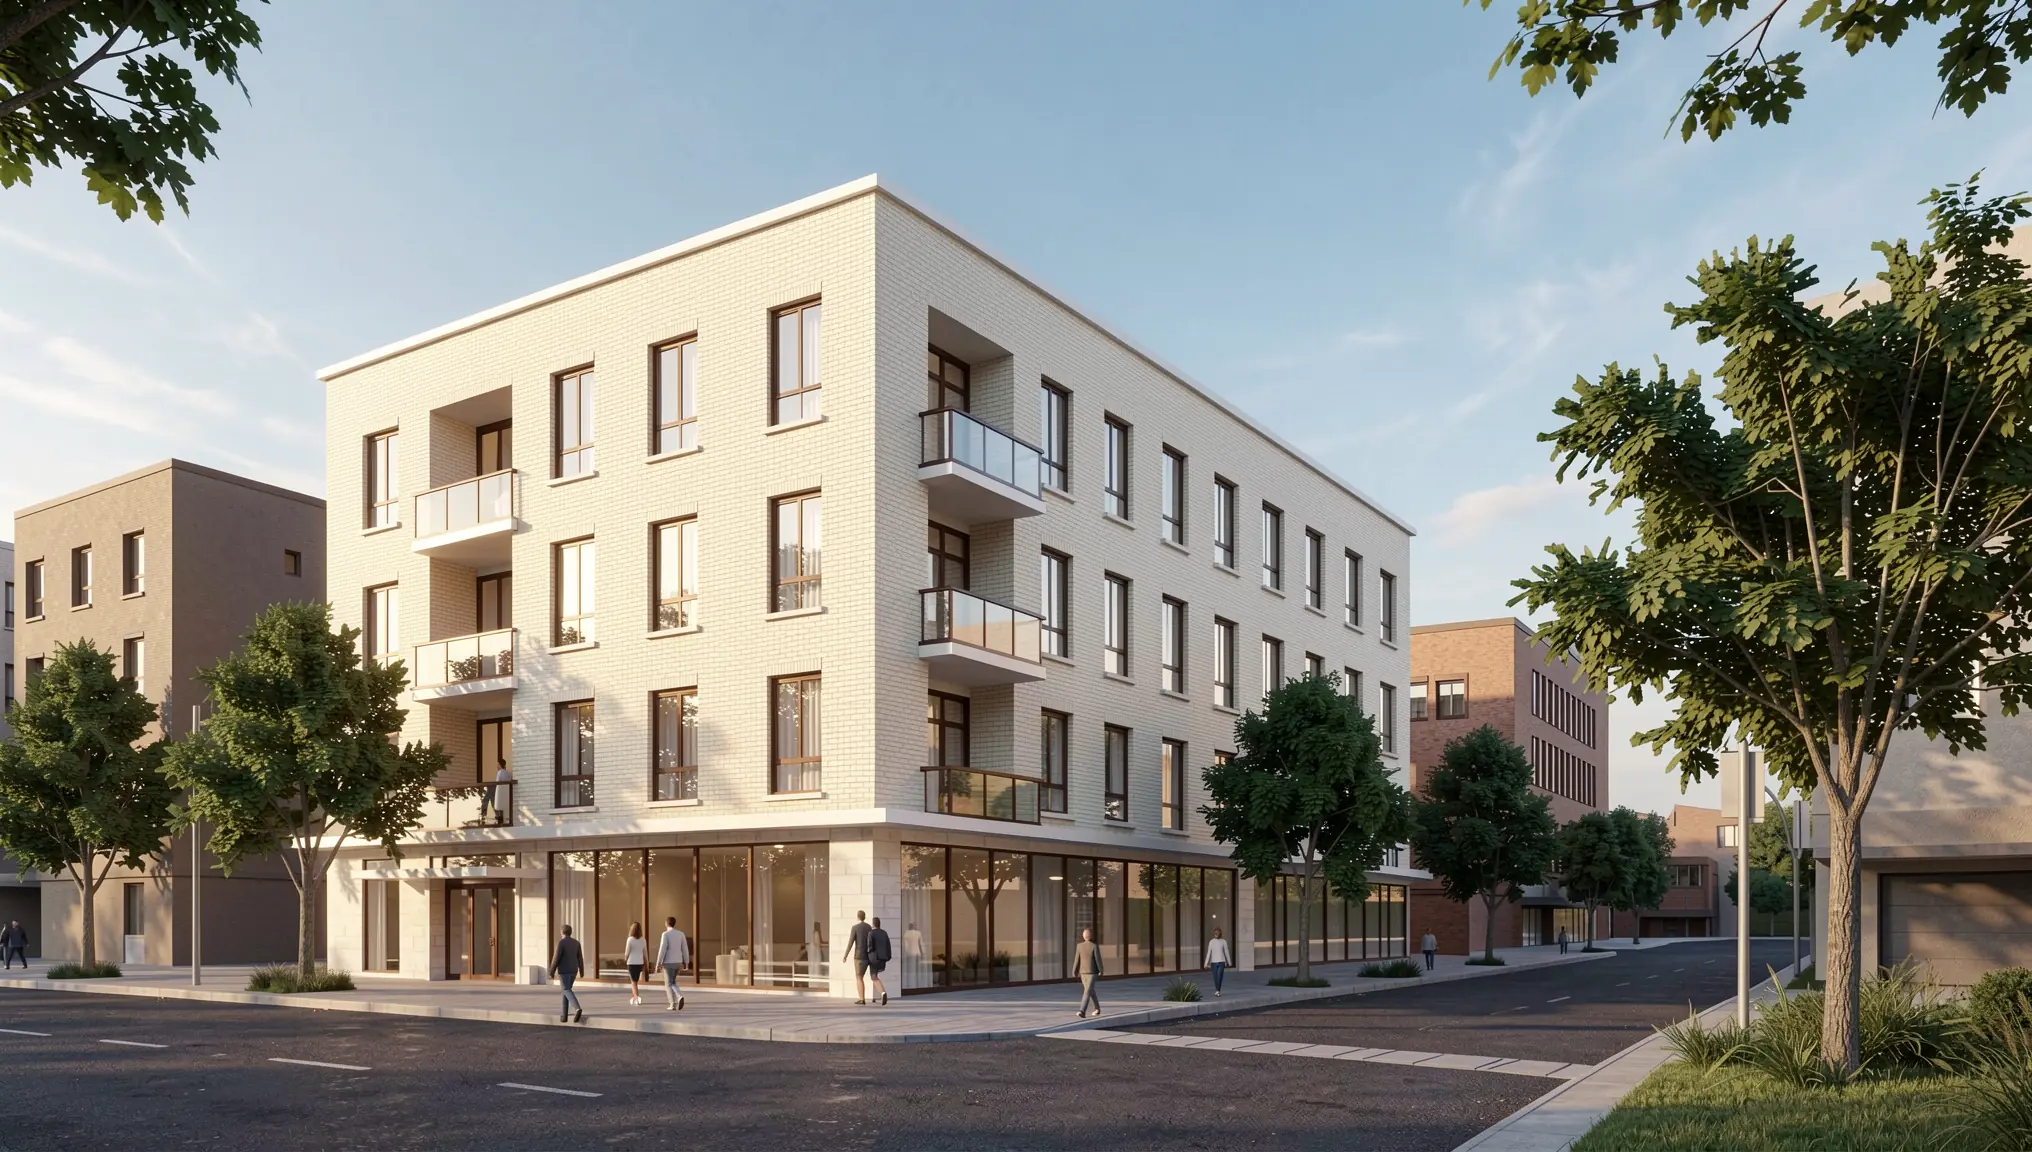
- Describe the context. Mention the setting, the season and the mood: “Mid-rise residential building on a tree-lined city street, late afternoon sun, people walking, warm and calm atmosphere.”
- Describe the materials. Name the facade materials with finish and colour: “light brick facade, dark bronze window frames, glass balconies.”
- Generate several versions and pick one. Choose the image that is closest to the design, not just the most dramatic one.
Put together, this is the prompt behind the hero image of the example project:
“Mid-rise residential building on a tree-lined city street, late afternoon sun, people walking, warm and calm atmosphere. Light brick facade, dark bronze window frames, glass balconies. Photorealistic, eye-level view.”
Our prompt guide for architectural renders has more examples of how to write these descriptions.
Step 3: Test Facade and Finish Options Before You Commit
Pre-sale is also the time when developers make decisions about colours, finishes and specification packages. With QUVIAI’s AI render editing you can change any element of an image (facade and architectural elements, materials and colours, furniture and decor, light and landscape), so the same view can show several options.
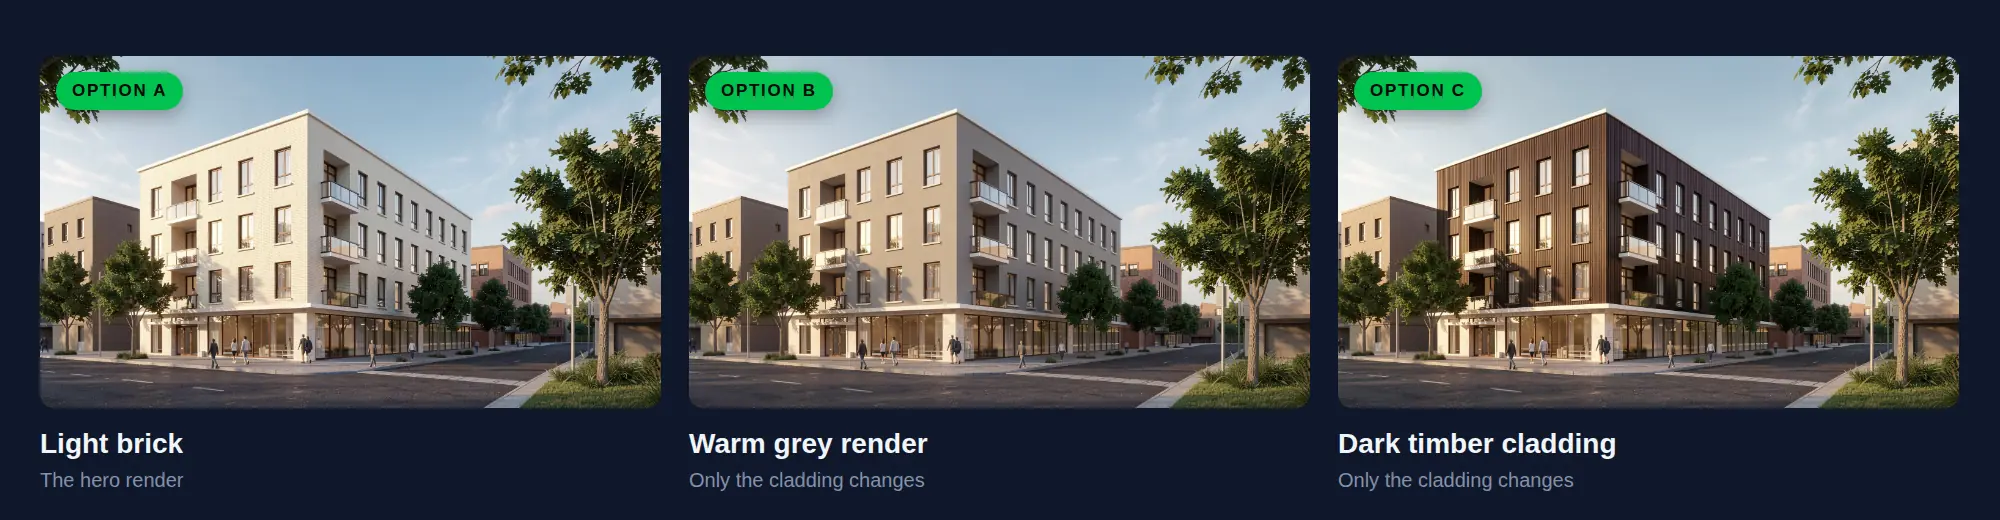
- Facade options: Show the hero view with two or three cladding colours or window frame finishes, side by side.
- Finish packages: If buyers can choose between interior packages, show the same living room in each one (see Step 4).
- Landscape: Try more mature planting or a different courtyard layout to see how it changes the feel of the project.
Use maskless editing that names one element (“change only the facade cladding”) for large surfaces, and a tight mask for small, clearly bounded elements. Our masked vs maskless guide explains the difference. These are the two edits behind options B and C:
“Change only the facade cladding to smooth warm grey render. Keep the windows, dark bronze frames, glass balconies, entrance, street, trees, people, camera angle and light exactly the same. Photorealistic.”
“Change only the facade cladding to dark vertical timber cladding. Keep the windows, dark bronze frames, glass balconies, entrance, street, trees, people, camera angle and light exactly the same. Photorealistic.”
Step 4: Show the Interiors Buyers Will Live In
Off-plan buyers want to imagine daily life in the unit. Focus on the unit types that matter most for sales.
- Start from the interior model view of each key unit type, or from an interior sketch.
- Furnish realistically. Use furniture sizes and layouts that actually fit the plan. An oversized sofa in a small living room may look good, but it creates false expectations.
- Show the view and the light. If the unit has a balcony or a large window, make sure the image shows it.
- Keep one style per campaign. Use the same interior style, colour palette and furniture language in every interior image, so the project feels like one place.
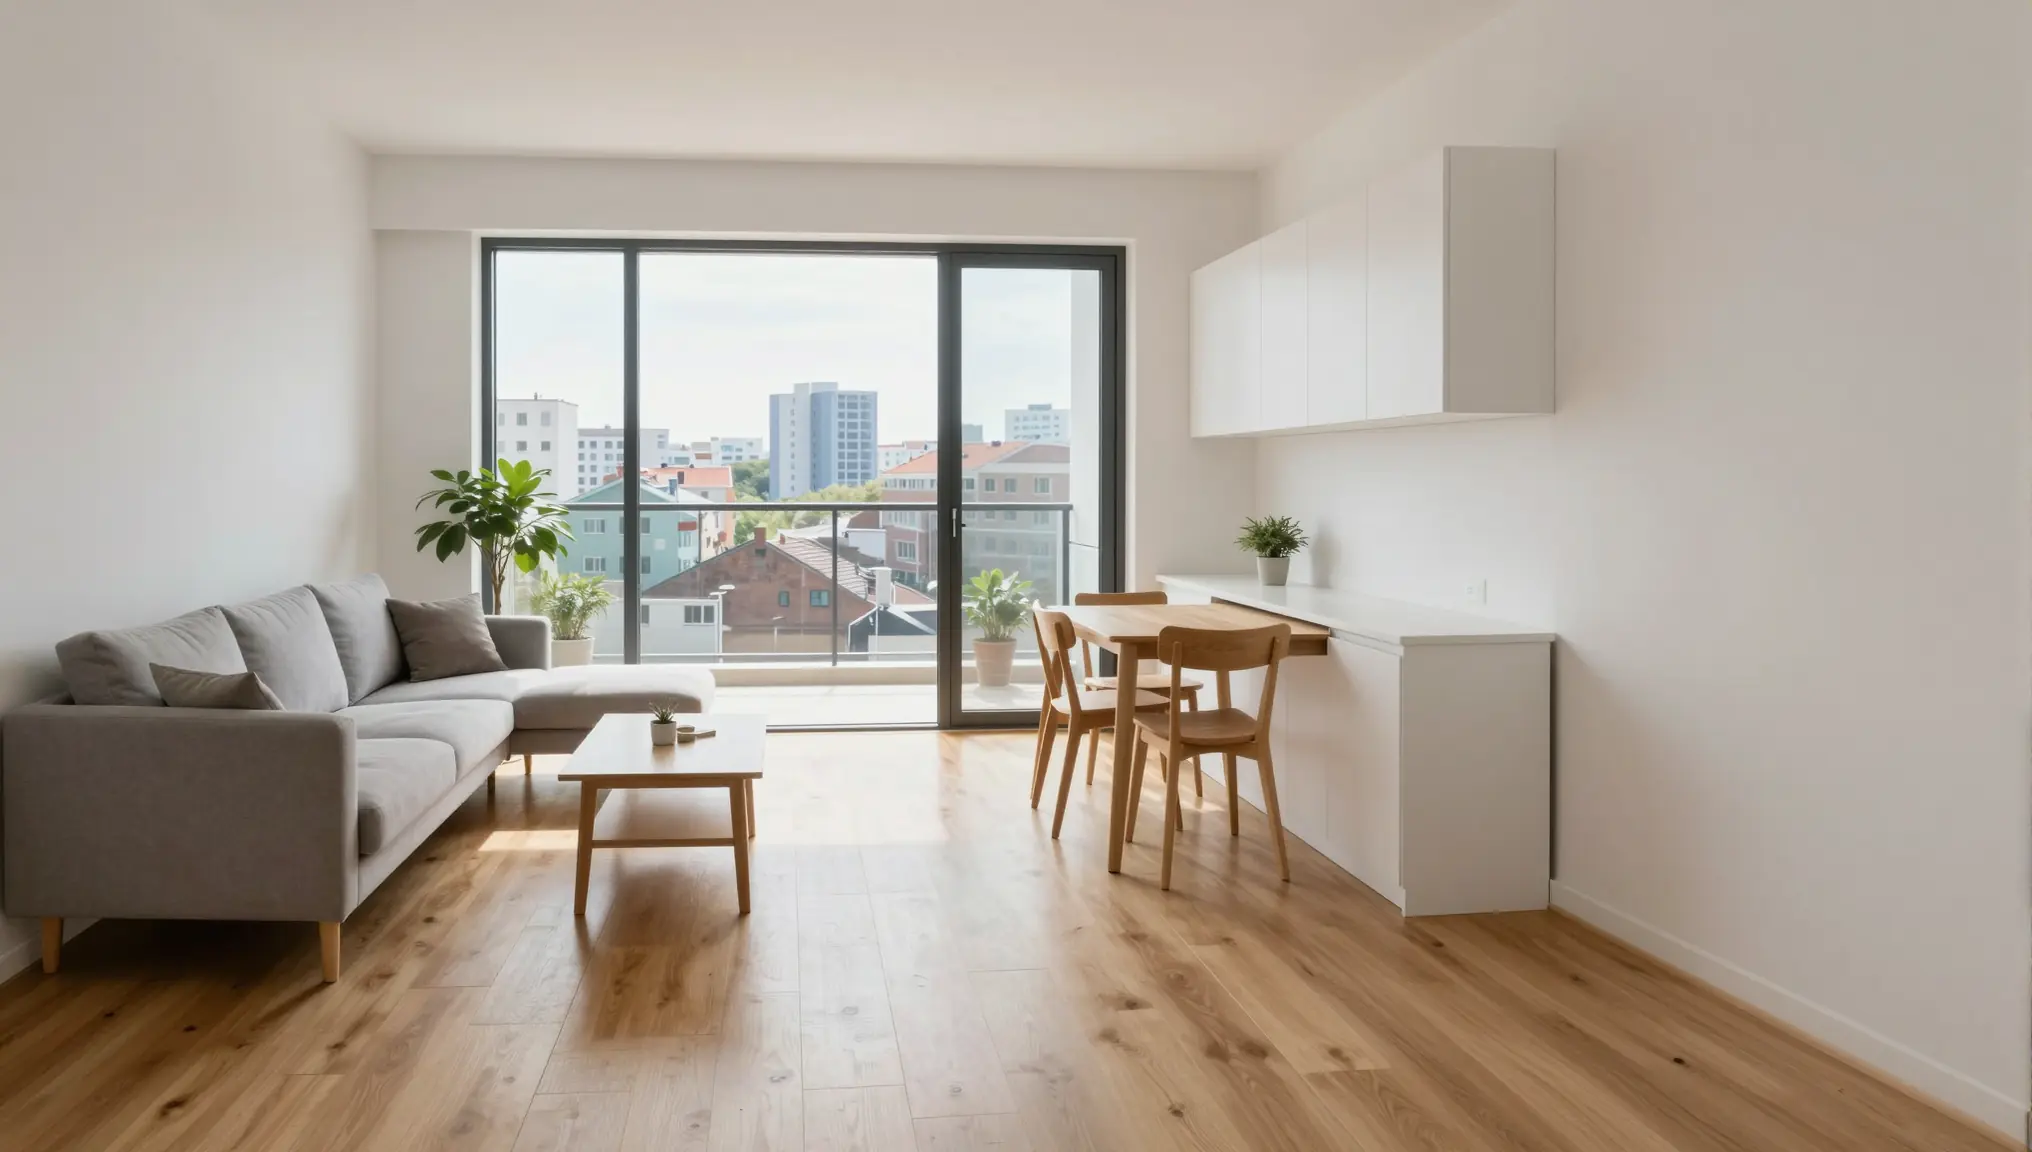
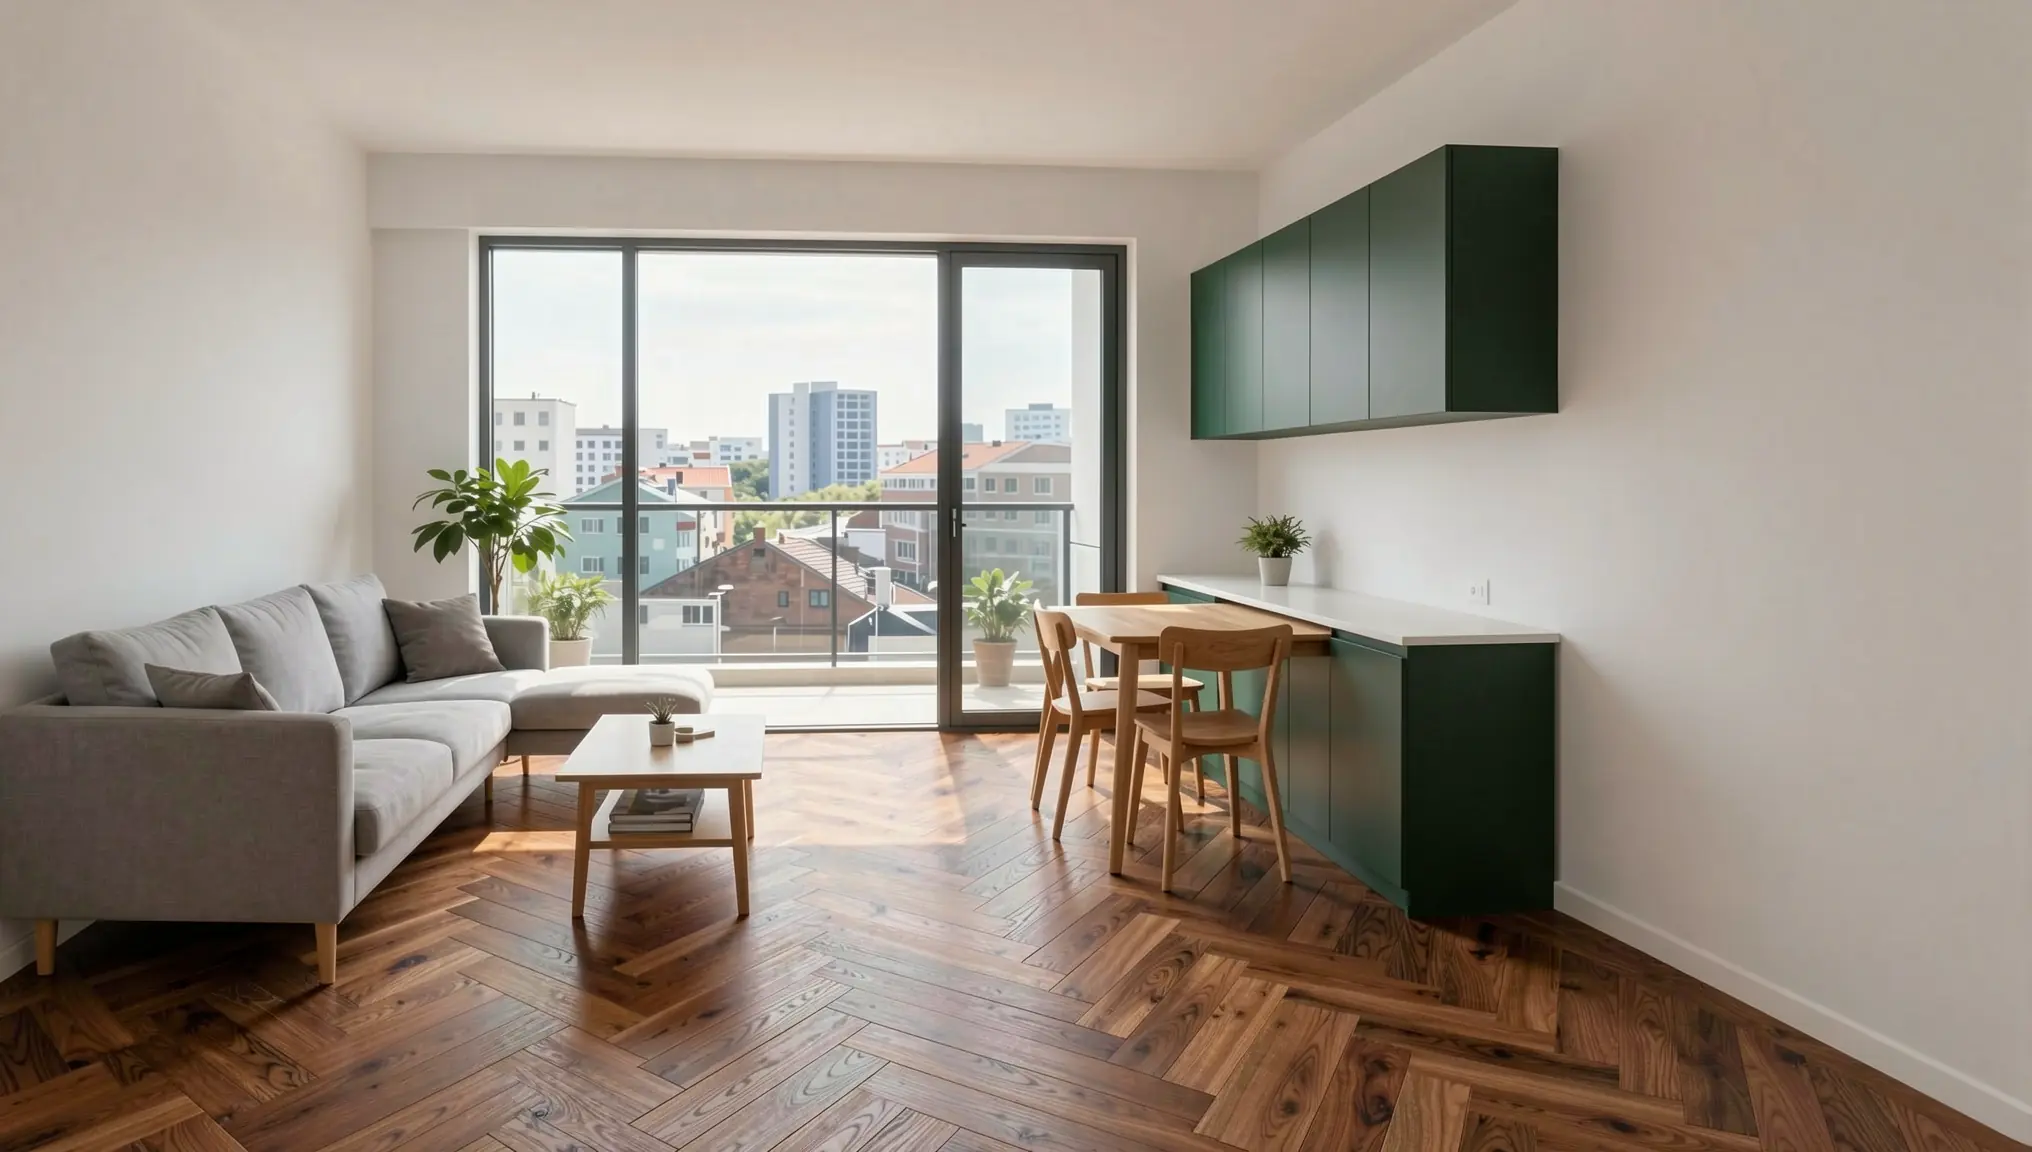
The living room of the example apartment, and the same room in a second finish package:
“Photorealistic interior of the living room in a new apartment, eye-level view towards a large glazed balcony door with a city view. Light oak floor, white walls, a realistically sized three-seat sofa, a small dining table for four, an open kitchen with white fronts on one side, soft afternoon daylight, calm contemporary style, natural colours.”
“Finish package B: change the floor to warm walnut herringbone parquet and the kitchen fronts to matte dark green. Keep the walls, furniture, window, balcony, view, camera angle and daylight exactly the same. Photorealistic.”
For existing buildings that are being converted or refurbished, you can start from a photo of the empty space instead. See our guides to AI virtual staging and renovation visualization.
Step 5: Add Day and Night Versions
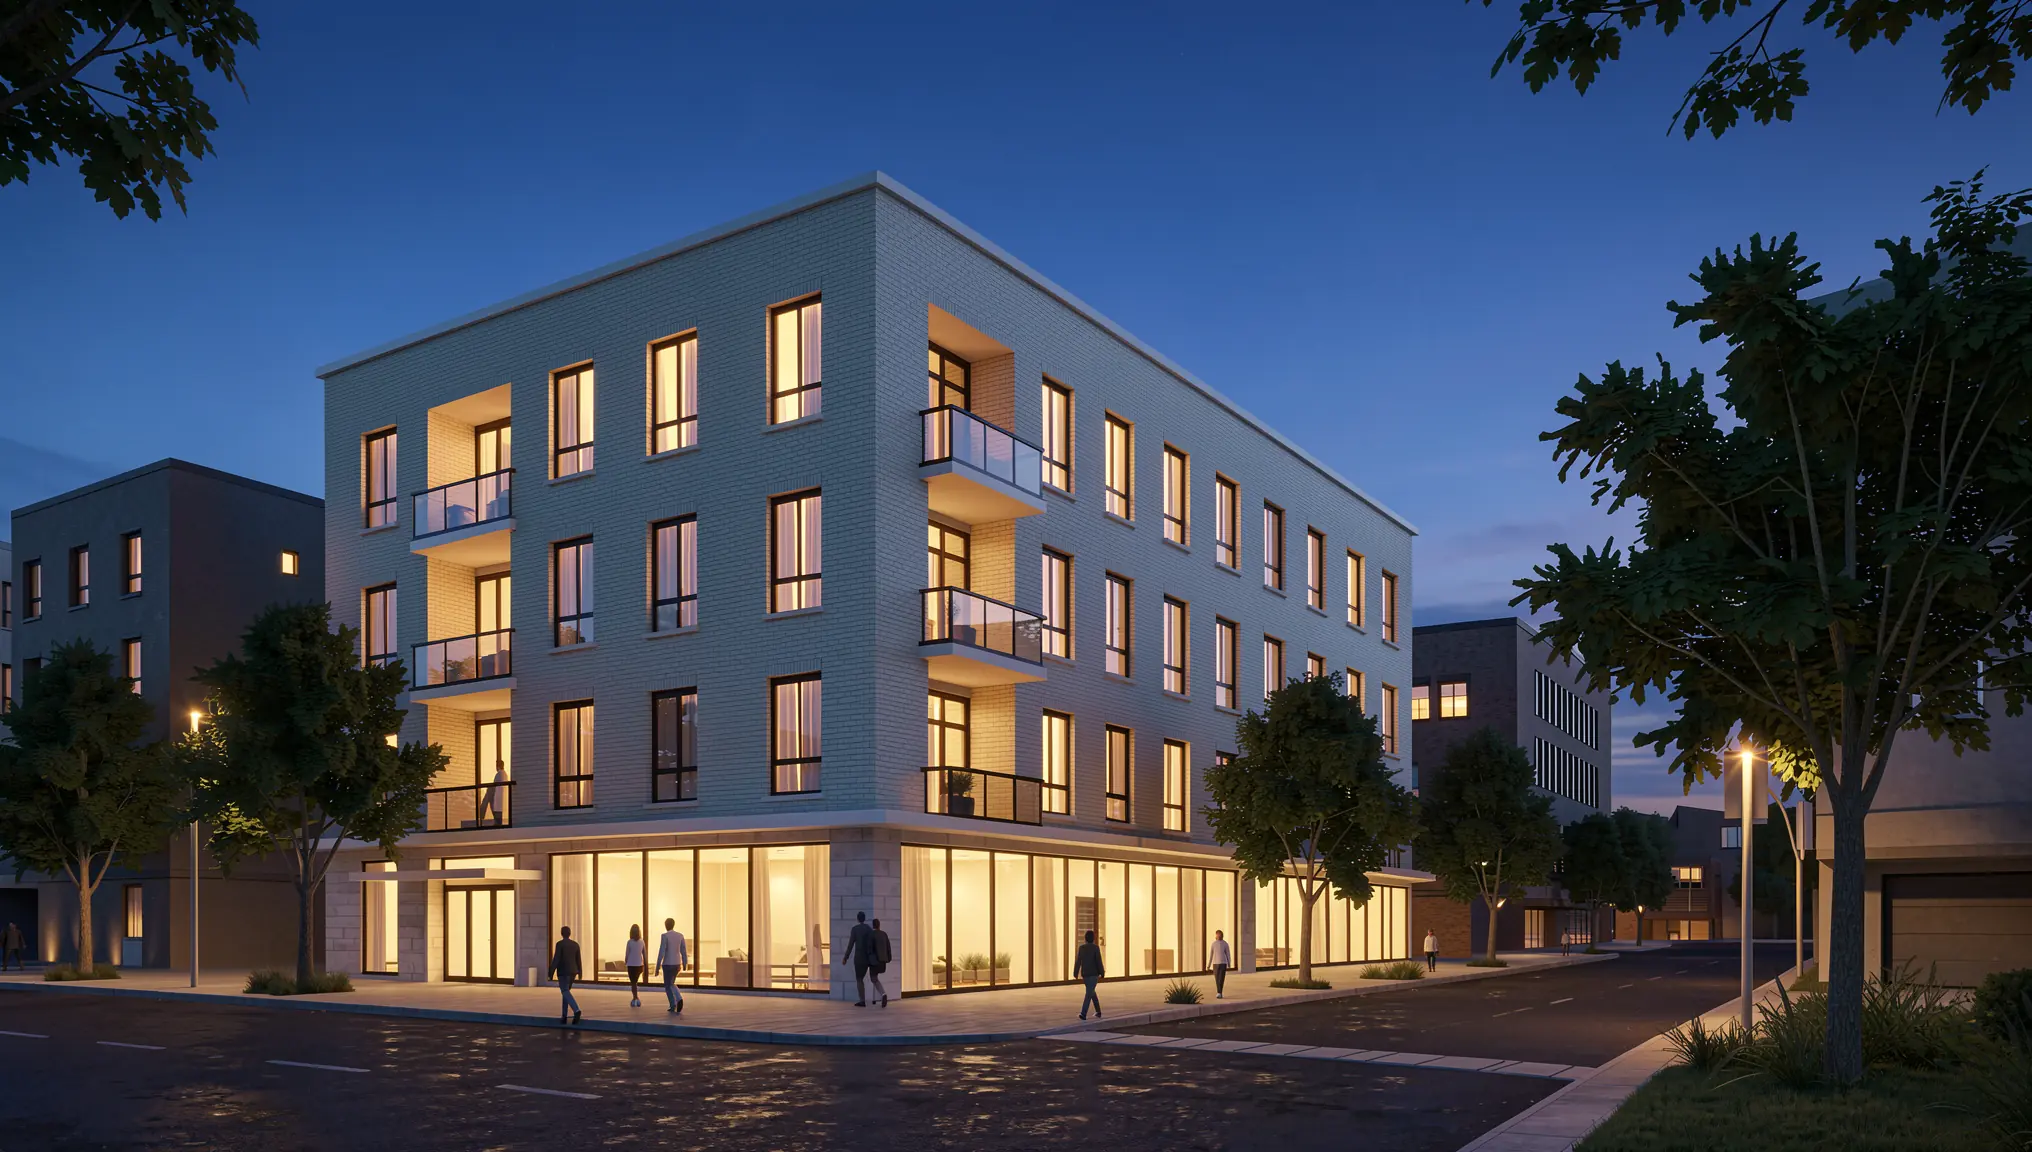
With QUVIAI you can produce the same view in different lighting conditions, such as day and night. Evening images with warm light in the windows are popular for websites and social media, while daylight images explain the architecture more clearly. Producing both from one approved view keeps the campaign consistent. Our day to night guide shows how.
“Change the scene to blue hour in the evening: deep blue sky, warm light glowing in many of the apartment windows, the entrance lobby lit, street lamps on, soft reflections on the pavement. Keep the building, materials, trees and camera angle exactly the same. Photorealistic.”
Step 6: Turn Key Images Into Short Videos
Short clips can help a post stand out in a social feed. Render → Video turns a finished render into a short clip, for example slow camera movement towards the entrance or along the balcony. Use it for the two or three most important images, not for every render. See our AI video guide for architecture for tips.
“Slow smooth camera move towards the building entrance, people walking along the pavement, leaves moving gently in the street trees, warm late afternoon light. Keep the building unchanged.”

Step 7: Check Accuracy Before Anything Goes Public
Pre-sale images influence buying decisions, so accuracy matters more here than in any other kind of render.
- Compare with the drawings. Check floor count, window positions, balcony sizes and the building’s shape against the current design.
- Check the surroundings. Do not show views, parks or open space that will not be there.
- Check the specification. Interior finishes and appliances should match what is actually included, or be clearly labelled as optional.
- Label the images. Mark them as computer-generated illustrations and check the advertising rules that apply to property marketing in your market.
- Update when the design changes. Keep a simple list of which image belongs to which design version, and replace outdated images quickly.
Quick Checklist
- A shot list agreed with the sales team
- Hero exterior from a real, eye-level viewpoint
- Facade and finish options tested on the same view
- Interiors with realistic furniture and one consistent style
- Day and night versions of key views
- Two or three short videos for social media
- Every image checked against the current design and labelled
Conclusion
For real estate developers, good pre-sale visuals are needed early, need to change often and need to stay accurate. AI rendering makes it practical to produce the full set (exteriors, interiors, options, day and night views and short videos) from the sketches and model views your team already has. Use it to move faster in the months before launch, and keep accuracy checks at the centre of the process.
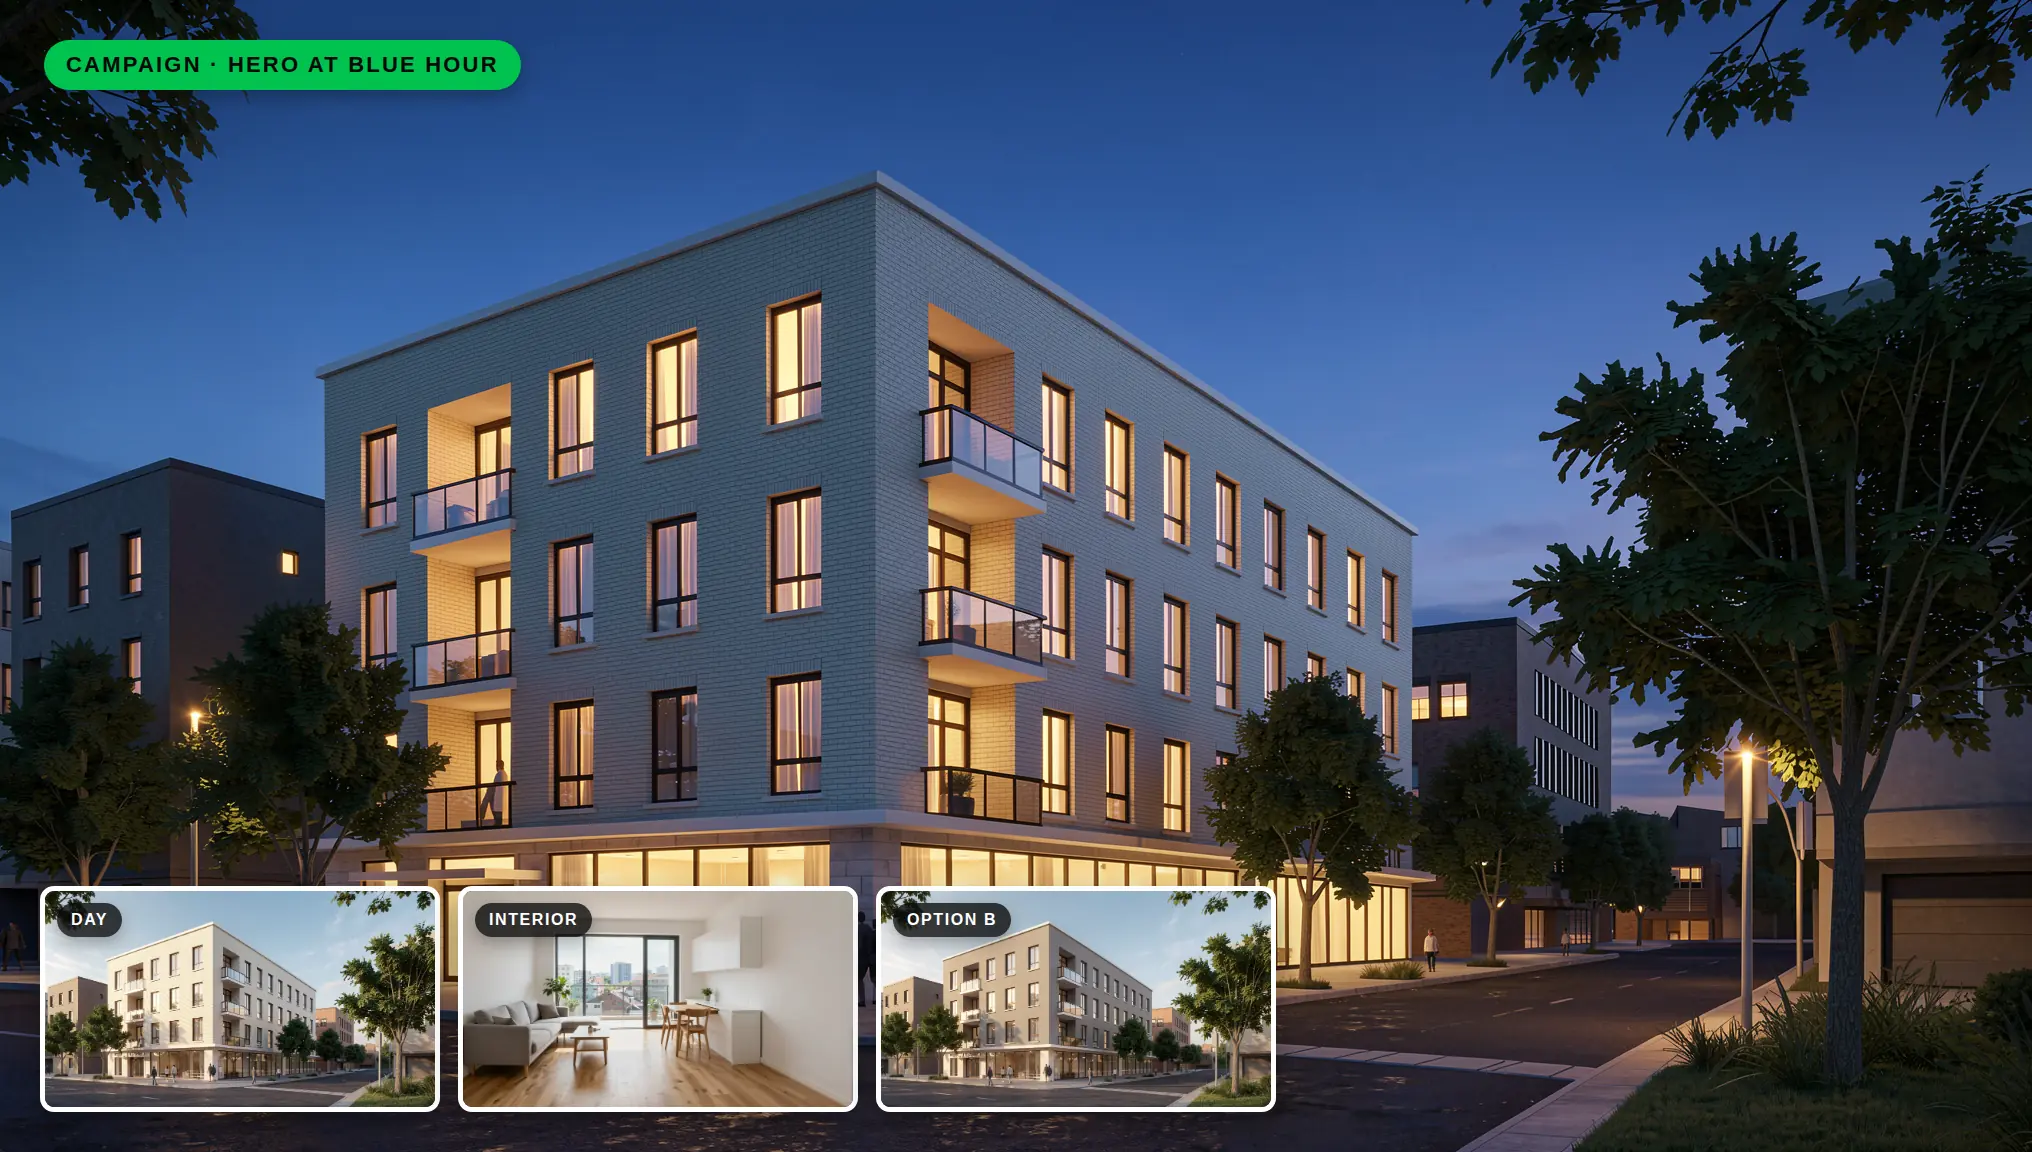
You can try this workflow in QUVIAI with free daily credits, and no credit card is required. Start with a model view of your next project and create your first hero image.