AI RENDERING GUIDE
AI Rendering for Architecture Students: Faster Studio and Jury Presentations
Published 8 min read
Every architecture student knows the week before a jury. The design is finally coming together, but the drawings are not finished, the model needs photos, and the render queue on your laptop says six hours. Too often, presentation images are produced at 3 a.m., in a hurry, and they end up showing less of the idea than they should.
AI rendering can change where that time goes. Instead of spending nights setting up materials and waiting for a render engine, you can turn a sketch or a model view into a clear, photorealistic image much faster, and spend the saved time on the design itself. In this guide you will learn where AI fits in a student workflow, how to prepare your inputs, and how to use AI images honestly and effectively in desk crits and final reviews.
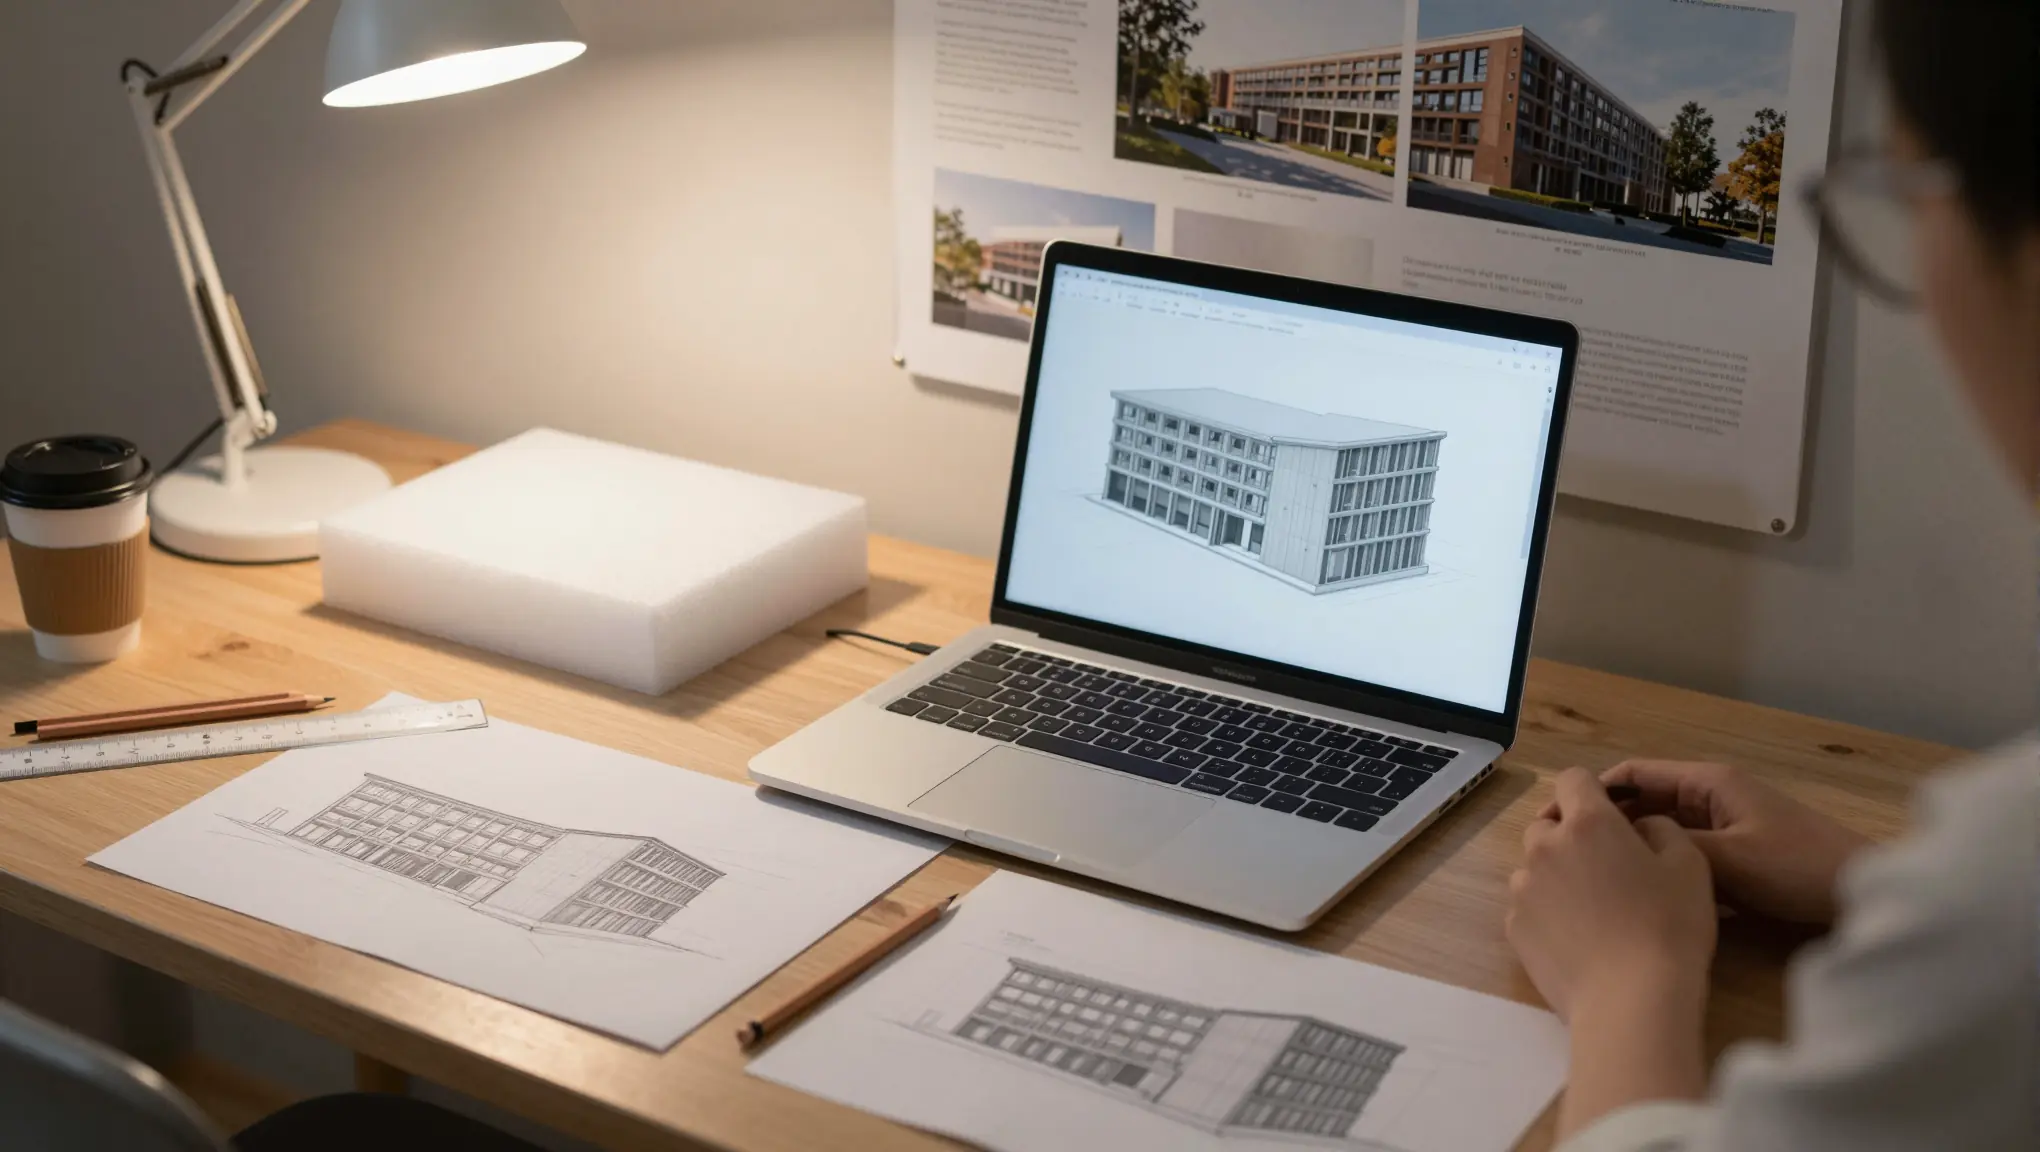
Every image in this guide was made in QUVIAI, including the student desk above, which was generated with the text-to-image tool. The library project that follows starts from a pencil sketch, and each render was created from it step by step.
Why AI Rendering Suits Student Projects
- Iteration speed. Studio is about testing ideas. When an image takes far less time to produce, you can try three facade directions before a crit instead of one.
- Low setup. You do not need to learn a full rendering engine, build material libraries or tune lighting before you can show a concept.
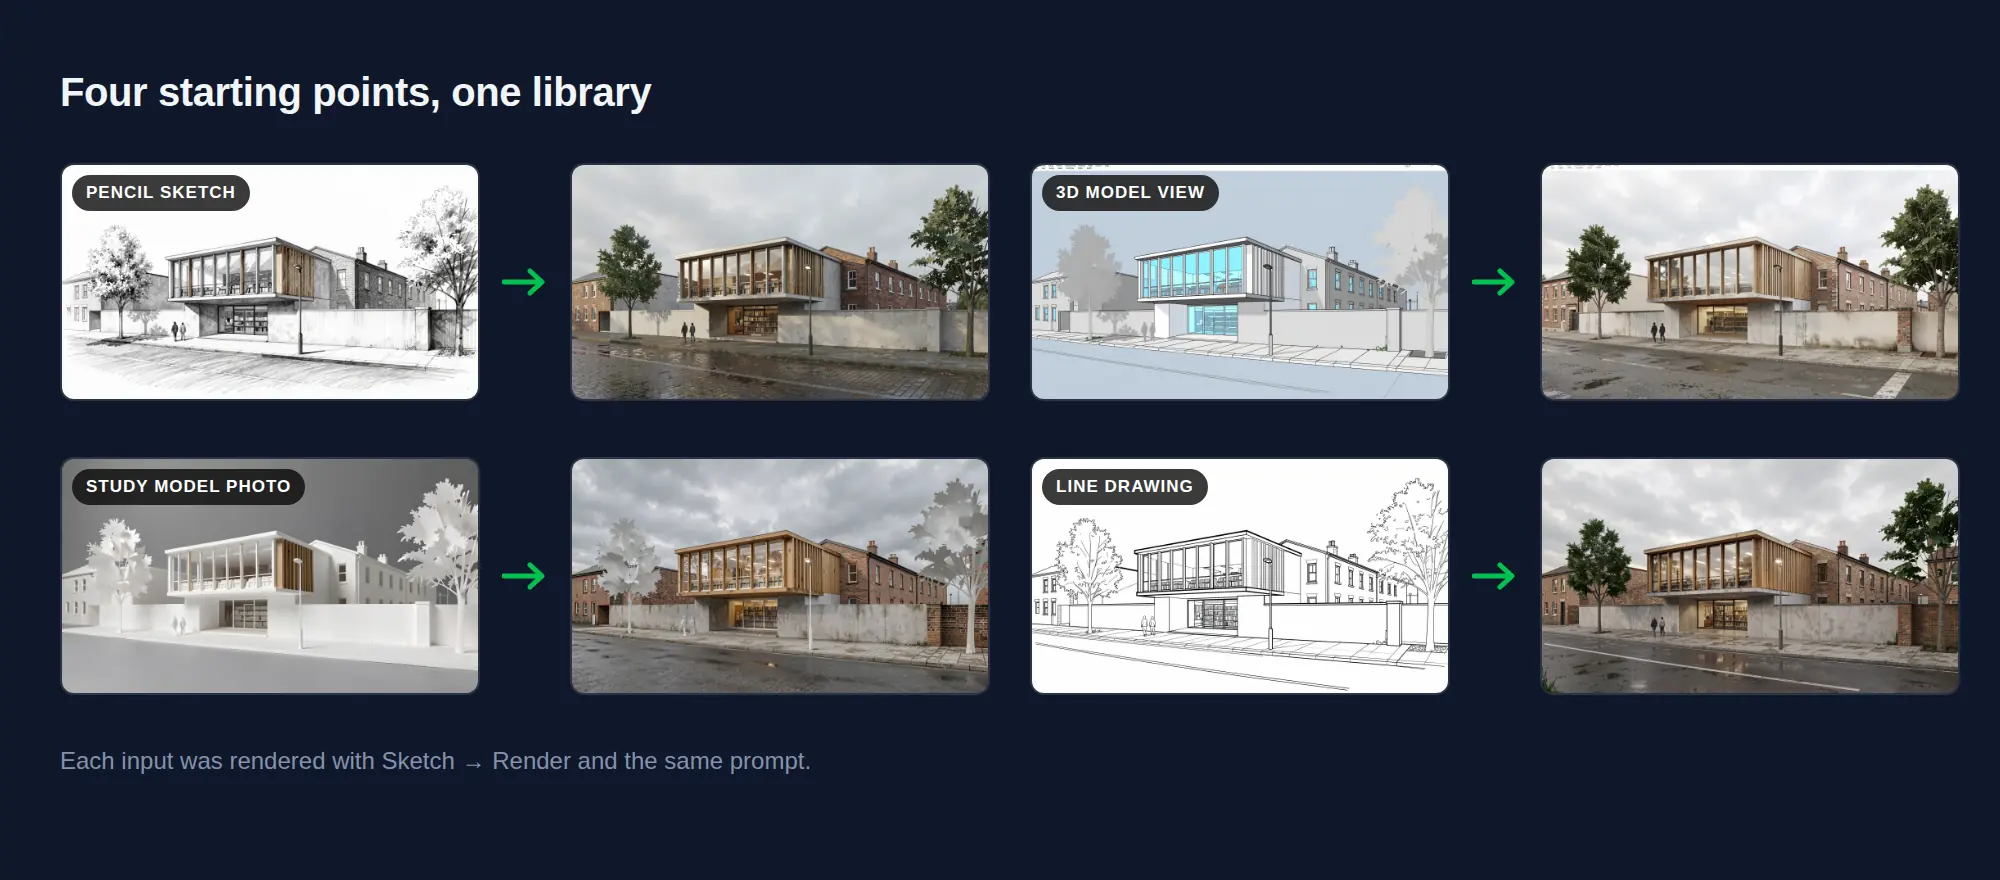
- Works from what you already have. A pencil sketch, a screenshot of a massing model or a photo of your physical model can all be starting points.
- Fits a student budget. With QUVIAI you can start with free daily credits, and no credit card is required.
A study at Nottingham Trent University, in which students tested web-based AI visualisation tools, found that students valued being able to iterate quickly, explore design variations and present with more confidence. The same study also noted that results depend heavily on how well prompts are written, and that some tools made unintended changes to the design. Both points shape the workflow below.
Step 1: Use AI at the Right Stage
AI images are most useful when the design is still moving.
- Early concept and desk crits: Quick mood and massing images to discuss a direction with your tutor.
- Mid-review: Testing materials, facade options and lighting on a design that is mostly fixed.
- Final jury: Polished hero images and atmosphere views, built on drawings and models you produced yourself.
Keep your plans, sections and technical drawings as your own work. AI images support the story of the project; they do not replace the drawings a jury reads to understand it.
Step 2: Choose Your Starting Point
A sketch. Perspective sketches work best, because the AI needs to see the space from a viewpoint. QUVIAI’s Sketch → Render tool turns hand sketches and line drawings into photorealistic images. See our sketch to render guide for the details.
A model view. If you work in 3D modelling software, a screenshot of a chosen view keeps your geometry and proportions. QUVIAI offers free AI render plugins for popular modelling tools, and our guide to rendering a 3D model or BIM view covers the rest.
A photo of your physical model. Shoot it at eye level with a phone, in even light, against a plain background. The AI can turn the card and foam into a believable building in context.
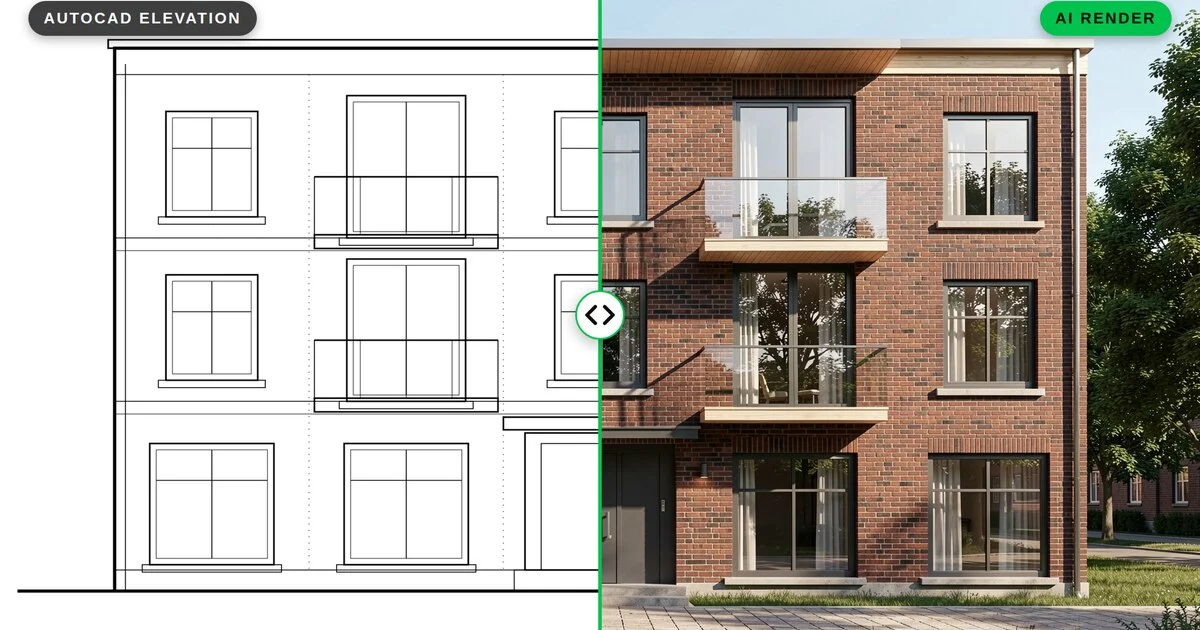
A 2D drawing. Elevations and line drawings from CAD can also become renders. Our AutoCAD guide shows how to clean and export them.
Step 3: Write Prompts That Protect Your Design
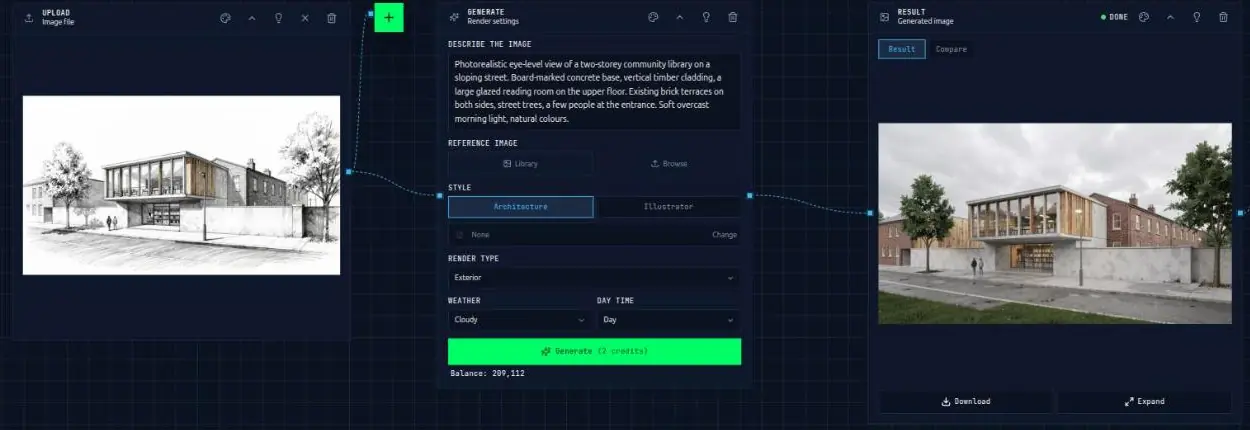
The image controls the geometry; the prompt controls materials, context and atmosphere. Be clear and spatial.
- Building and use: “Two-storey community library on a sloping urban site.”
- Materials: “Board-marked concrete base, vertical timber cladding above, large glazed reading room.”
- Context: “Narrow street with existing brick terraces, mature street trees.”
- Light and mood: “Overcast morning, soft light, people entering the building.”
- Image style: “Photorealistic, eye-level, natural colours.”
Avoid vague words like “futuristic” or “amazing”, which invite the AI to invent design that is not yours. Our prompt guide for architectural renders has more examples.
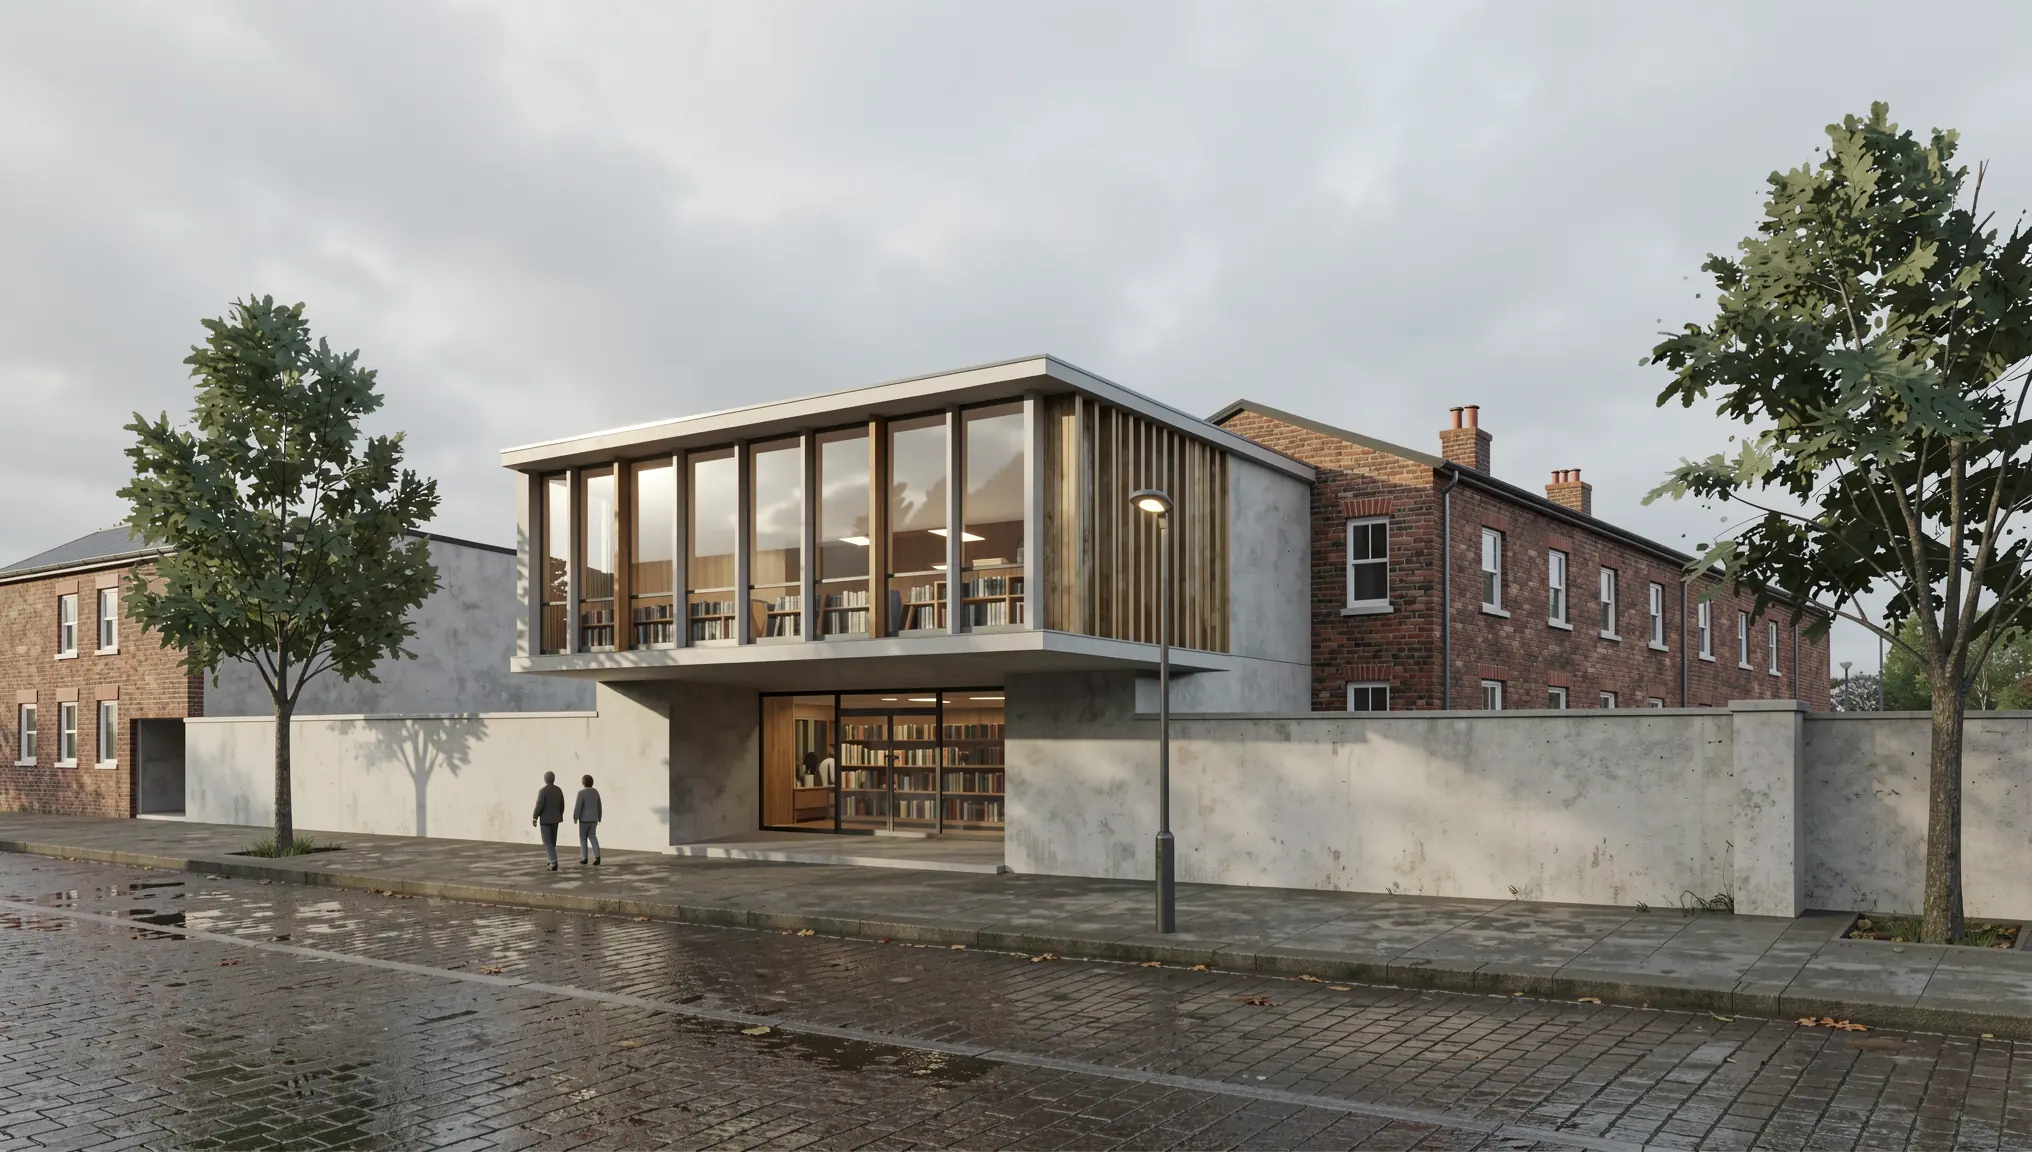
This is the prompt behind every library render in this guide:
“Photorealistic eye-level view of a two-storey community library on a sloping street. Board-marked concrete base, vertical timber cladding, a large glazed reading room on the upper floor. Existing brick terraces on both sides, street trees, a few people at the entrance. Soft overcast morning light, natural colours.”
Step 4: Check and Correct the Result
AI can change things you did not ask it to change: an extra window, a different roof, a staircase that moves. Before an image goes on a board, compare it with your drawings.
- Fix one area at a time. With masked editing in QUVIAI you select a region, such as the entrance or the roof, and regenerate only that part.
- Make broader changes. Maskless editing helps when you want to change the overall tone of the image. See masked vs maskless editing.
- Reject images that misrepresent the design. A beautiful render of the wrong building will raise questions you do not want at a jury.
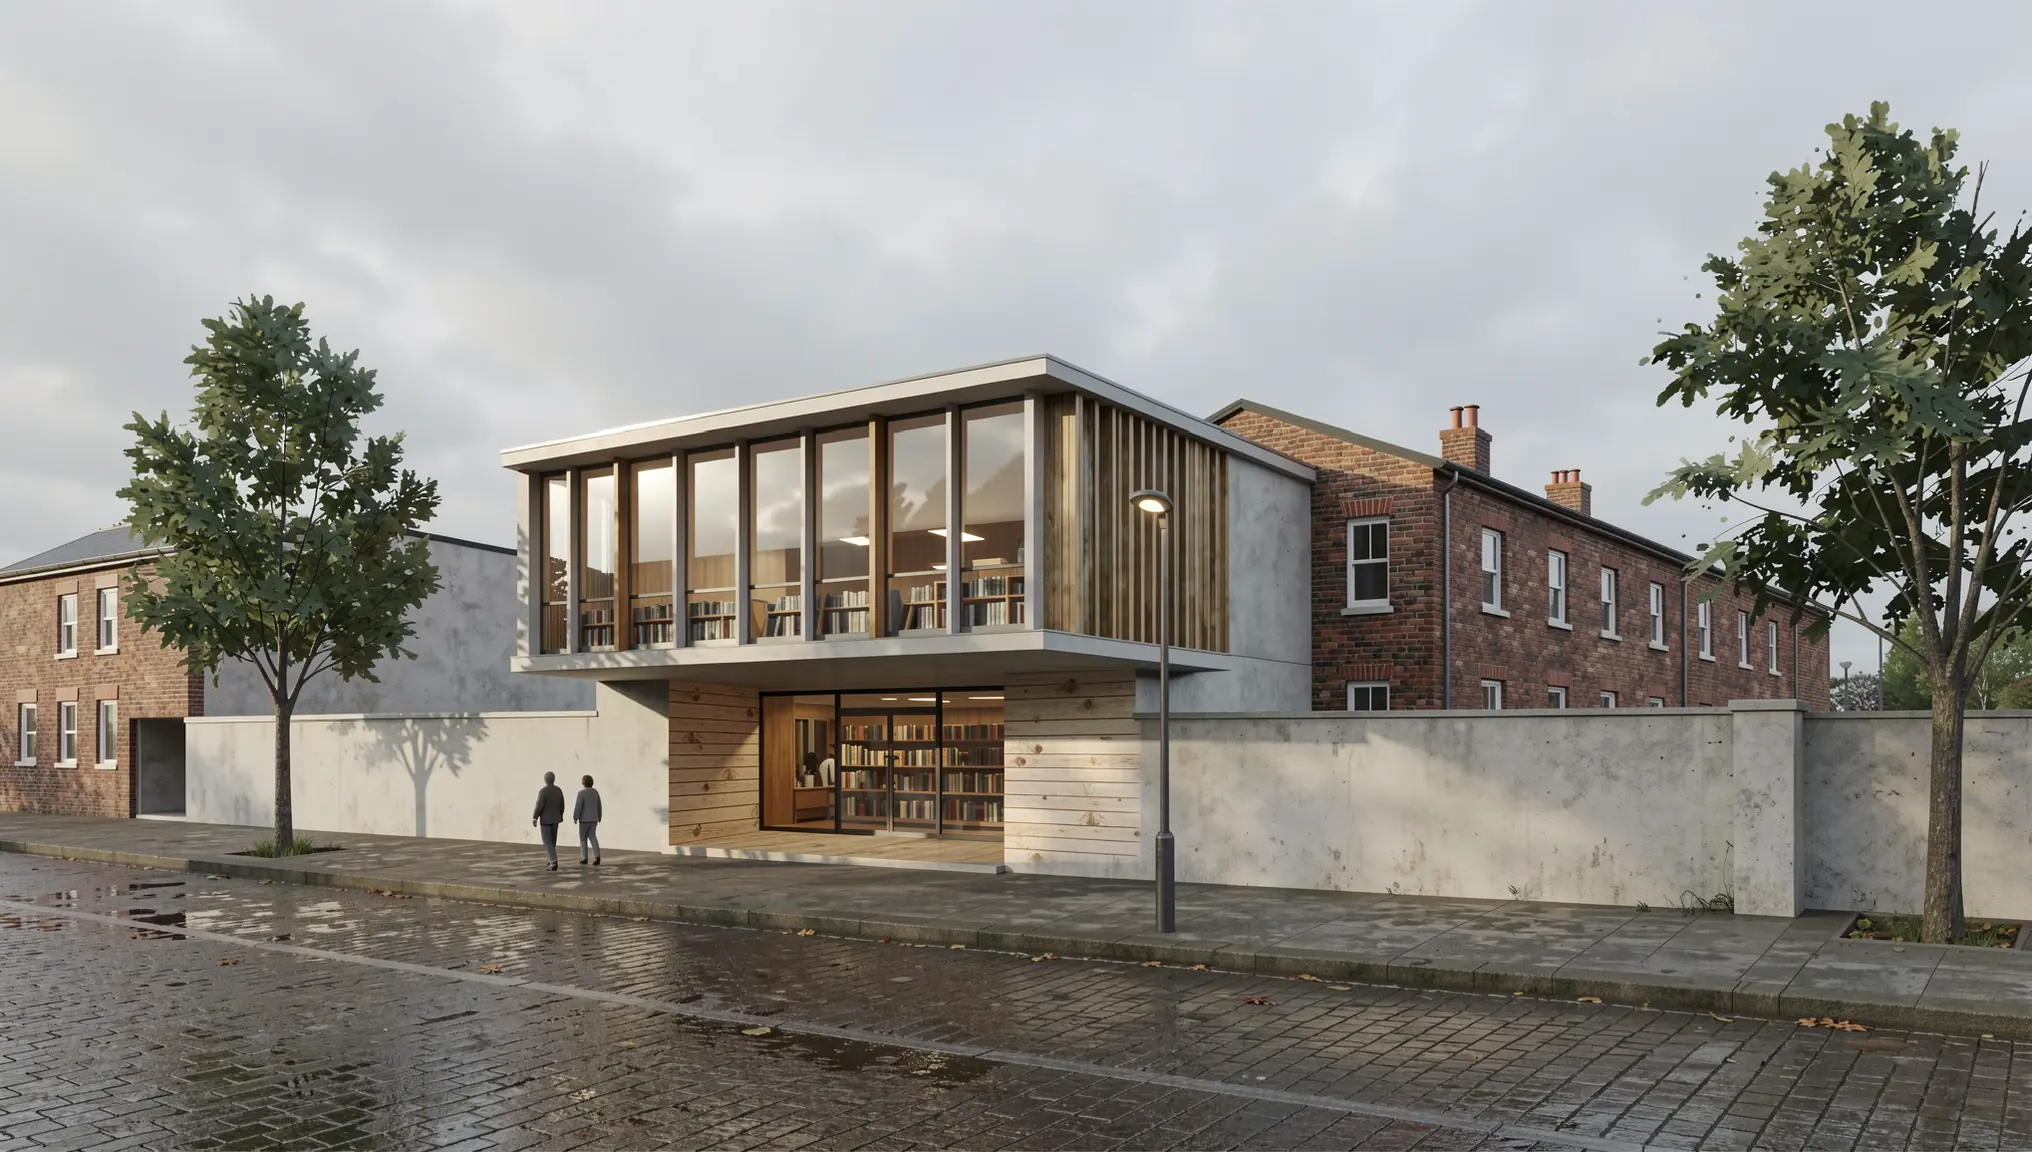
Here is a real example from the library project. The design calls for a board-marked concrete base, but the first render showed smooth concrete. Instead of regenerating the whole image, a masked edit corrects only the ground floor:
“Change the smooth concrete walls of the ground floor to board-marked concrete with clearly visible horizontal timber board imprints, as in the design. Keep the glazed entrance, the bookshelves, the people and the daylight exactly the same. Photorealistic.”
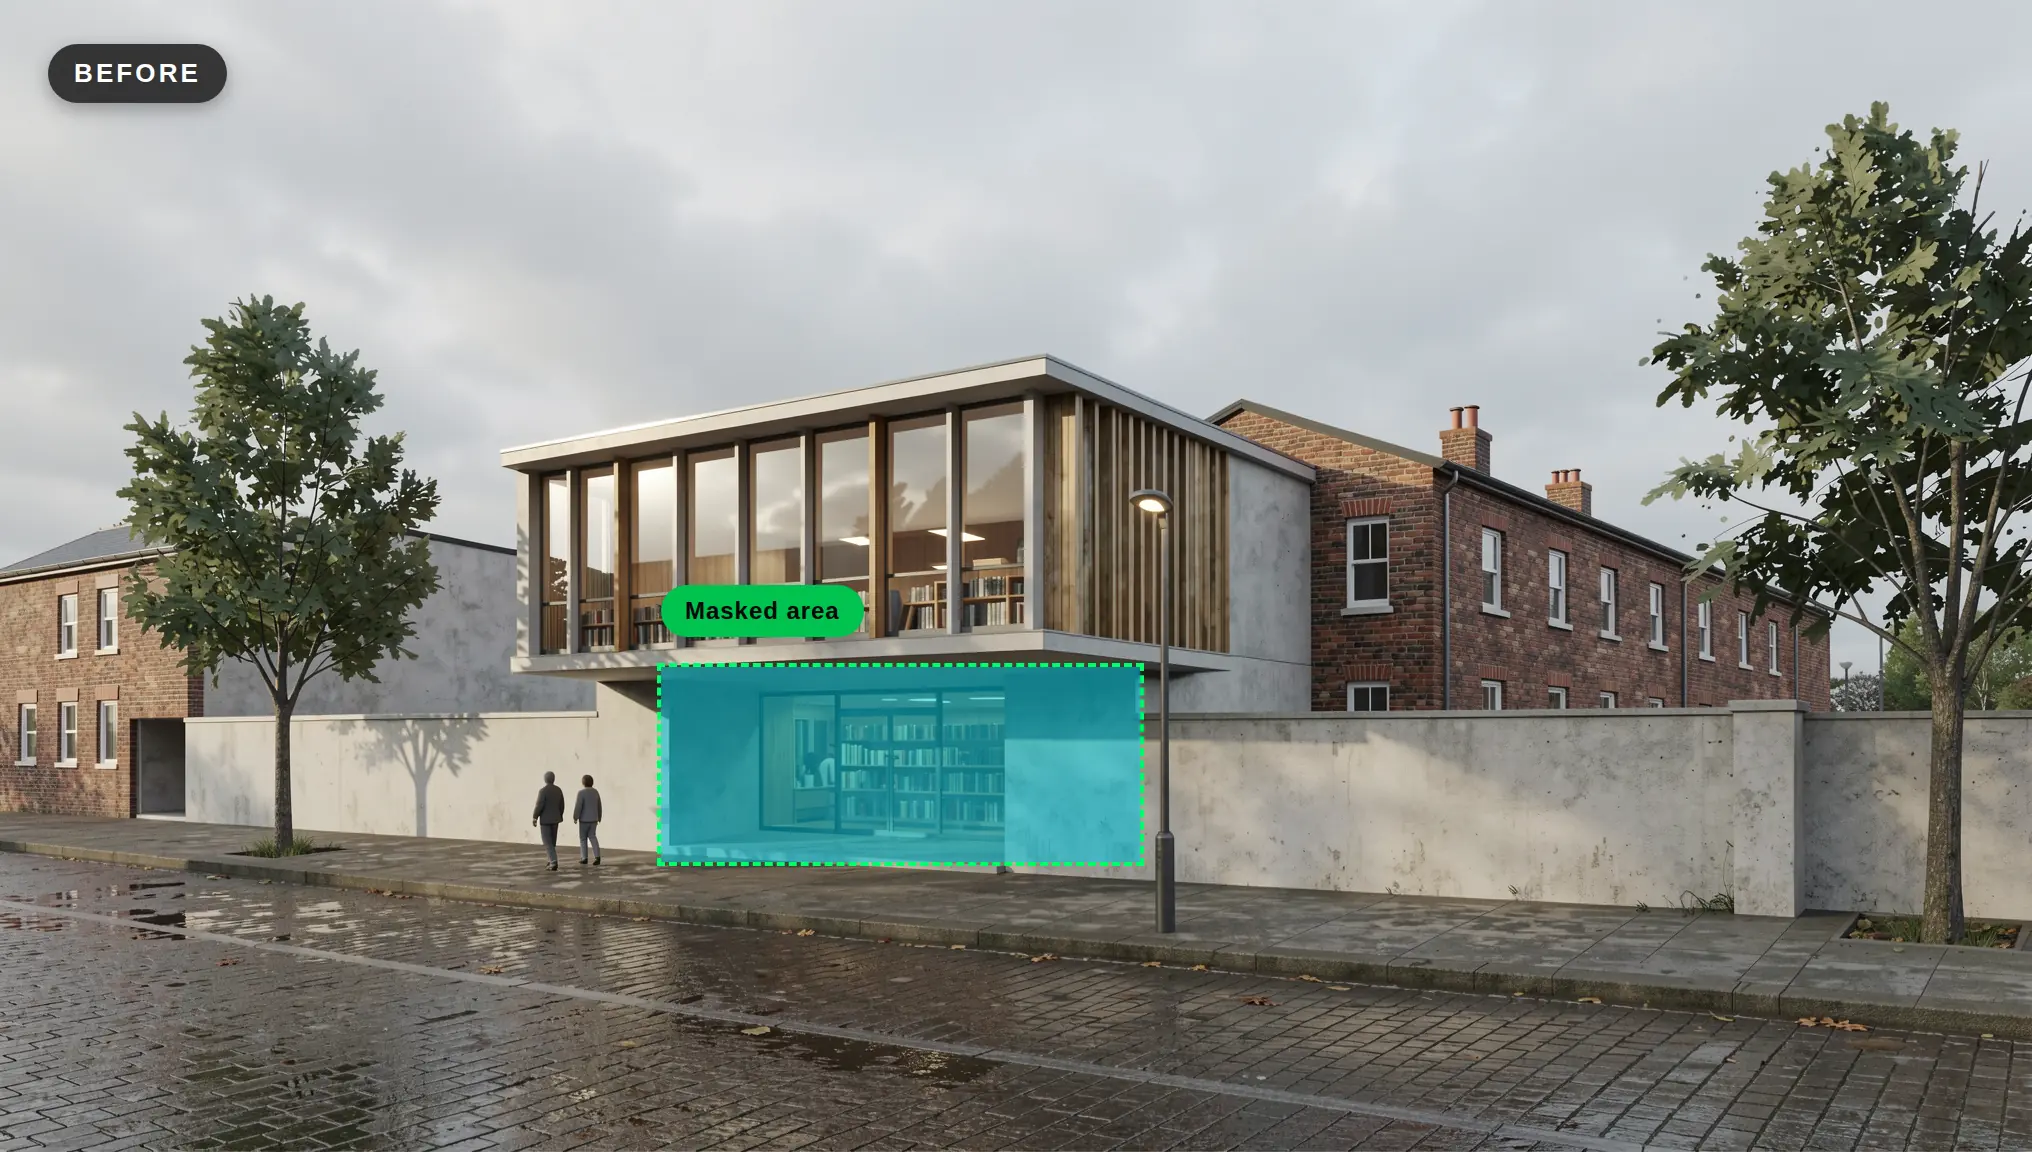
Tip: Keep the mask tight around the element you want to correct. A small, clearly bounded selection gives the most predictable result.
Step 5: Build a Presentation Set, Not Just One Image
Juries respond to a clear story. AI makes it quick to produce a consistent set.
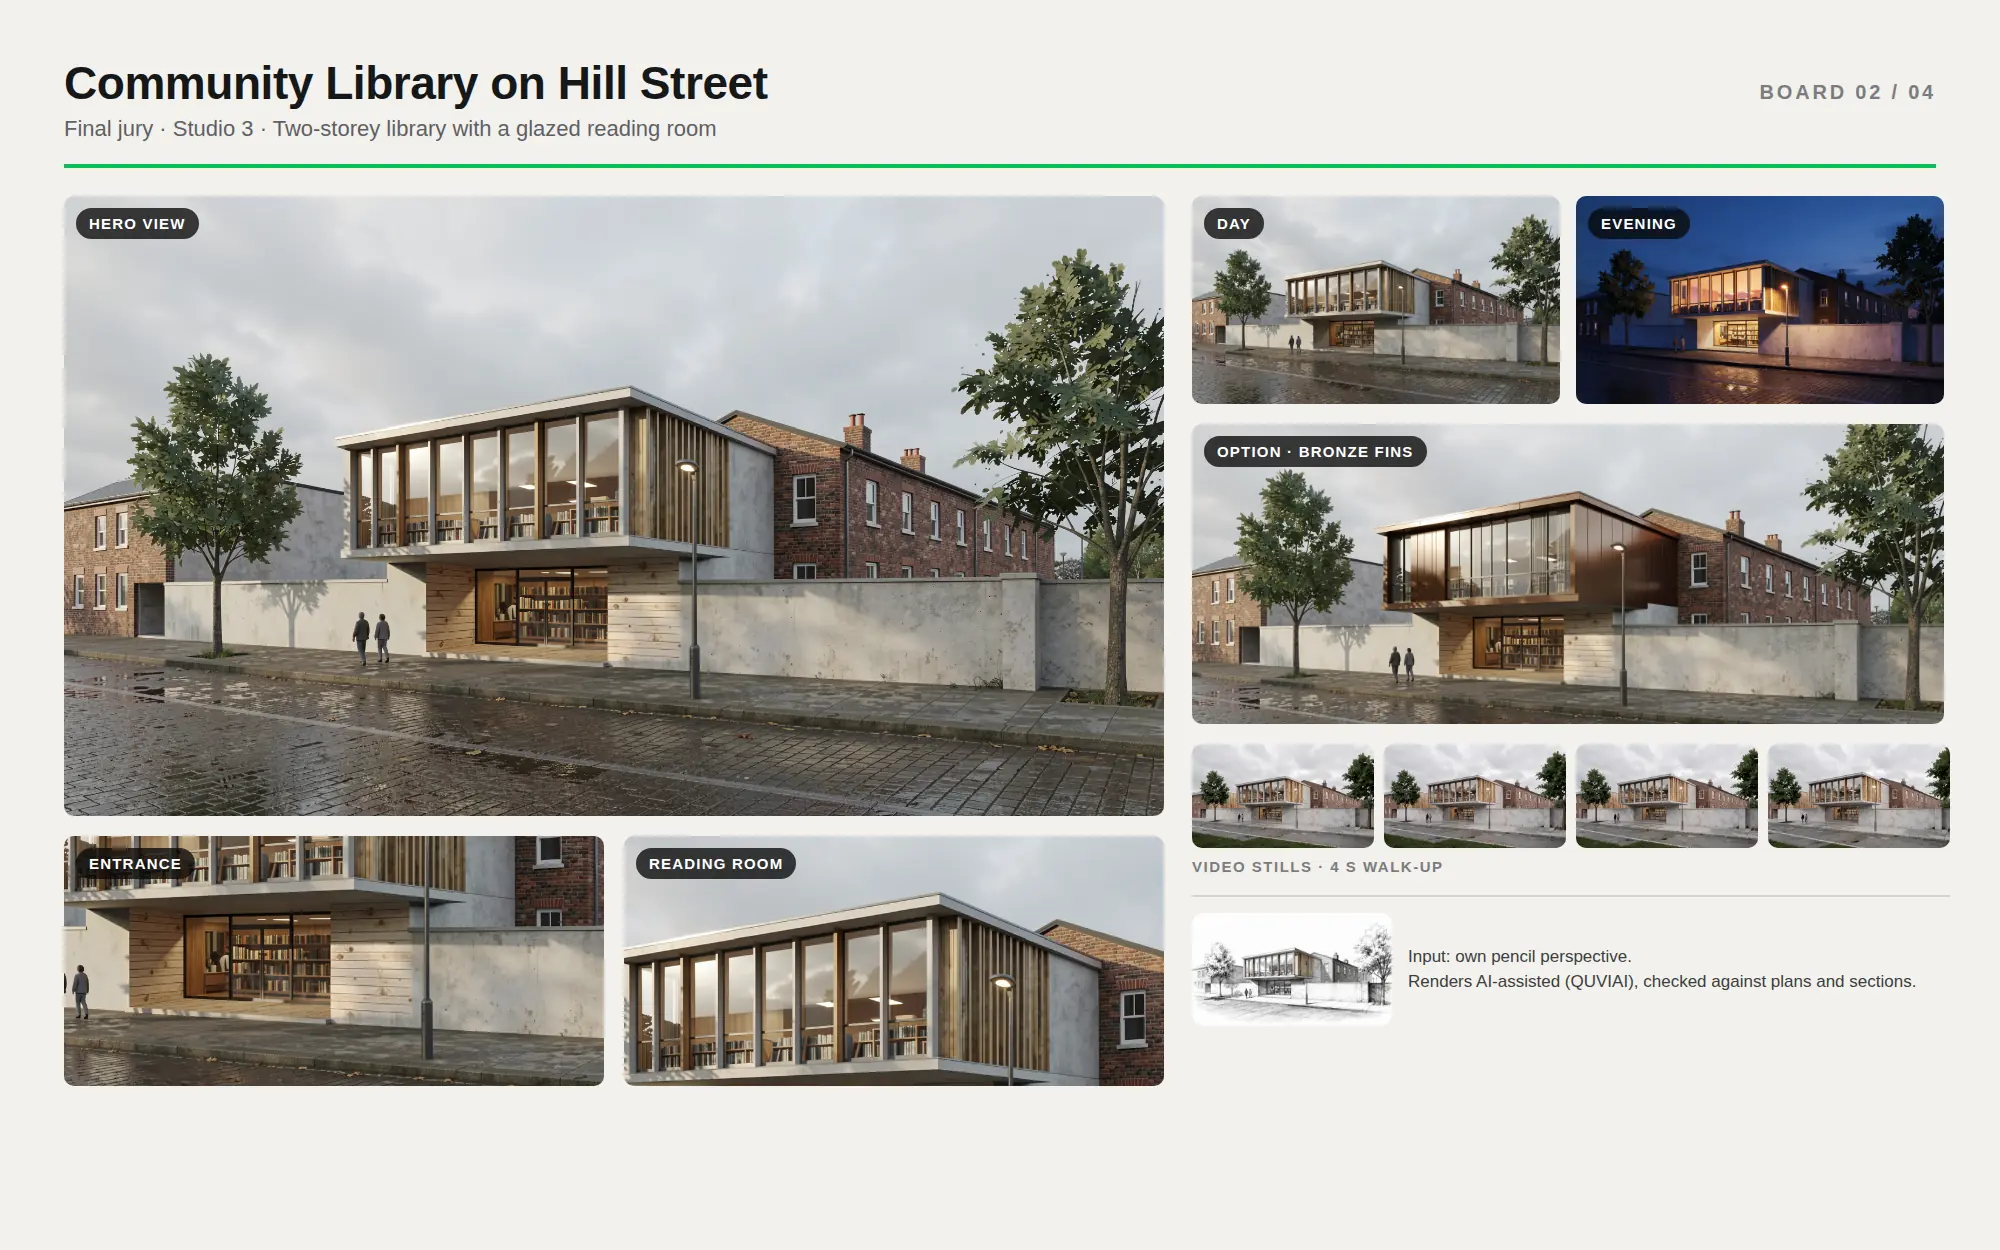
- Several key views. Render two or three chosen viewpoints from your model with the same prompt, so the set feels consistent. QUVIAI’s multi-angle tool can also create new camera angles from a finished render.
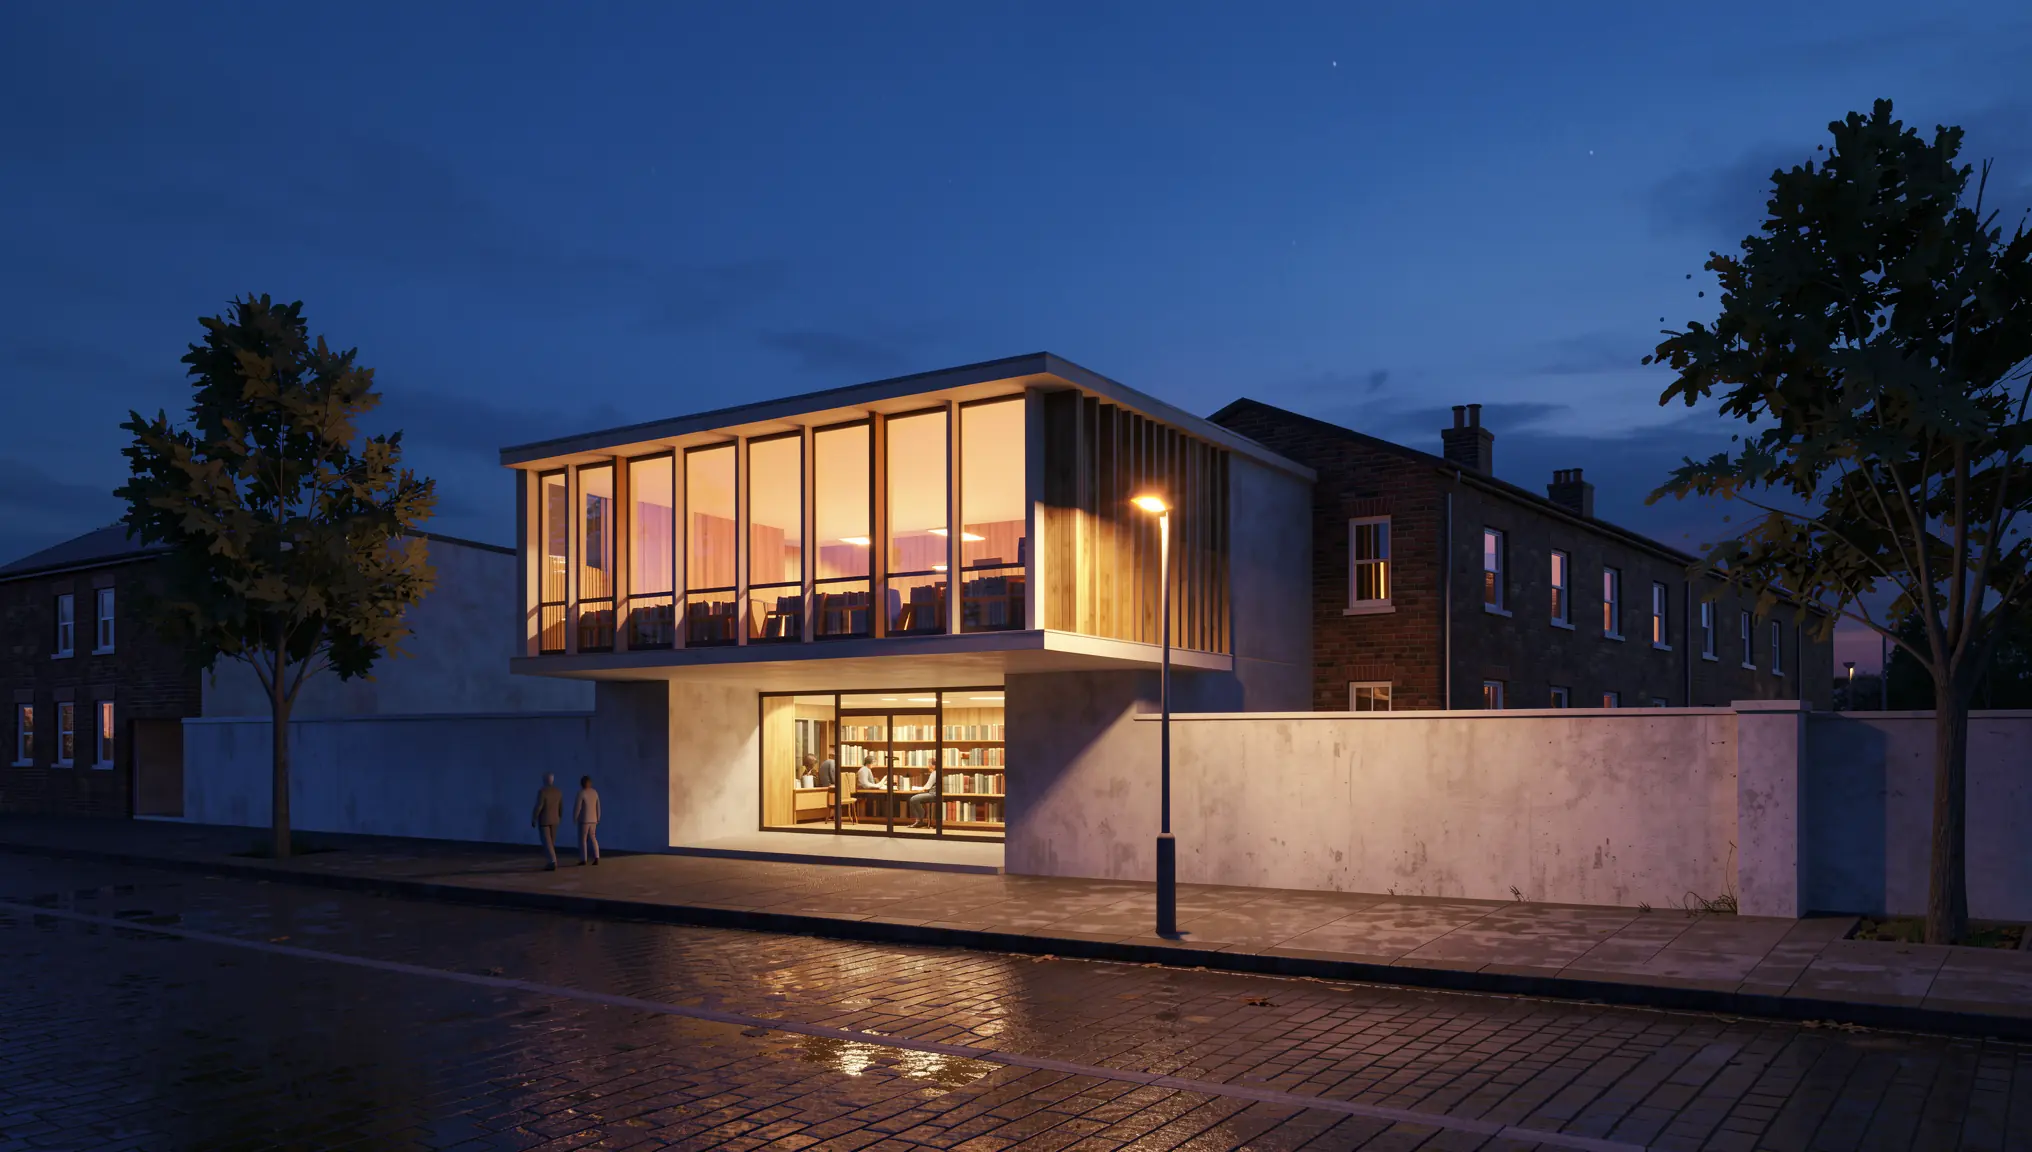
- Day and night. Show the same view in different lighting to explain how the building is used in the evening (day to night guide).
- Material options. Put two facade or interior material directions side by side to explain a design decision.
- Motion. Render → Video turns a finished image into a short clip for a digital review or your portfolio.
“Change the scene to early evening: deep blue dusk sky, the glazed reading room glowing with warm interior light, people reading inside, warm light in the ground floor entrance, street lamp on, soft reflections on the wet street. Keep the building, materials, neighbouring houses, trees and camera angle exactly the same. Photorealistic.”
“Material option: change the vertical timber fins and timber cladding of the upper floor to bronze-coloured anodised aluminium fins and panels. Keep the glazing, the board-marked concrete base, the building shape, the neighbouring houses, the trees, the daylight and the camera angle exactly the same. Photorealistic.”
Use AI Openly and Responsibly
Schools are still developing their rules on AI, and lecturers rightly ask how to assess originality when visuals are AI-assisted.
- Check your school’s policy before using AI images in assessed work.
- Be transparent. Note on your boards or in your portfolio which images are AI-assisted and what the input was.
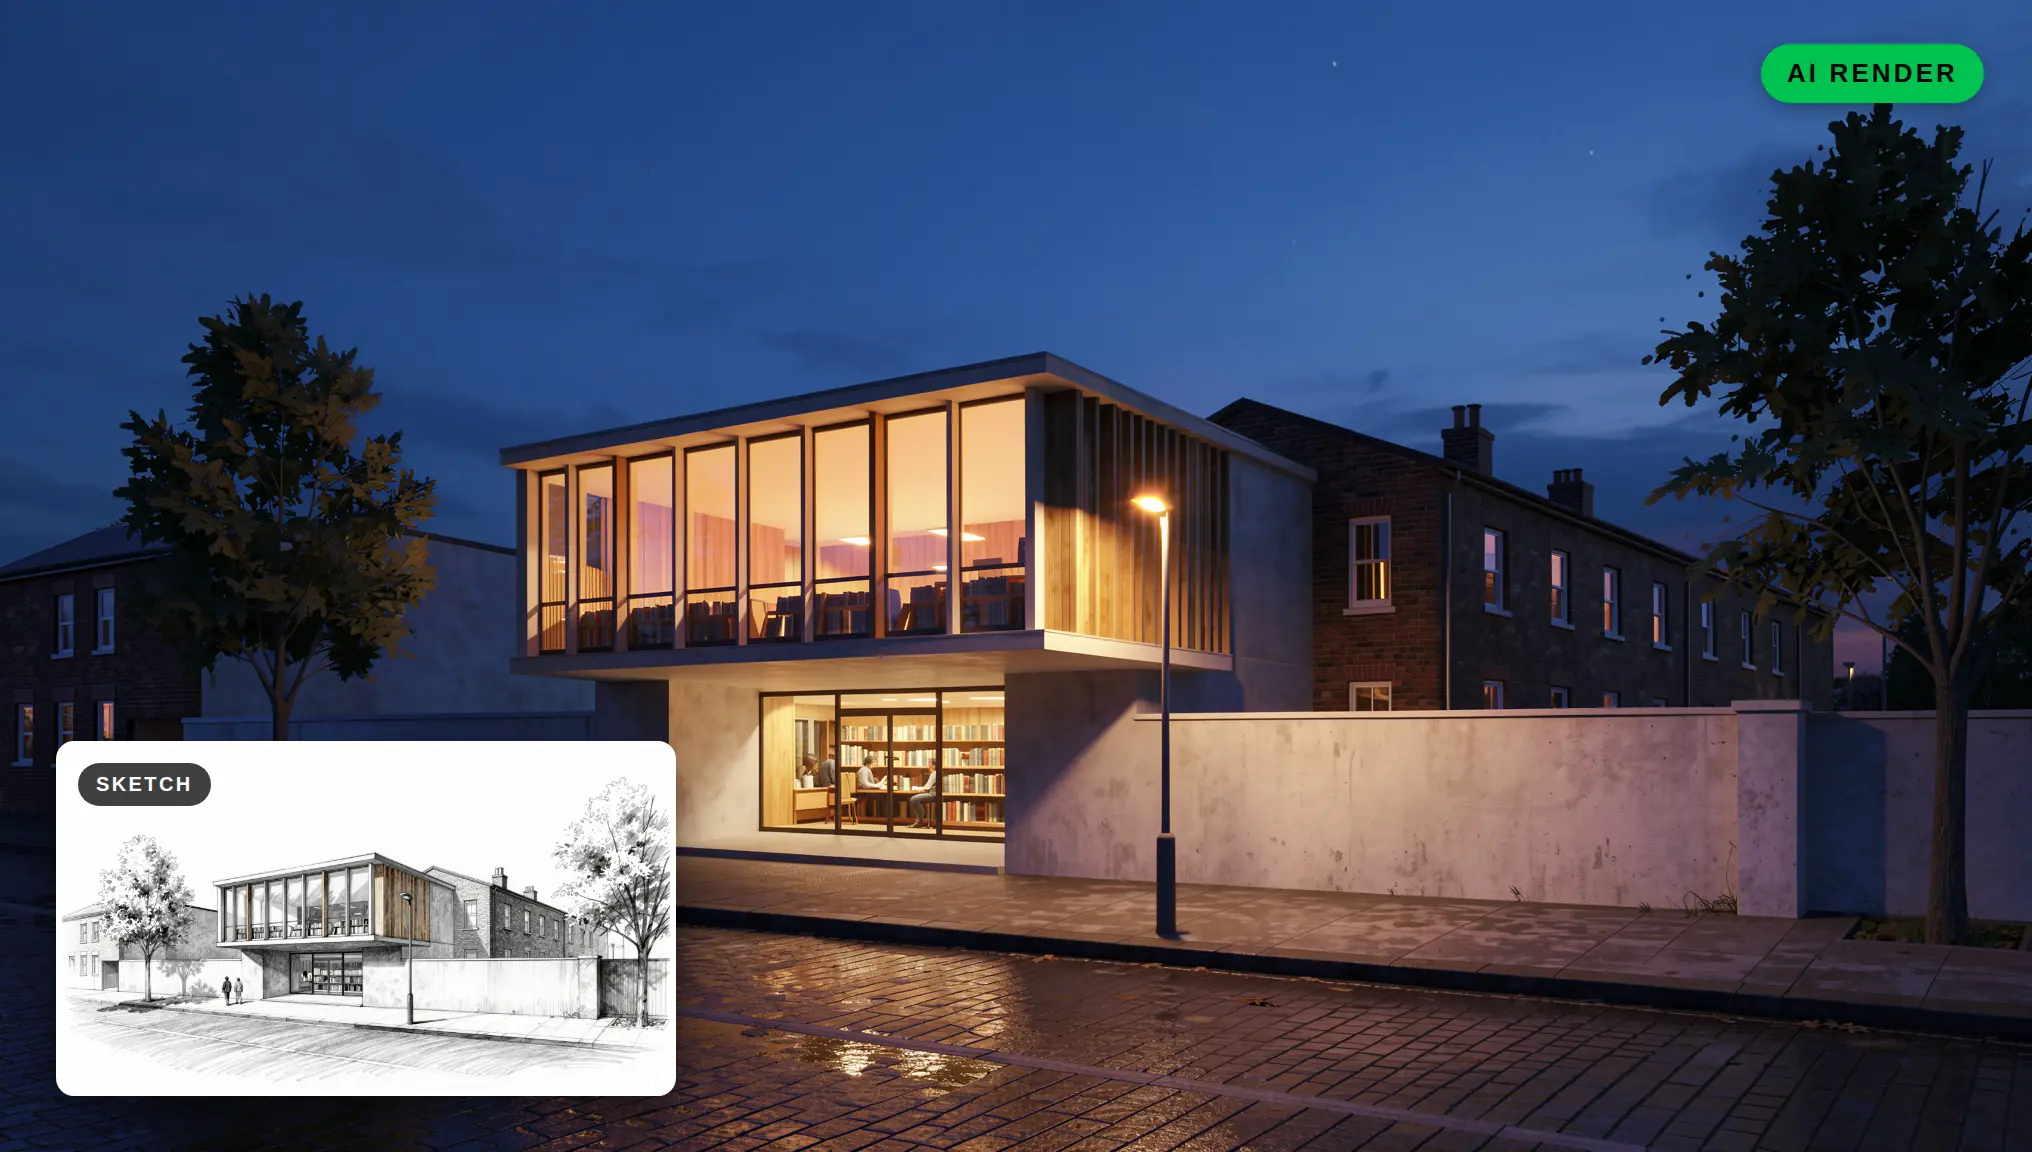
- Show your process. Include the sketch or model view next to the final image. It demonstrates that the design is yours and often impresses reviewers more than the render alone.
- Stay the author. Use AI to visualise decisions you have made, not to make them for you.
Quick Checklist Before Your Jury
- One strong hero image and a few supporting views
- Every render checked against your plans and sections
- Consistent light and style across the set
- Inputs (sketches, model views) shown alongside outputs
- AI-assisted images labelled
Conclusion
AI rendering will not design your project, but it can give you back the hours you used to lose to render settings and waiting. Start from your own sketches and models, write clear prompts, check every image against your drawings, and present the process with confidence.
You can try this workflow in QUVIAI with free daily credits, and no credit card is required. Take the sketch or model view from your current studio project and see how quickly it becomes a presentation image.
Source: Thomas M Job, “Beyond the render: embedding AI tools into architectural education,” AT Journal issue 156 (Winter 2025), via Designing Buildings Wiki.