AI RENDERING GUIDE
How to Render a Rhino Model With AI: From Viewport Capture to Photorealistic Image
Published 8 min read
Rhino is where many architects test forms quickly: a façade study, a pavilion, a massing option for a competition. Turning those models into presentation images usually means assigning materials, setting up lights and waiting for a render engine — often longer than the modelling itself.
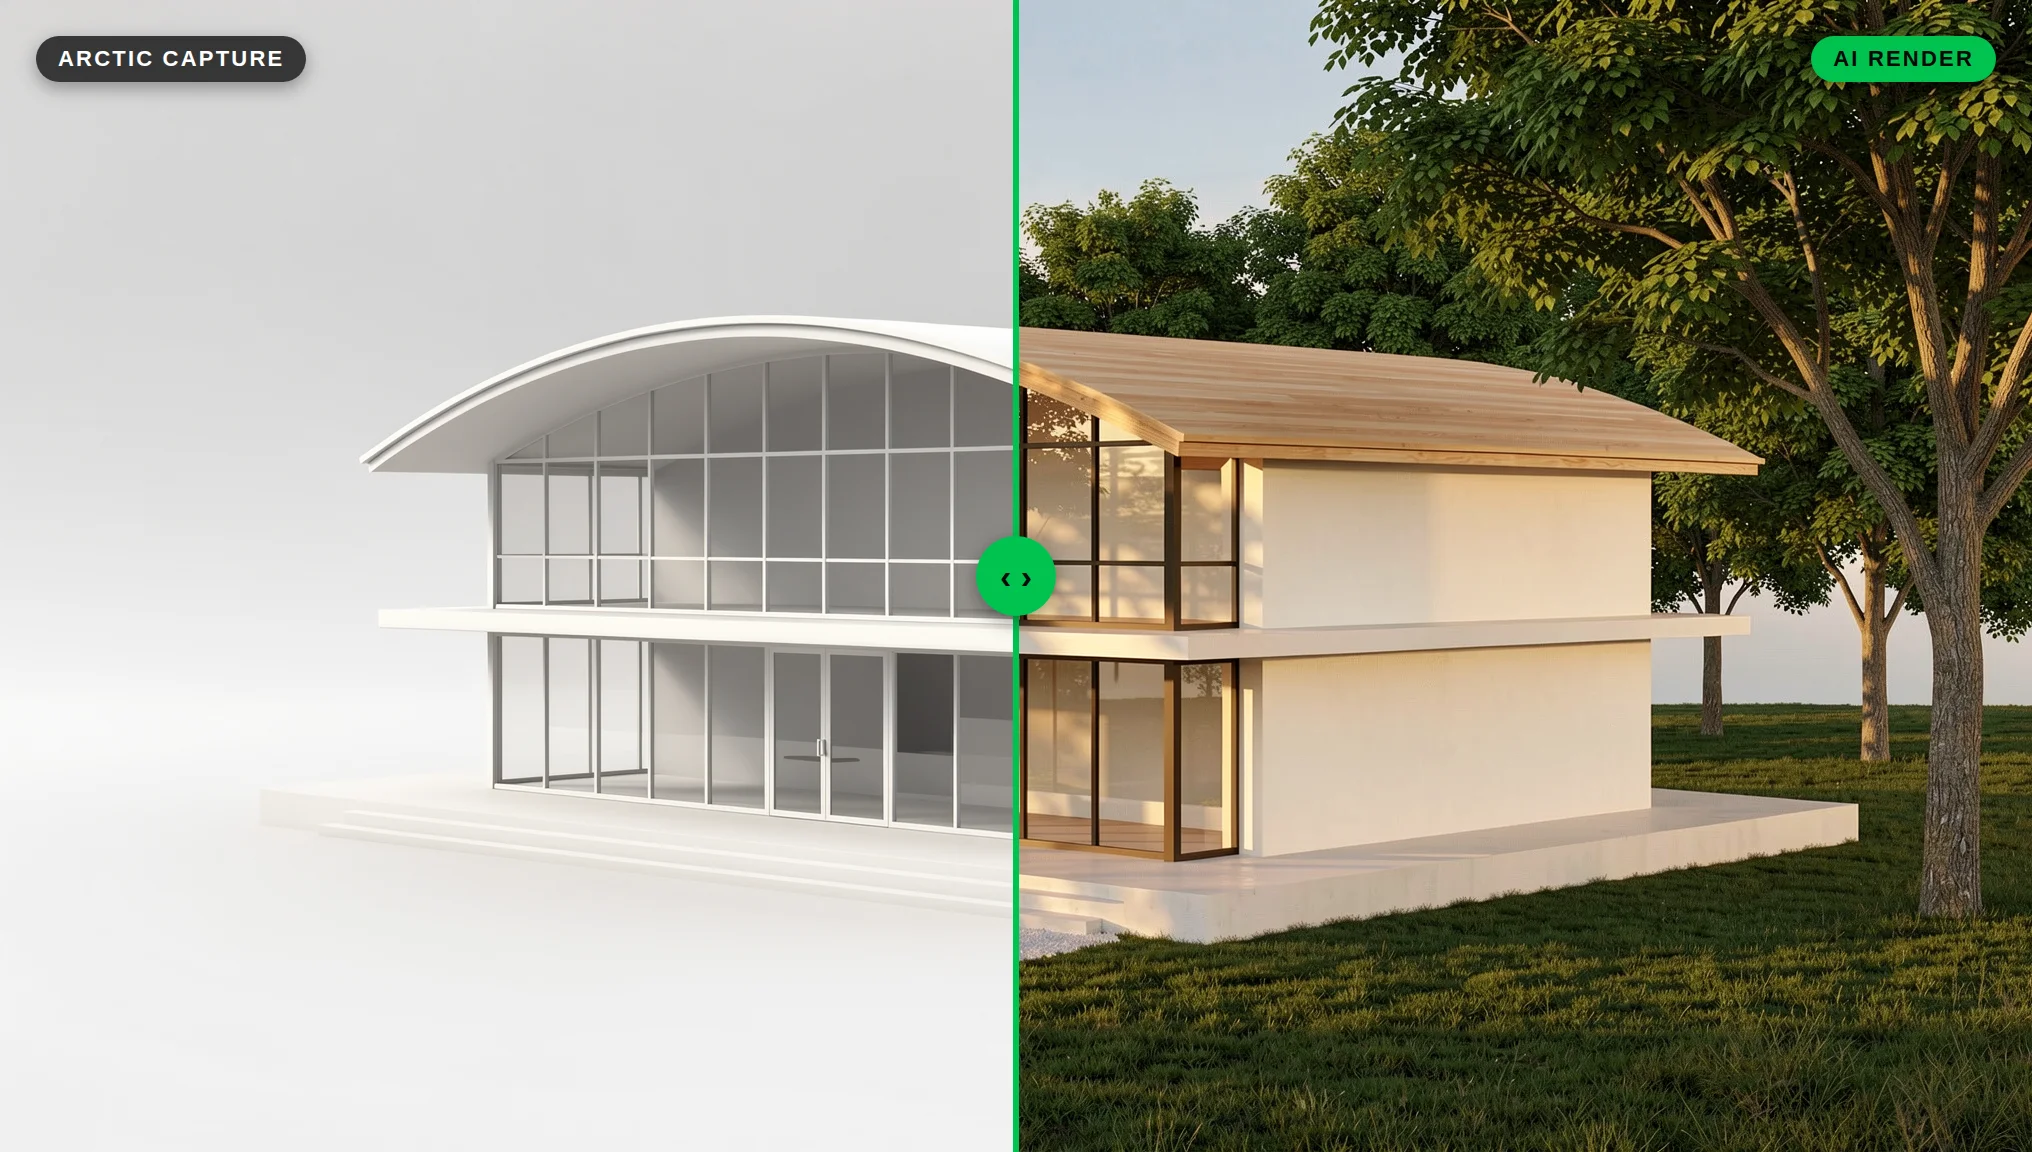
With AI rendering you can skip most of it. You capture a clean view of your Rhino model, upload it to QUVIAI and describe the materials, light and setting you want. The geometry is based on your model; the atmosphere comes from your prompt.
This guide shows you how to prepare the view in Rhino, which display mode to capture, how to write the prompt and how to refine the result.
All images in this guide were made in QUVIAI: the viewport captures were generated with text-to-image and Edit to look like Rhino's display modes, and every render was made from those captures.
What you need
- A Rhino model (any version that has the View Capture commands)
- A QUVIAI account — the free plan gives you 5 credits a day, and no credit card is needed
- A rough idea of the materials and mood you want to show
For Rhino, the workflow is a simple image export: you capture the viewport and upload it to QUVIAI.
Step 1: Set up the camera
The AI follows the composition of your capture, so the camera is the most important decision you make.
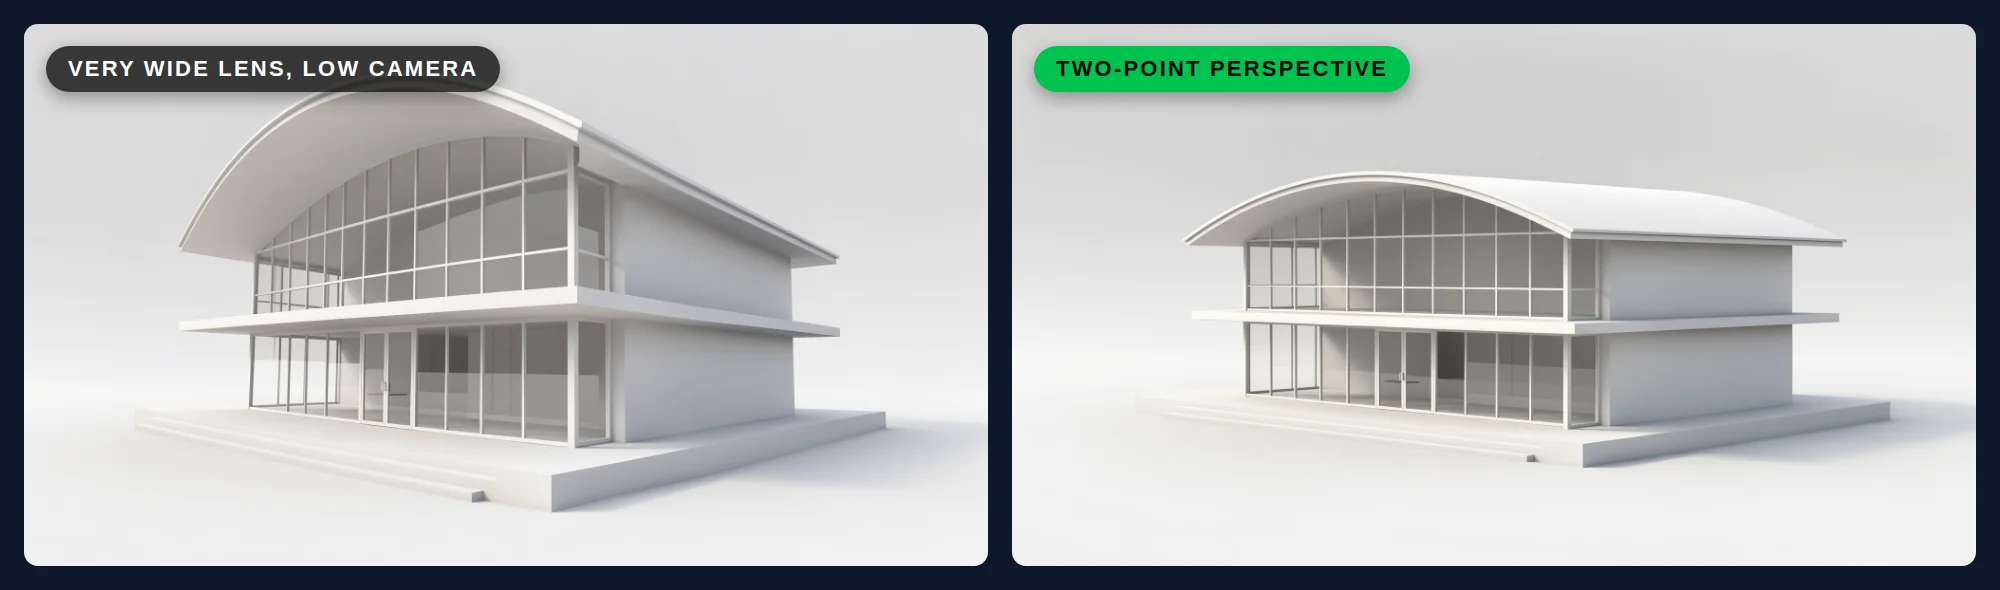
- Use Two-Point Perspective for exteriors. In Rhino's Viewport Properties you can set the projection to Two-point perspective, where vertical lines do not converge. Building edges stay straight, like a professional architectural photograph.
- Choose a natural lens length. In a normal Perspective projection, Rhino describes a lens length of about 43–50 mm as "normal" for a 35 mm camera. Very wide lenses distort interiors and make spaces look larger than they are.
- Use eye-level for people-focused views. Put the camera at around standing height for street views, lobbies and interiors. Use a higher angle only when you want to explain a massing or a site.
- Save the view. Use NamedView to store the camera, so you can come back to the exact same angle after design changes.
Step 2: Clean up the view
Anything visible in the viewport may be read as part of the design. Before capturing:
- Hide dimensions, annotation, construction curves, section planes and helper layers.
- Turn off the grid and axes (or leave them off in the capture options — see Step 4).
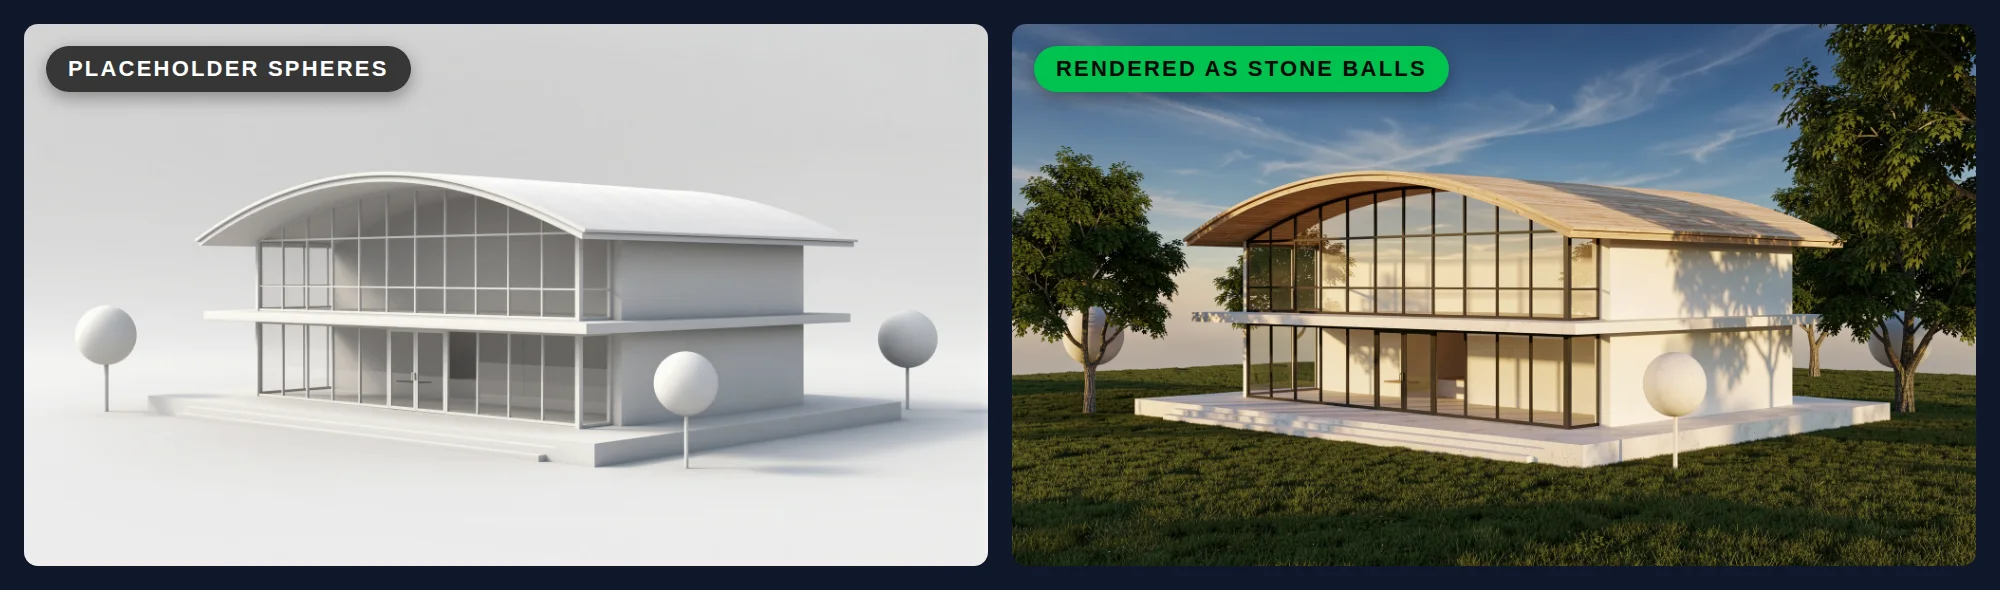
- Hide or delete placeholder objects you do not want the AI to interpret as real elements.
- Add a simple ground plane and, if possible, basic context such as neighbouring blocks. The AI handles the scene better when the building is not floating in empty space.
Step 3: Pick the right display mode
Rhino's display modes change how readable your capture is. The goal is clear edges and clear depth, not finished materials.
| Display mode | What it shows | When to use it for AI rendering |
|---|---|---|
| Arctic | White objects and background with soft, ambient-occlusion-like shadows | Best all-round choice: depth reads clearly and nothing competes with your prompt |
| Technical | Silhouettes, intersections, creases and borders | Façades and detailed geometry where edges matter |
| Pen | White surfaces with black lines, like a pen drawing | When you want the result to feel closer to a sketch-to-render workflow |
| Shaded | Surfaces in layer or object colours | When colours help separate elements (for example glass, frame and cladding on different layers) |
| Rendered | Rhino materials, lights and shadows | When you have already assigned materials and want the AI to follow them |
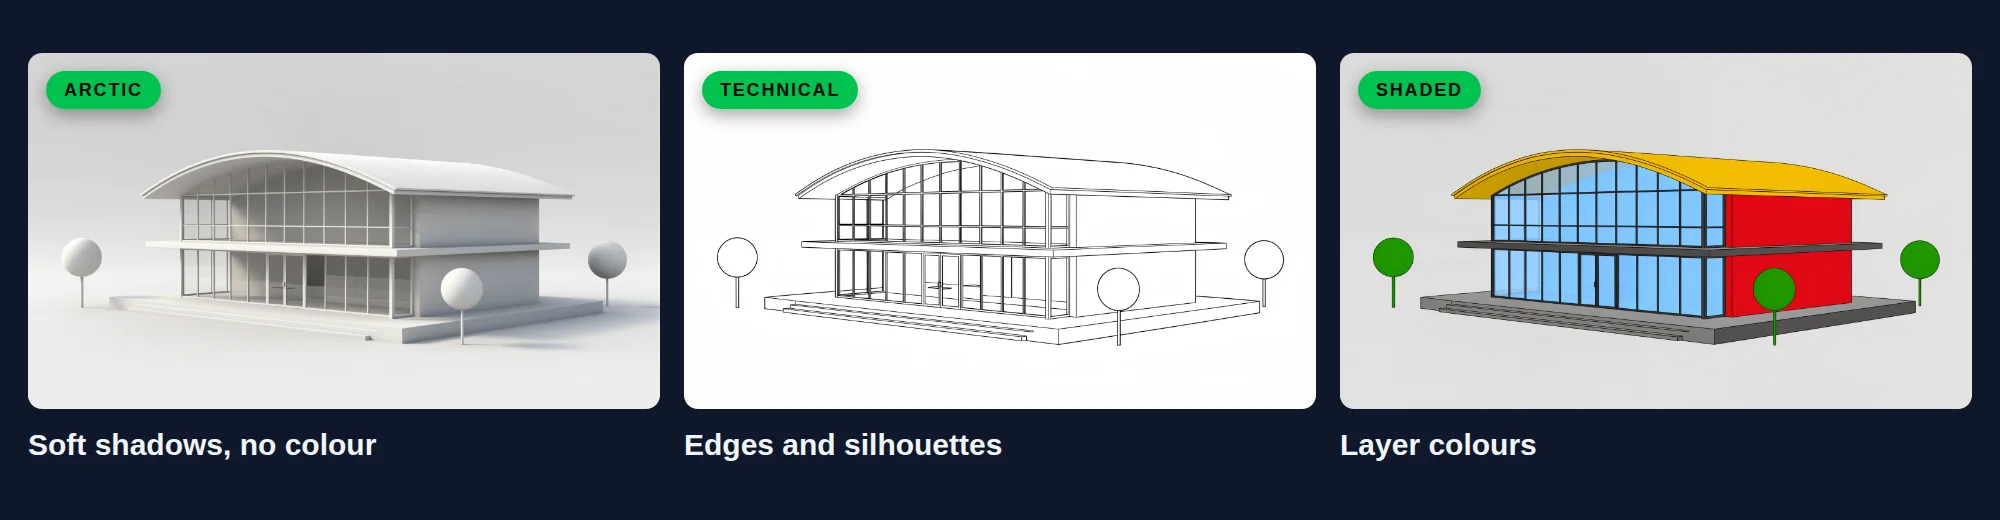
If colours are confusing — for example a default red layer on a wall that should be timber — use Arctic or Technical, then describe the materials in your prompt instead.
Step 4: Capture the viewport
Use ViewCaptureToFile to save the current viewport as an image (or ViewCaptureToClipboard to paste it directly).
- Size: Set the size in pixels. A larger capture keeps thin details such as mullions and railings readable.
- Grid, World axes, CPlane axes: Leave these unchecked so they do not appear in the image.
- Transparent background: Leave this off. A plain white or light background is easier for the AI to read than a transparent one.
Save the file as PNG or JPG.
Step 5: Upload and write your prompt
Upload the capture to QUVIAI as the reference image for your render. Then describe what the model cannot tell the AI:
- Materials: "white board-formed concrete walls, vertical oak cladding, slim black aluminium window frames"
- Context: "on a quiet residential street with mature trees" or "in a coastal landscape with dunes"
- Light and time: "soft overcast daylight" or "warm late-afternoon sun with long shadows"
- Camera feel: "architectural photography, eye level, natural colours"
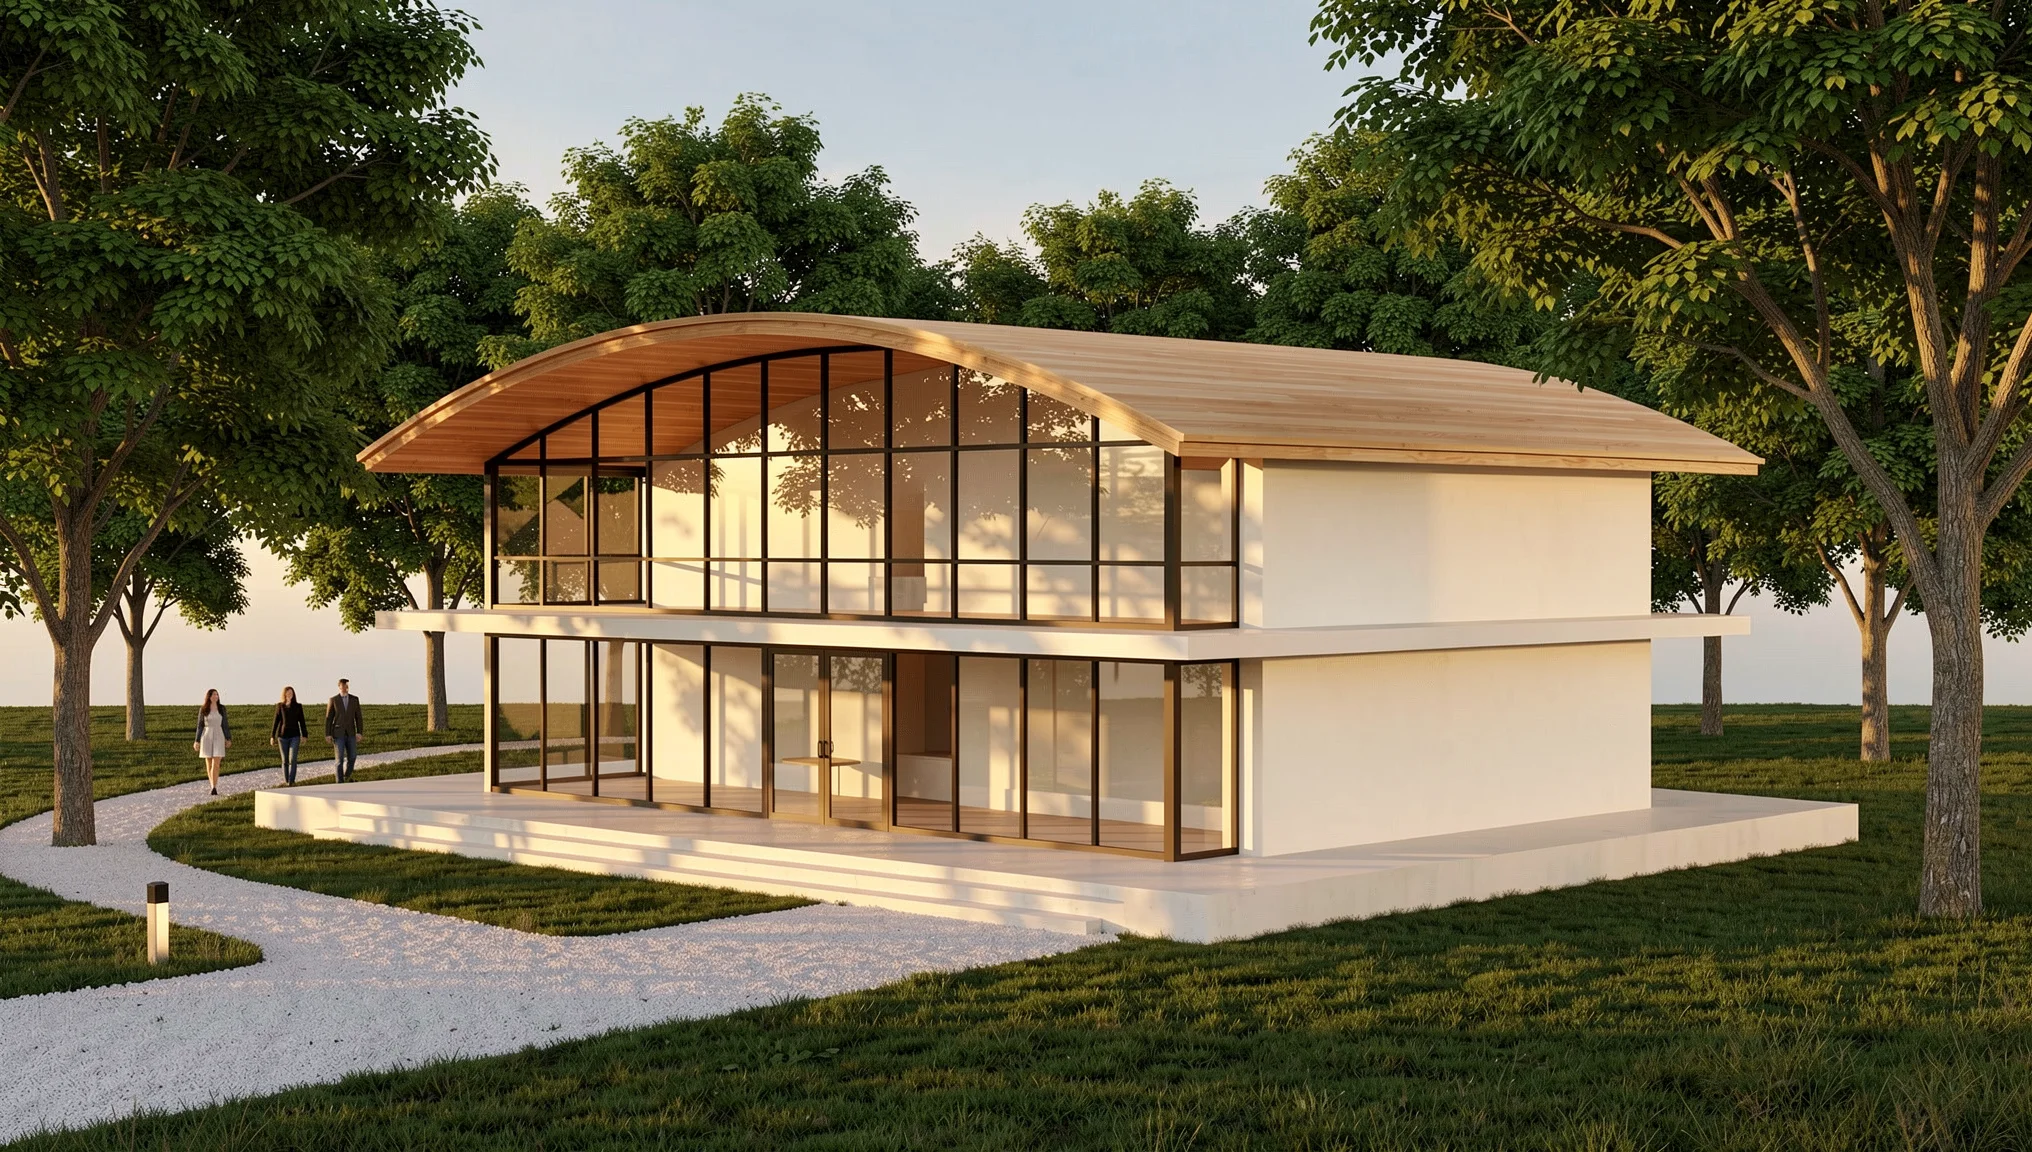
A full example, as we used it for the pavilion in this guide:
“Photorealistic architectural photograph of a two-storey pavilion with a curved timber roof, white concrete base and full-height glazing, set in a park with mature trees and a gravel path, warm late-afternoon light, people walking, natural colours. Low golden sun with long soft shadows across a green lawn. Keep the same massing, roof curve, openings and camera angle as the reference image.”
Keep the prompt focused on the elements in your view. Our guide to writing AI architecture prompts covers this in more detail.
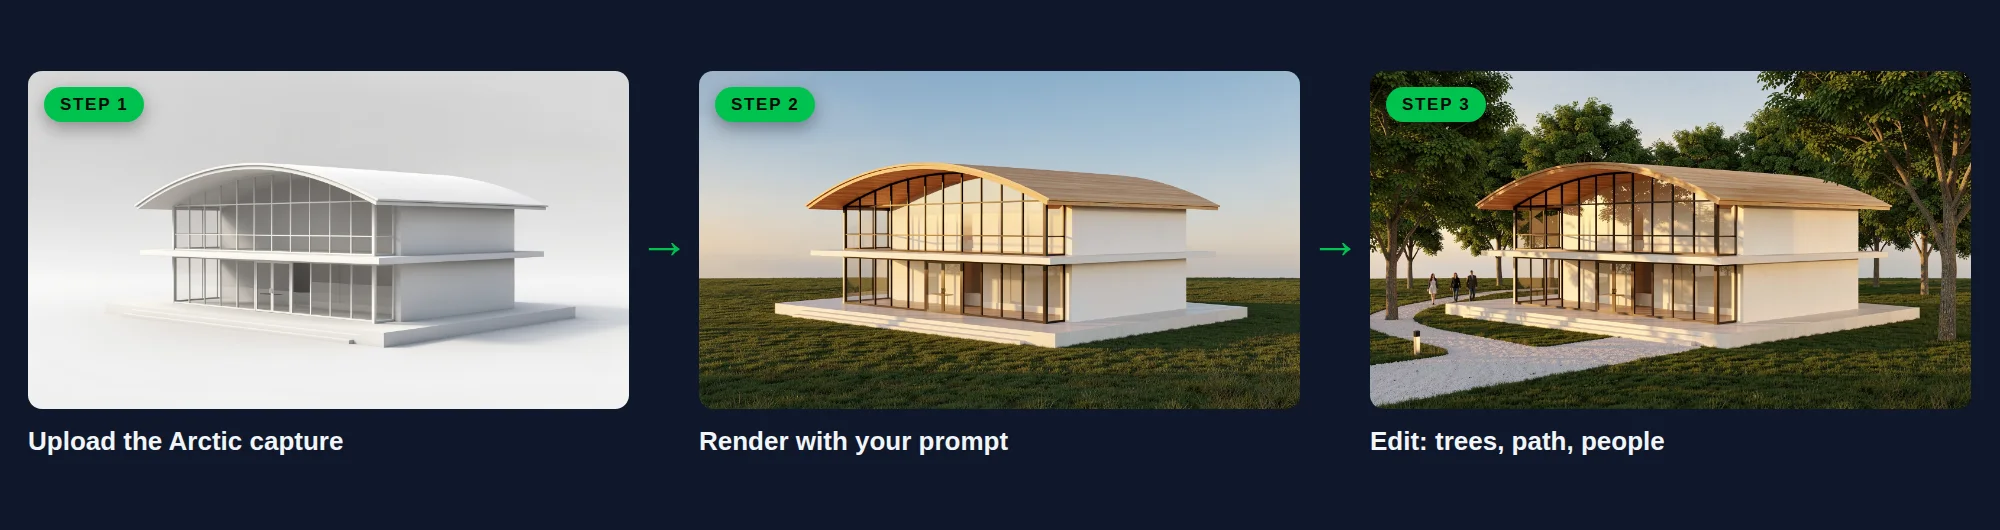
The render followed our capture very closely: the timber roof, the glazing and the warm light came through, but the empty white ground became an open lawn without the trees and path from the prompt. One maskless Edit added them:
“Add mature deciduous park trees around the pavilion, a gravel path leading to the front steps and a few people walking on the lawn. Keep the pavilion, the curved timber roof, the white concrete base, the glazing, the warm late-afternoon light and the camera angle exactly the same. Photorealistic architectural photograph.”
Step 6: Refine the result
Your first image is a starting point. Instead of going back to Rhino for every change, edit the render itself:
- Change one area: Use AI render editing with a mask to change only the selected part — for example the cladding, the landscape or the furniture on a terrace. With maskless editing you describe the change in words. See Masked vs Maskless AI Editing.
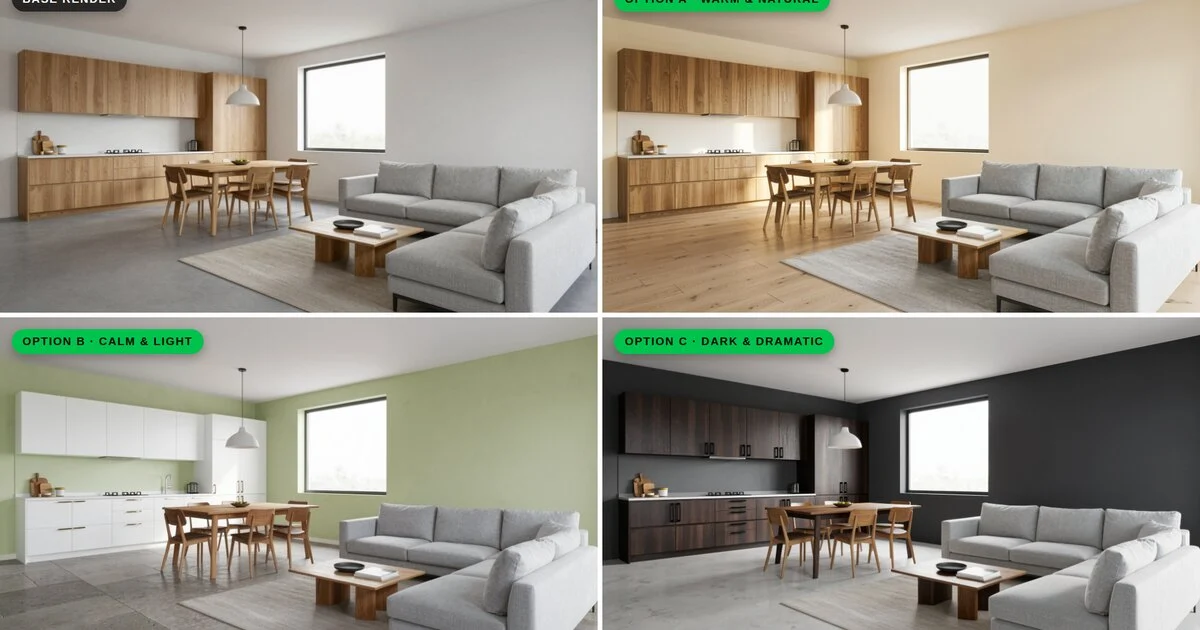
- Show options: Generate the same view with different materials so the client can compare them side by side. Our article on showing clients material options walks through this.
- Change the light: Create day and night versions of the same render — useful for façades with lighting design. See Day to Night Render With AI.
- Add movement: Use Render → Video to turn a still into a short clip for a presentation or social media.
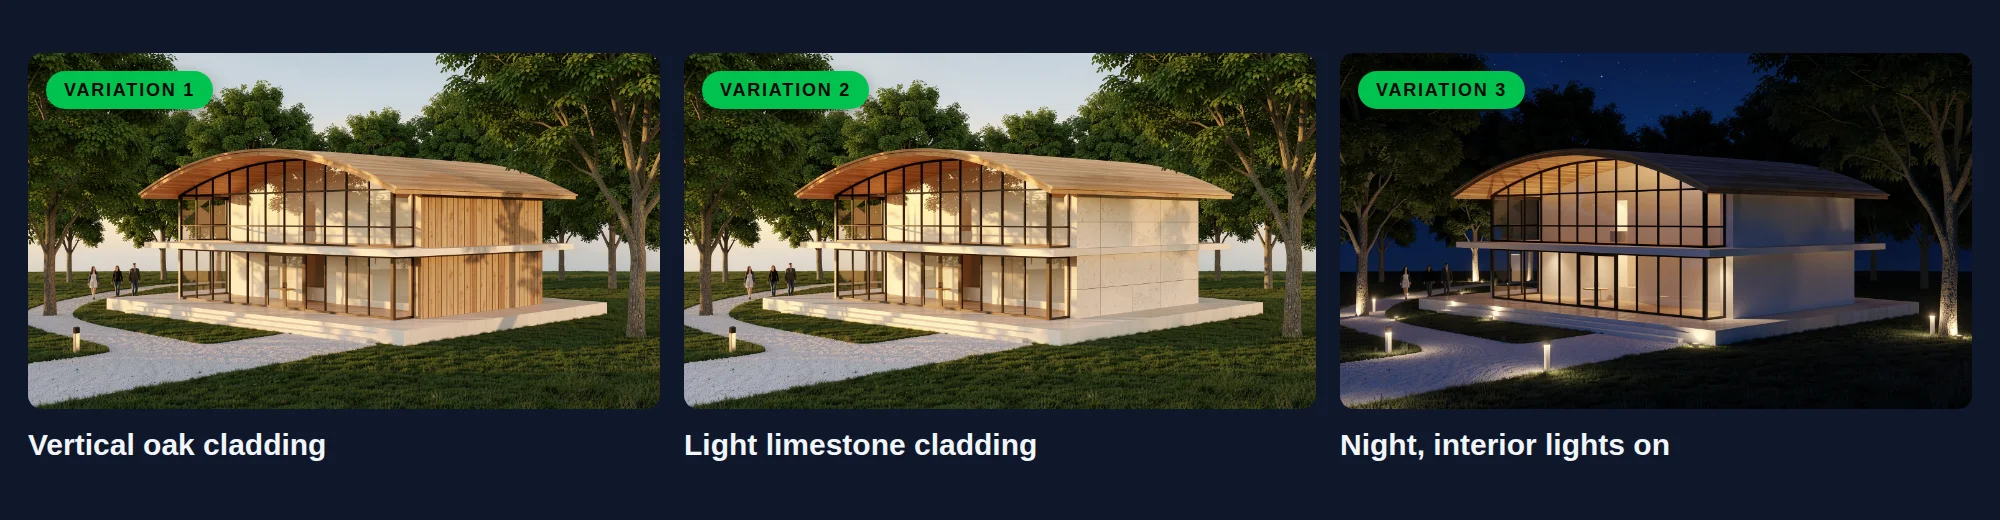
The prompt for the oak version is below; for the limestone version only the material changed, to "large-format light limestone panel cladding with fine joints".
“Change only the solid end wall on the right side of the pavilion, on both storeys, to vertical natural oak board cladding with fine shadow gaps. Keep the curved timber roof, the white concrete base, the glazing, the trees, the gravel path, the people, the warm late-afternoon light and the camera angle exactly the same. Photorealistic architectural photograph.”
The night version:
“Change the scene to night with a deep blue sky, warm interior lights glowing through the full-height glazing, soft uplights on the trees and low bollard lights along the gravel path. Keep the pavilion, the curved timber roof, the white end wall, the concrete base, the trees, the path and the camera angle exactly the same. Photorealistic architectural photograph.”

Tips for better results
- Model what matters, suggest the rest. Geometry that defines the design (roof shape, openings, floor levels) should be in the model. Trees, people and furniture can come from the prompt.
- Keep thin elements visible. If railings or louvres disappear at small sizes, capture at a larger size or move the camera closer.
- Use layers as a planning tool. Separate glass, frames and cladding onto layers with distinct colours if you capture in Shaded mode, and name those materials in your prompt.
- Check the design, not just the picture. AI rendering is excellent for communicating ideas, but always compare the render with your model before sharing it with a client, and correct any element that changed.
When to use a render engine instead
AI rendering is fastest for concept design, competitions and client discussions. When every detail must match the drawings, a traditional render engine is still the right tool; many teams use AI for iterations and a full render once the design is fixed. Our comparison of AI rendering vs traditional rendering explains the trade-offs.
Conclusion
Rendering a Rhino model with AI comes down to three things: a good camera, a clean capture and a clear prompt. Set up a two-point perspective, capture the view in Arctic or Technical mode, and let QUVIAI add materials, light and context. Then edit, compare options and create day and night versions without rebuilding your scene.
Try it with your next Rhino study on quvi.ai — the free plan includes 5 credits a day.
Sources: Rhino 8 Help — View Capture (ViewCaptureToFile, ViewCaptureToClipboard), Viewport display modes, Viewport Properties (projection, lens length), Navigate in viewports (NamedView).
Rhino and Rhinoceros are registered trademarks of Robert McNeel & Associates. QUVIAI is an independent product and is not affiliated with, sponsored or endorsed by Robert McNeel & Associates.